Today I would like to share with you a brand new technique I just recently learned how to do. I was browsing the aisles of Hobby Lobby a couple weeks ago and come upon a Martha Stewart mini scoring board. It wasn’t on sale but I had my 40% off coupon on my phone that I used. SCORE! I initially bought the board to use it for making envelopes. I make a lot of handmade cards and need to make my own envelopes for them to fit in. I have seen a few paper rosettes on Pinterest and thought my scoring board would be perfect to do a tutorial on it.
Materials:
- Mini or full size scoring board
- 12″ x 12″ pattern scrapbook paper
- White cardstock
- 2″ round paper punch
- Adhesive tape
- Paper cutter
- Embellishments
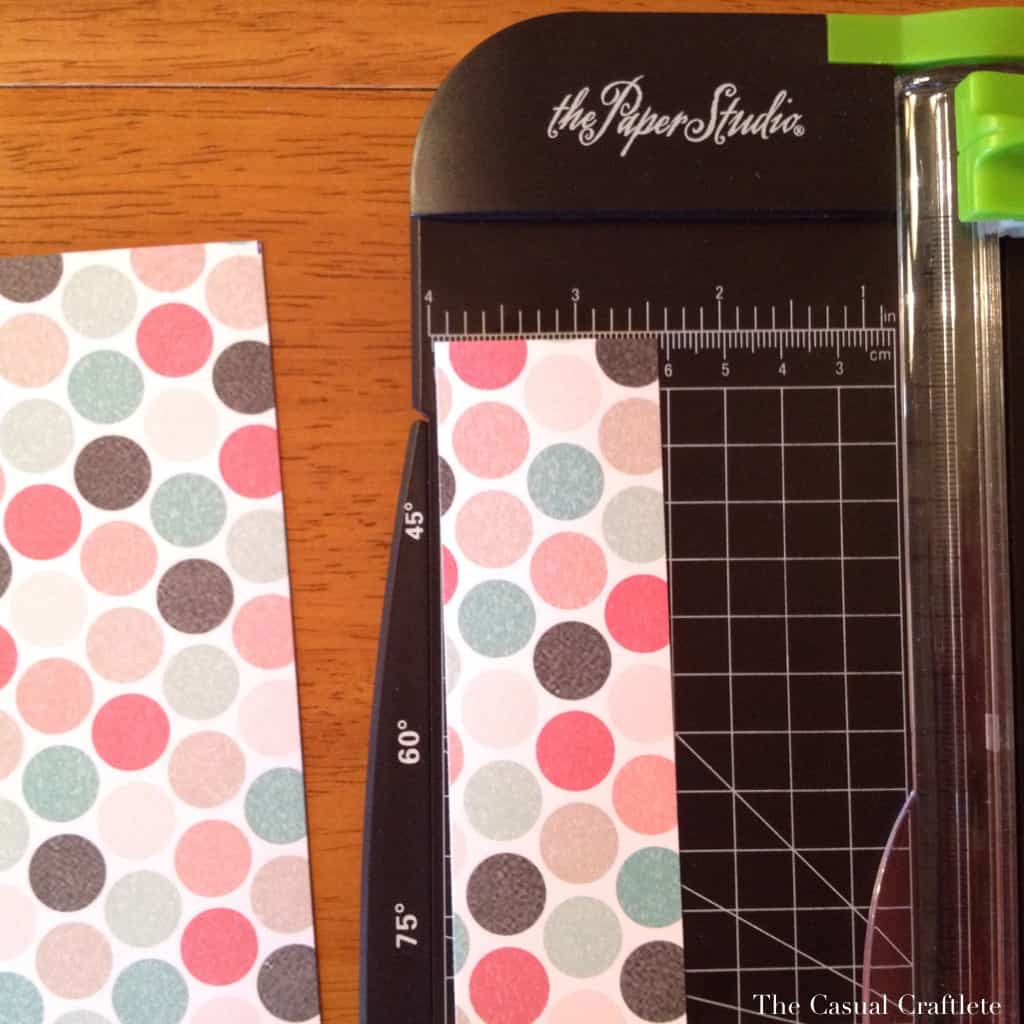
First you need a piece of 12″ x 12″ pattern scrapbook paper. I found some really cute paper at Archiver’s made by My Mind’s Eye called Cut & Paste ‘flair‘. Cut the paper into a stripe that is 1 1/2″ wide.
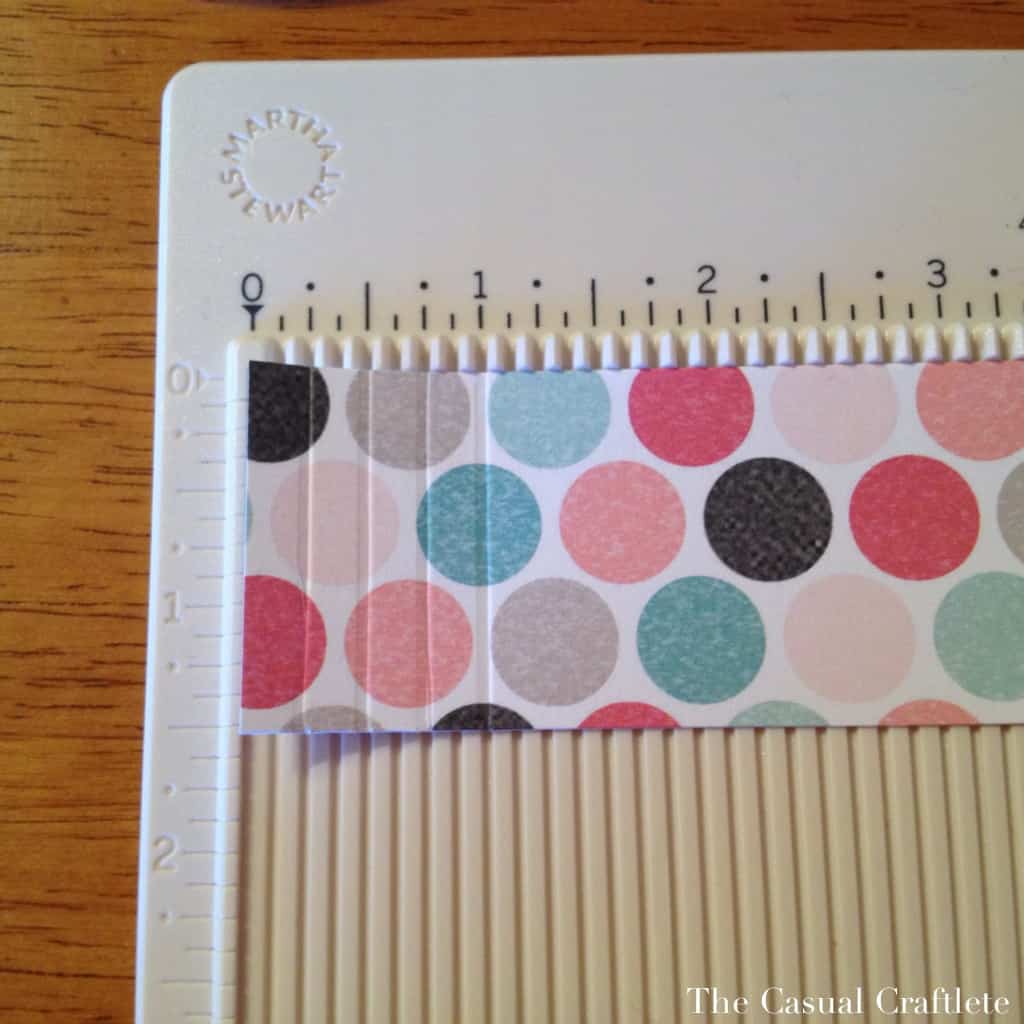
Place the stripe of paper onto the scoring board. Using the bone file that came with the board score every 1/4″ down the stripe of scrapbook paper. Since I have a mini board that is only 6″ I had to move the paper over to continue to score the entire 12″ of the stripe of paper.
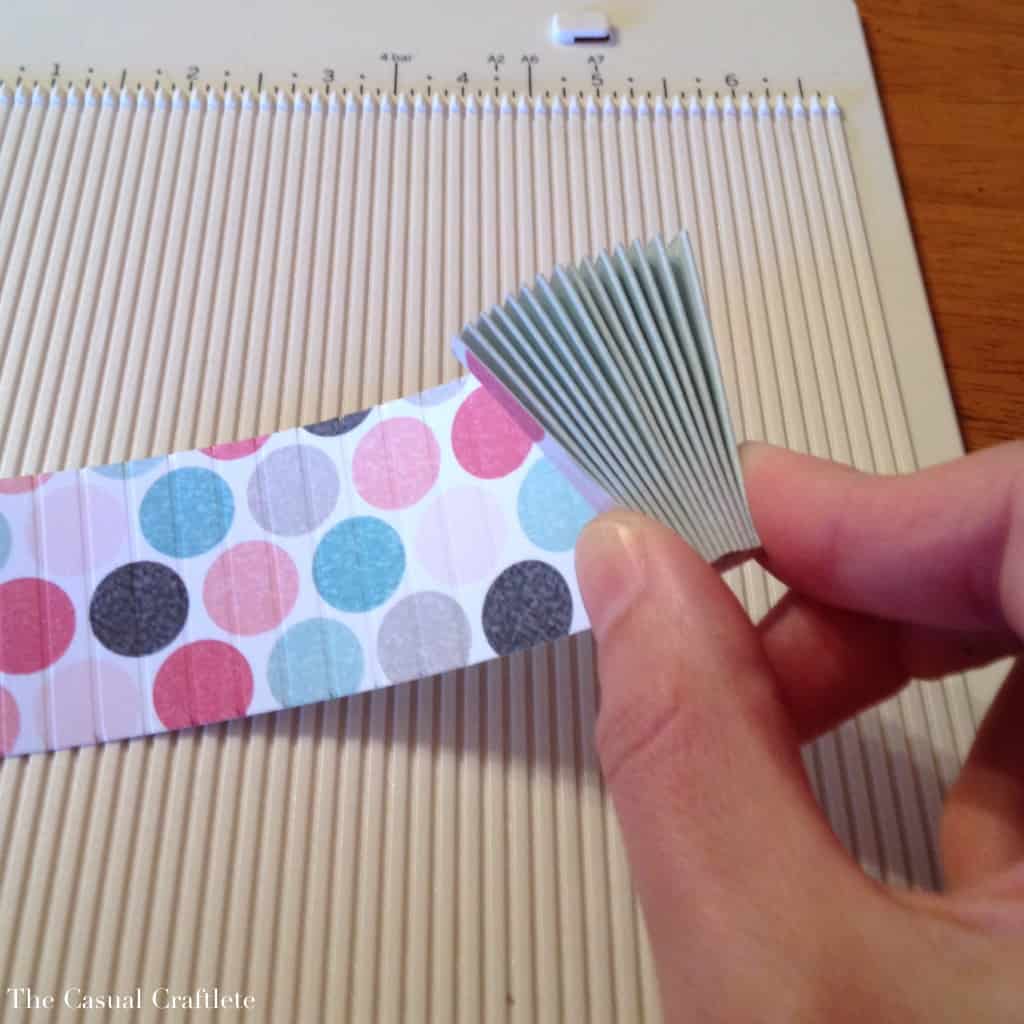
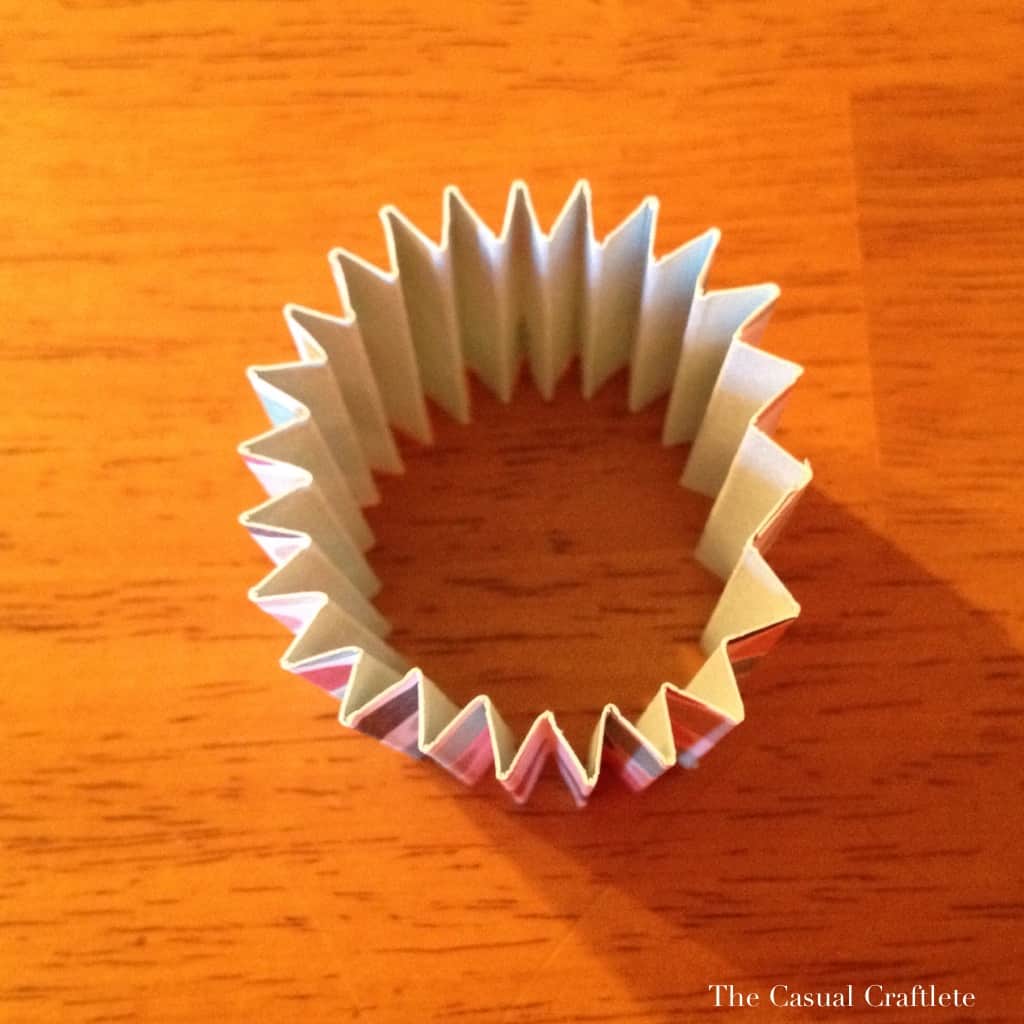
Once you have scored the entire 12″ stripe of scrapbook paper, fold the stripe of paper back and forth like an accordion.
After folding the paper line up the two ends. Make sure you have one side that is down and the other side that is up making a link. Once you have them lined up place adhesive tape to the side that is up and stick the down side to the tape, making a complete circle.
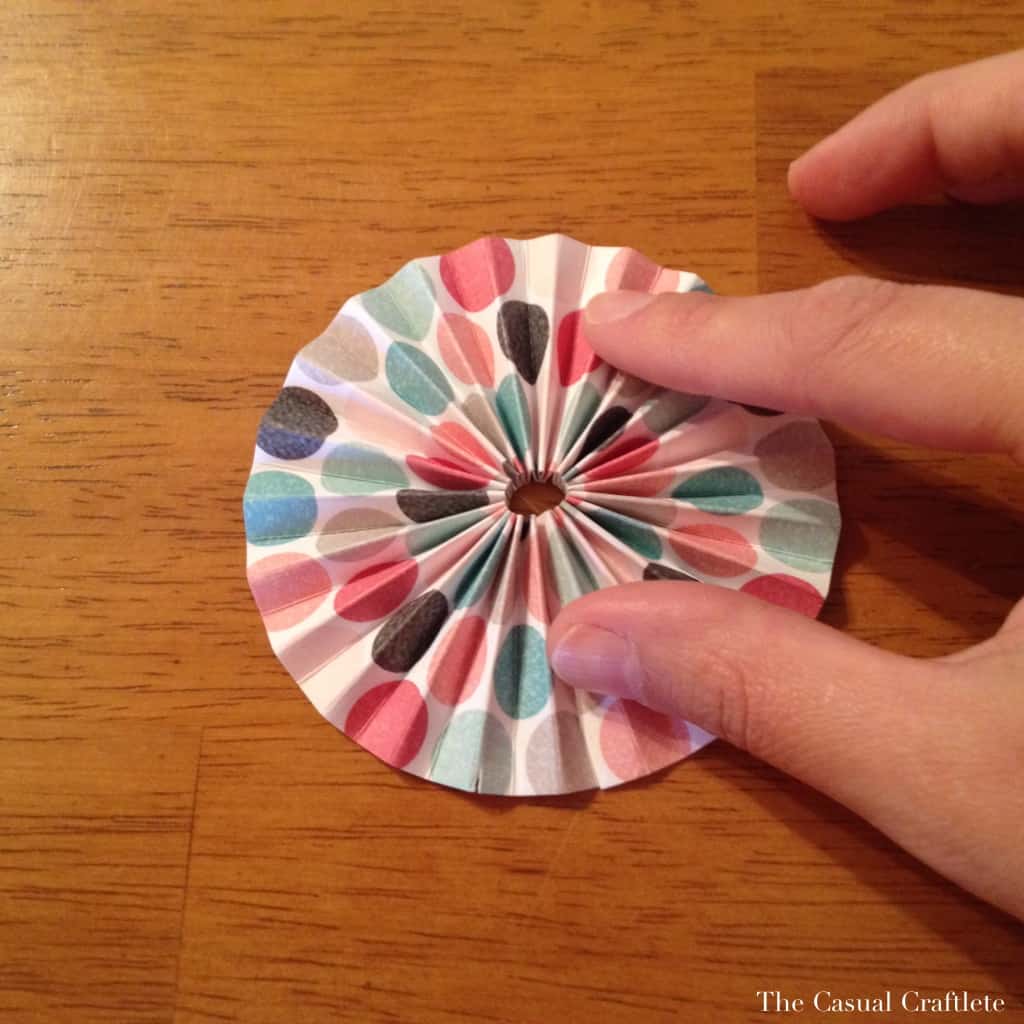
Press the accordion paper in the center making a flat rosette.
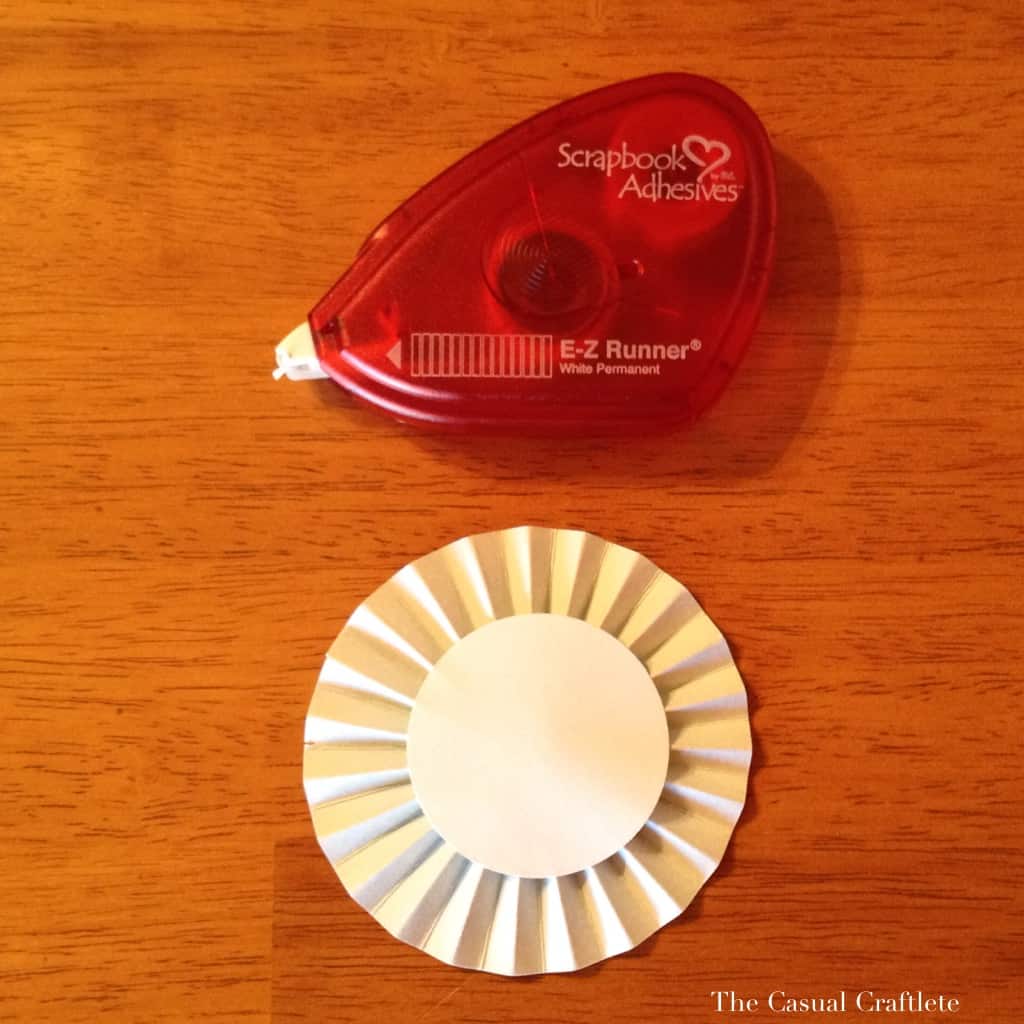
Using a 2″ round circle paper punch cut out one round piece of white cardstock. Place the adhesive tape to one side of the cut out round piece and stick it on the back of the rosette.
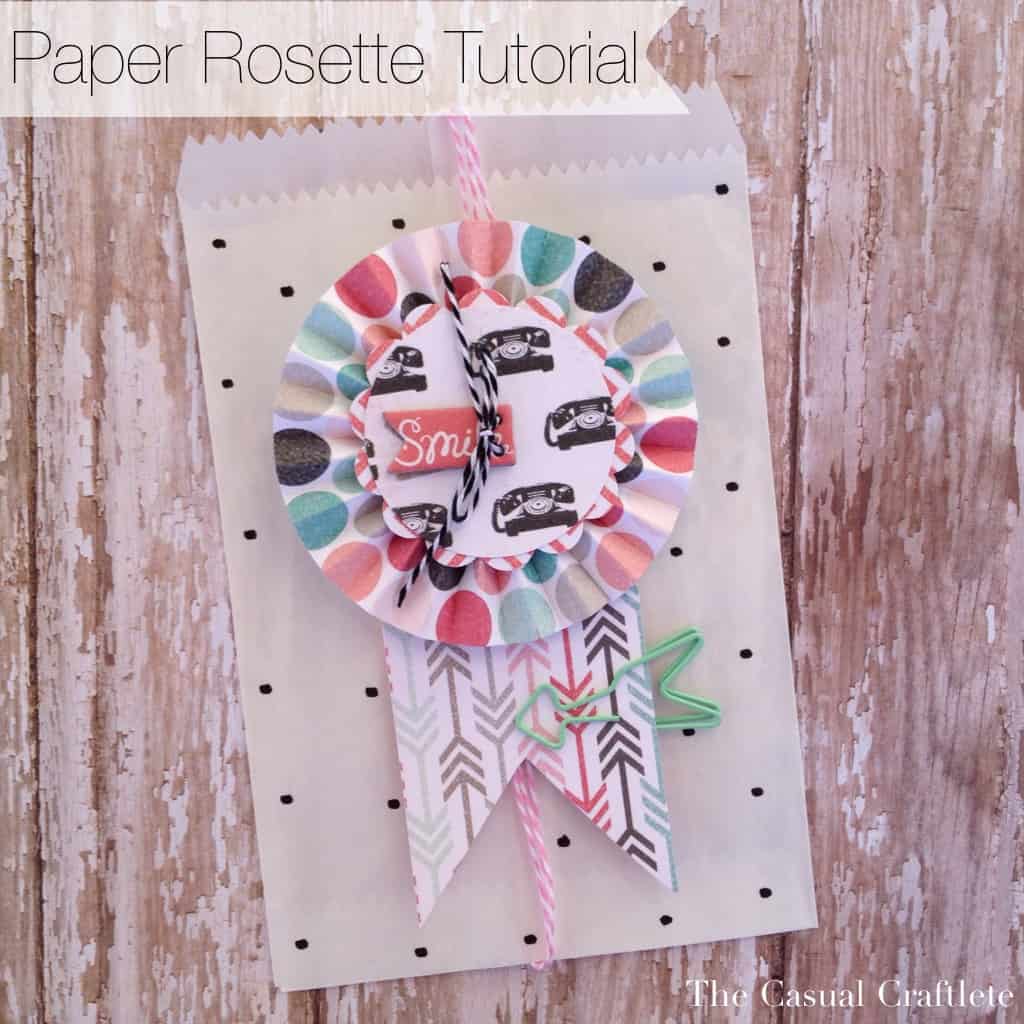
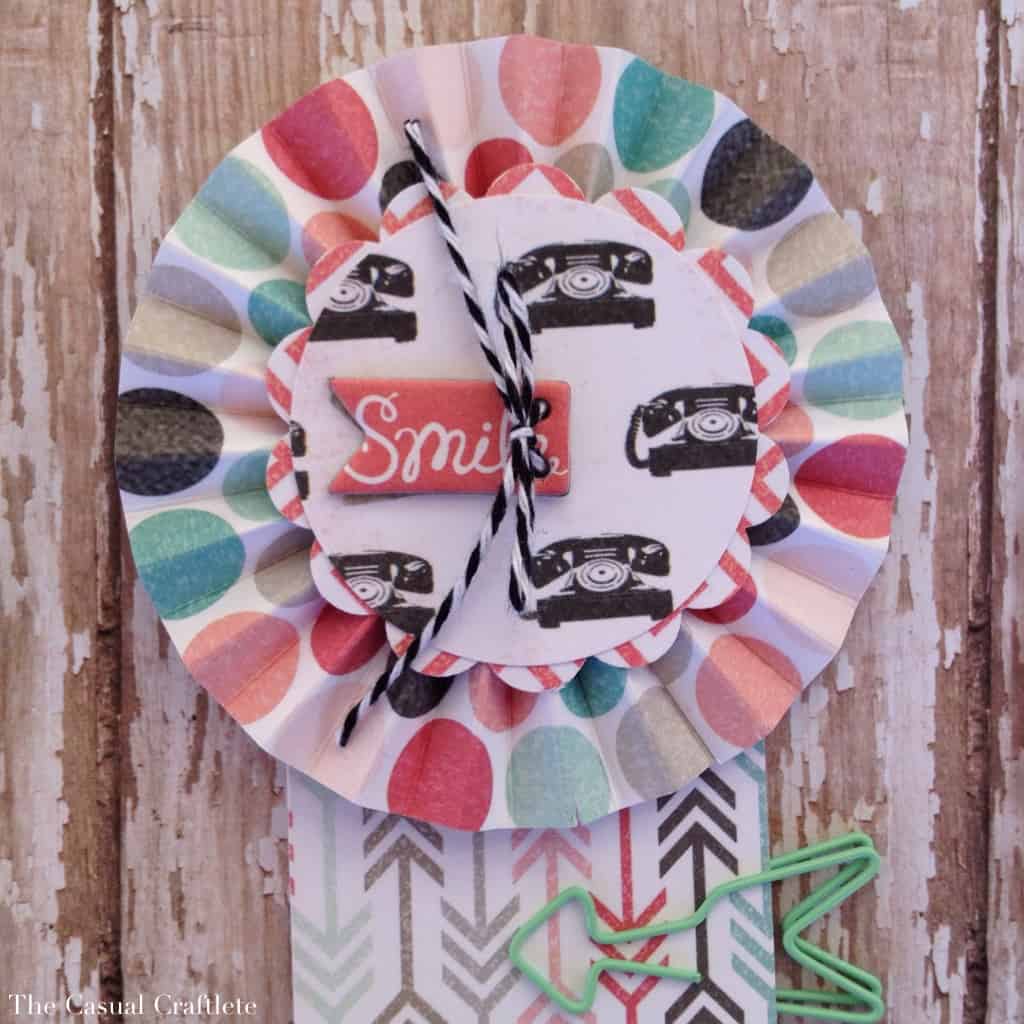
After you have the basic rosette made you can add all kinds of fabulous embellishments to give the rosette some character. I added one piece of pattern paper cut with a 2″ circle scallop punch and one more cut out round piece of different pattern scrapbook paper for dimension. Then I stuck a ‘smile’ chipboard button to the front and tied a piece of twine in between the two holes on the chipboard. Using a third piece of pattern scrapbook paper I made a flag and adhered it to the back of the rosette with tape. I added one last touch with a mint green arrow paperclip.
This rosette was super easy to make. The possibilities are endless on what you can use the rosette for: Cards, Packing, Decorating, etc, etc.
I also made a rosette and used it as a gift tag. You can find the tag and some pretty gift wrapping ideas HERE!
This post was featured on:

 –
–
So cool! I do not have a scoring board, but I love how this came out. Found you through Whimsy Wednesdays. c: You are making me want to make more cards!!
Thanks for stopping by, Carolyn! You can alway fold the paper by hand to make an accordion. Hope I have inspired you 😉
Hi Katie: I’m Connie @ http://hotflashncraftn.blogspot.com. I added you to my g+ circle. Your paper rosettes are adorable, they do look easy to make. Thanks for sharing.
Hey Connie! Thanks for stopping by. I just added you to my google + circle. Have a great night!
Hey, I love running too!
Love this project!
Stopping by from Create it Thursday.
Carolyn
http://www.ccmcafeeperspective.com/
Yay! I love ‘meeting’ people with common interests. Thanks for stopping by, Carolyn!
This is so cute. Thank you for sharing this on Krafty Inspiration. I like the addition of the embellishments.
Handmade at Warratahstree
Thanks Tracy! SO glad you stopped by. Hope you have a wonderful weekend!
Perfection! Thank you for sharing.
Thanks SO much, Laura! I really love this rosette. Glad you stopped by. Have a great day!
These are so cute, i love the papers you chose! http://www.handmadeintheheartland.com/
Thanks Angela! I’m kinda obsessed with that paper. Glad you stopped by to comment. Hope to see you tonight at the Blog Hop 🙂
I love making these! I have the Martha Stewart score board too, but I have never used it to make envelopes…I will have to give that a try. I love your blog, it is so sleek and bright! I would be pleased if you visited my little craft blog Lifesimply!
I just used the scoring board to make envelopes and it was really easy! Here is a link to a picture of the envelopes >https://www.purelykatie.com/2014/01/01/4-free-printable-thank-you-cards/
Love your blog, Paula!
Thank you for linking up @ Craft, Create & Inspire linky party last weekend , your awesome project is featured this week.
Looking forward to seeing what awesome projects your have been working on this week 🙂
http://livel0vecreate.blogspot.co.uk/2014/01/craft-create-inspire-linky-party_11.html
Looking forward to seeing you there, Claire xo