How To Make A Wood And Metal Coffee Table With Confidence
The One Room Challenge is half way over and we still have lots of details to knock out. Things are definitely moving along, the painting is done and all the furniture I ordered online has arrived. The only piece of furniture I don’t have is a coffee table so we decided to make one ourselves to save tons of money. (If you are just tuning in you can also head back to week 1 and start from the beginning.)

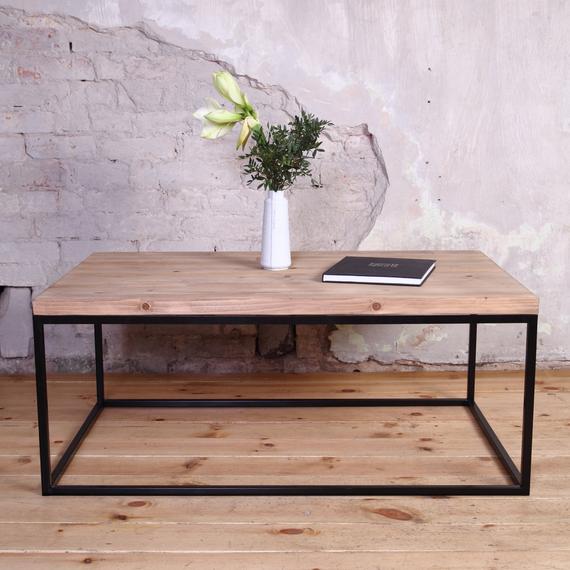
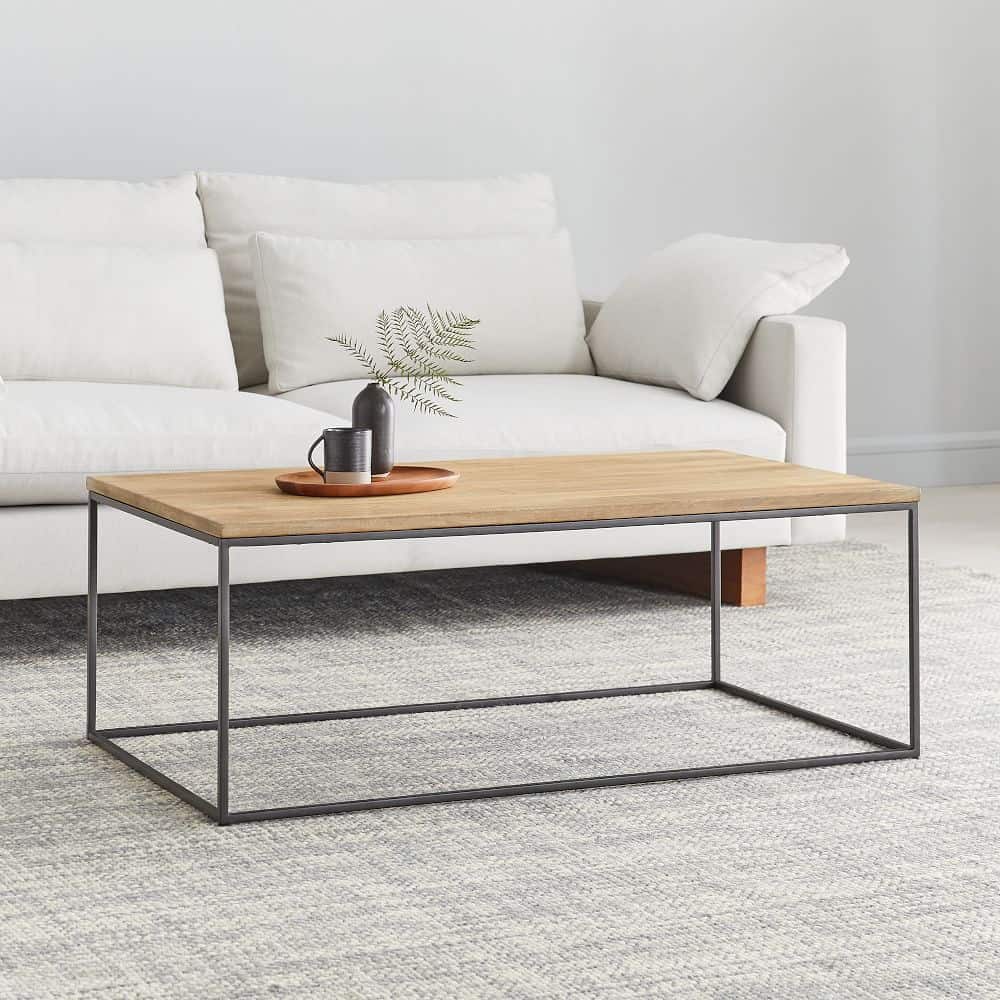
If you are like me, I search on Pinterest for home decor ideas. It is a source of knowledge and who doesn’t like to look at pretty pictures?! There are many styled photographs of coffee tables that I ooh and aah over but dang they are expensive. I am lucky enough to have a husband who can make anything, so when I mentioned I would love a wood and metal coffee table, he got right on it. DIYs will save you money but do take time to complete.
Best Coffee Tables For Your Home
Mix natural wood tones with metal, texture and pattern, and streamlined with traditional for achieving the perfect living room. Here are a couple of coffee tables that I used for inspiration and are available to purchase online for a a hefty price.
How to get started on building a coffee table
- Start with a design plan. First, you want to start by measuring the space in your living room that the coffee table will go. Next, you want to decide on what type of table you want. I will be showing you how we made a square wood and metal coffee table.
- Track down the materials. We had wood leftover from a previous project that my husband had made when he was in college. The project was just not functional and was taking up precious garage space, so we thought that we could re-purpose the wood for the coffee table. As far as the metal goes, my husband was able to find some scraps at work for free…score!
- Picking a wood stain. Staining is done for a variety of reasons. Properly used, stain can emphasize the wood grain. It can make a new wood look old or a common wood look like a rare one. It can pull together a two-wood piece, restore color to bleached areas and change or deepen the color of any wood.
Building a coffee table from scratch (the plans)
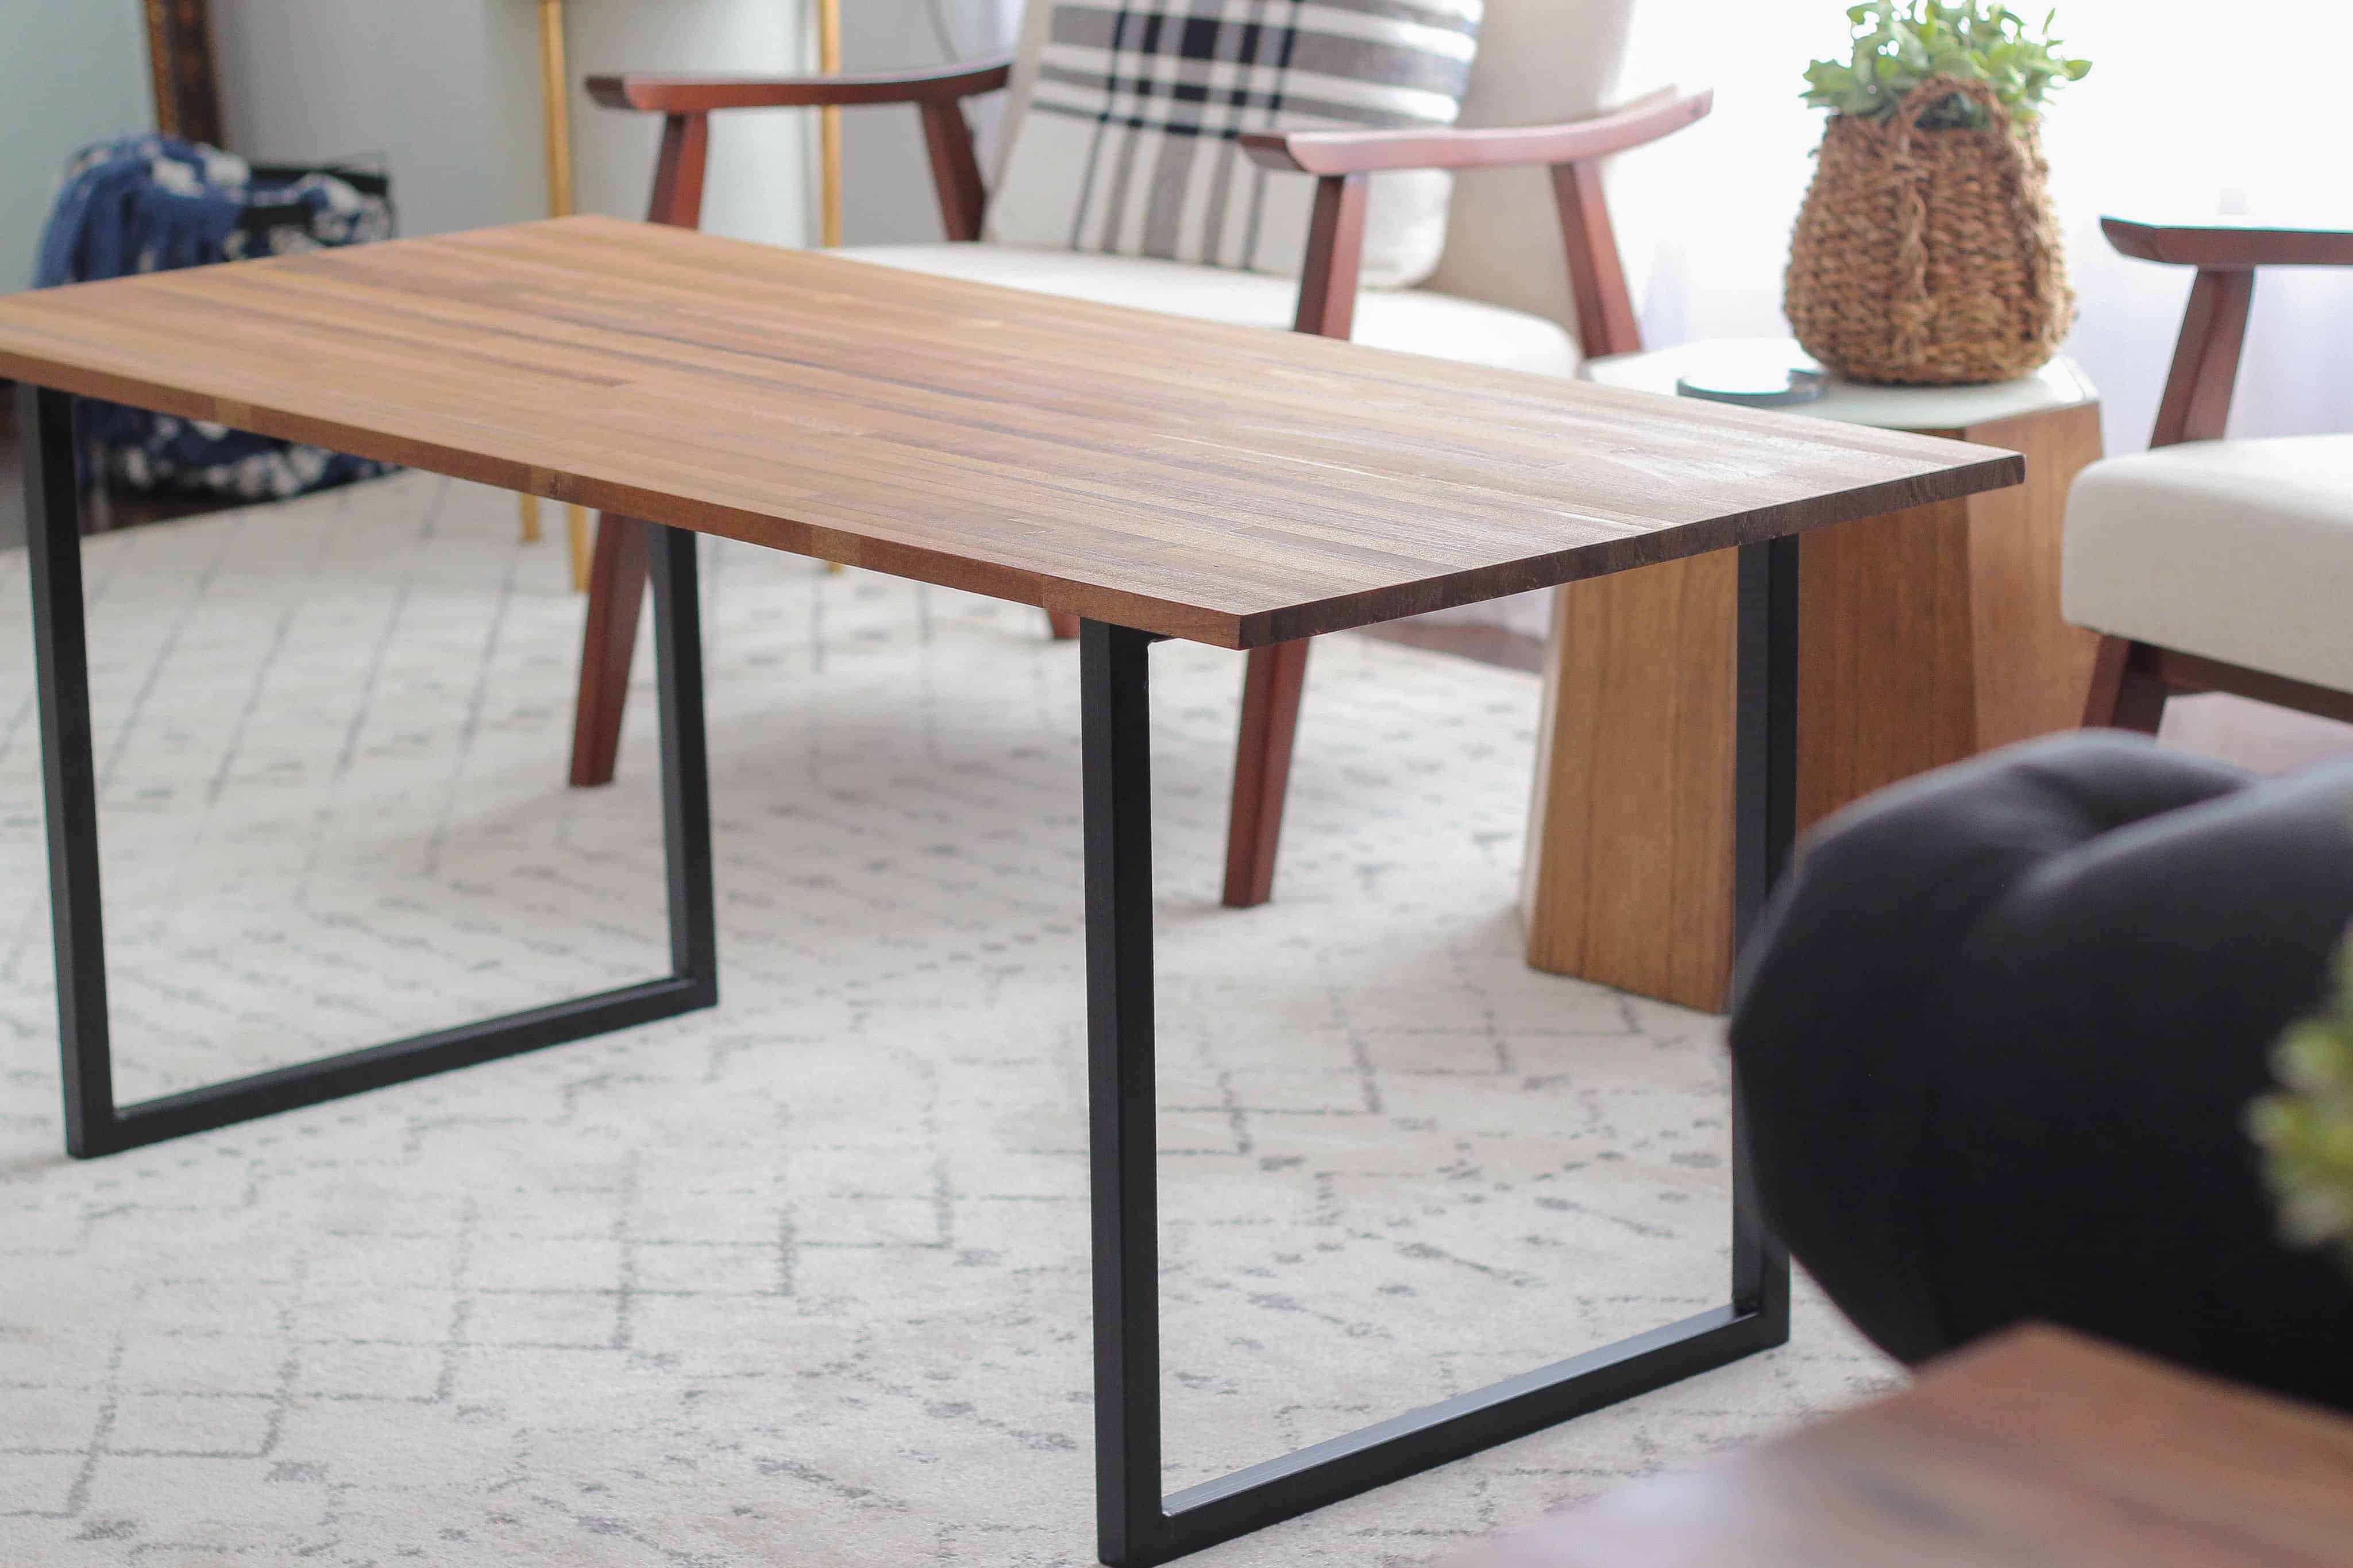
These coffee table plans are for those advance woodworking and welding skills but are also useful for someone who wants to get started in these skills and willing to learn from the instructions. The table measures 23 1/2″ wide by 50″ long by 20 3/4″ tall. All of these dimensions can be adjusted to your own taste.
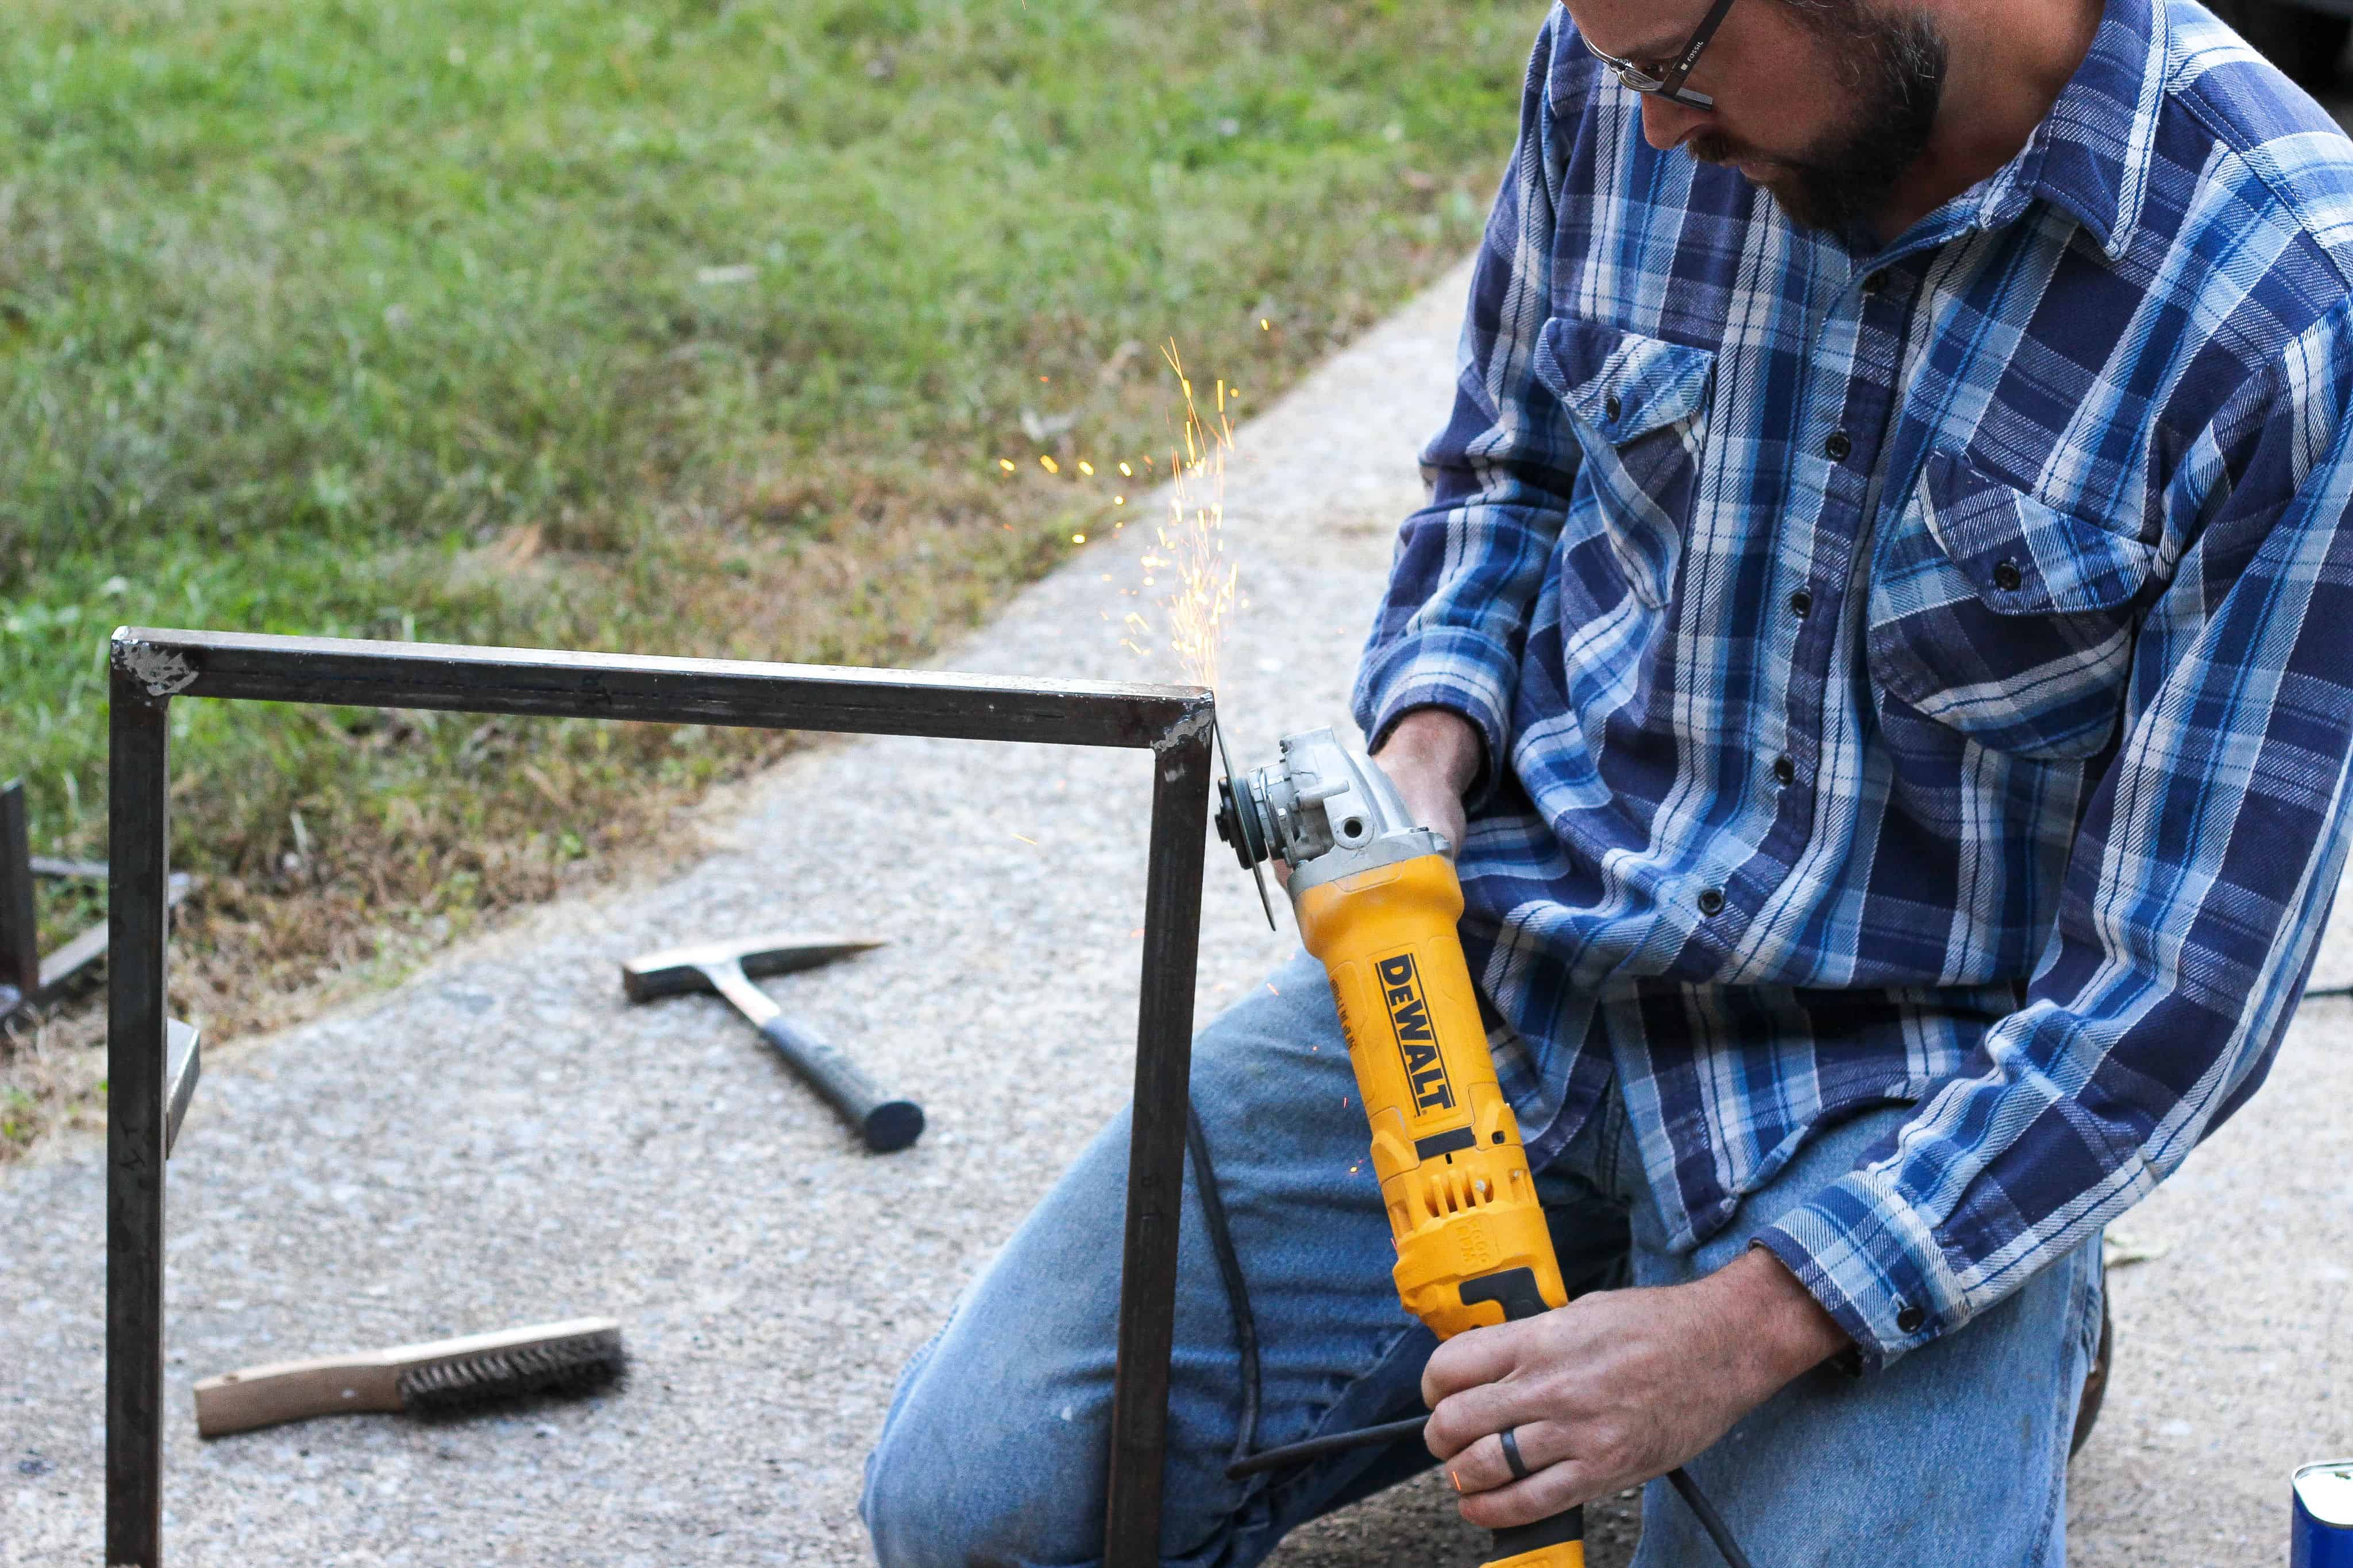
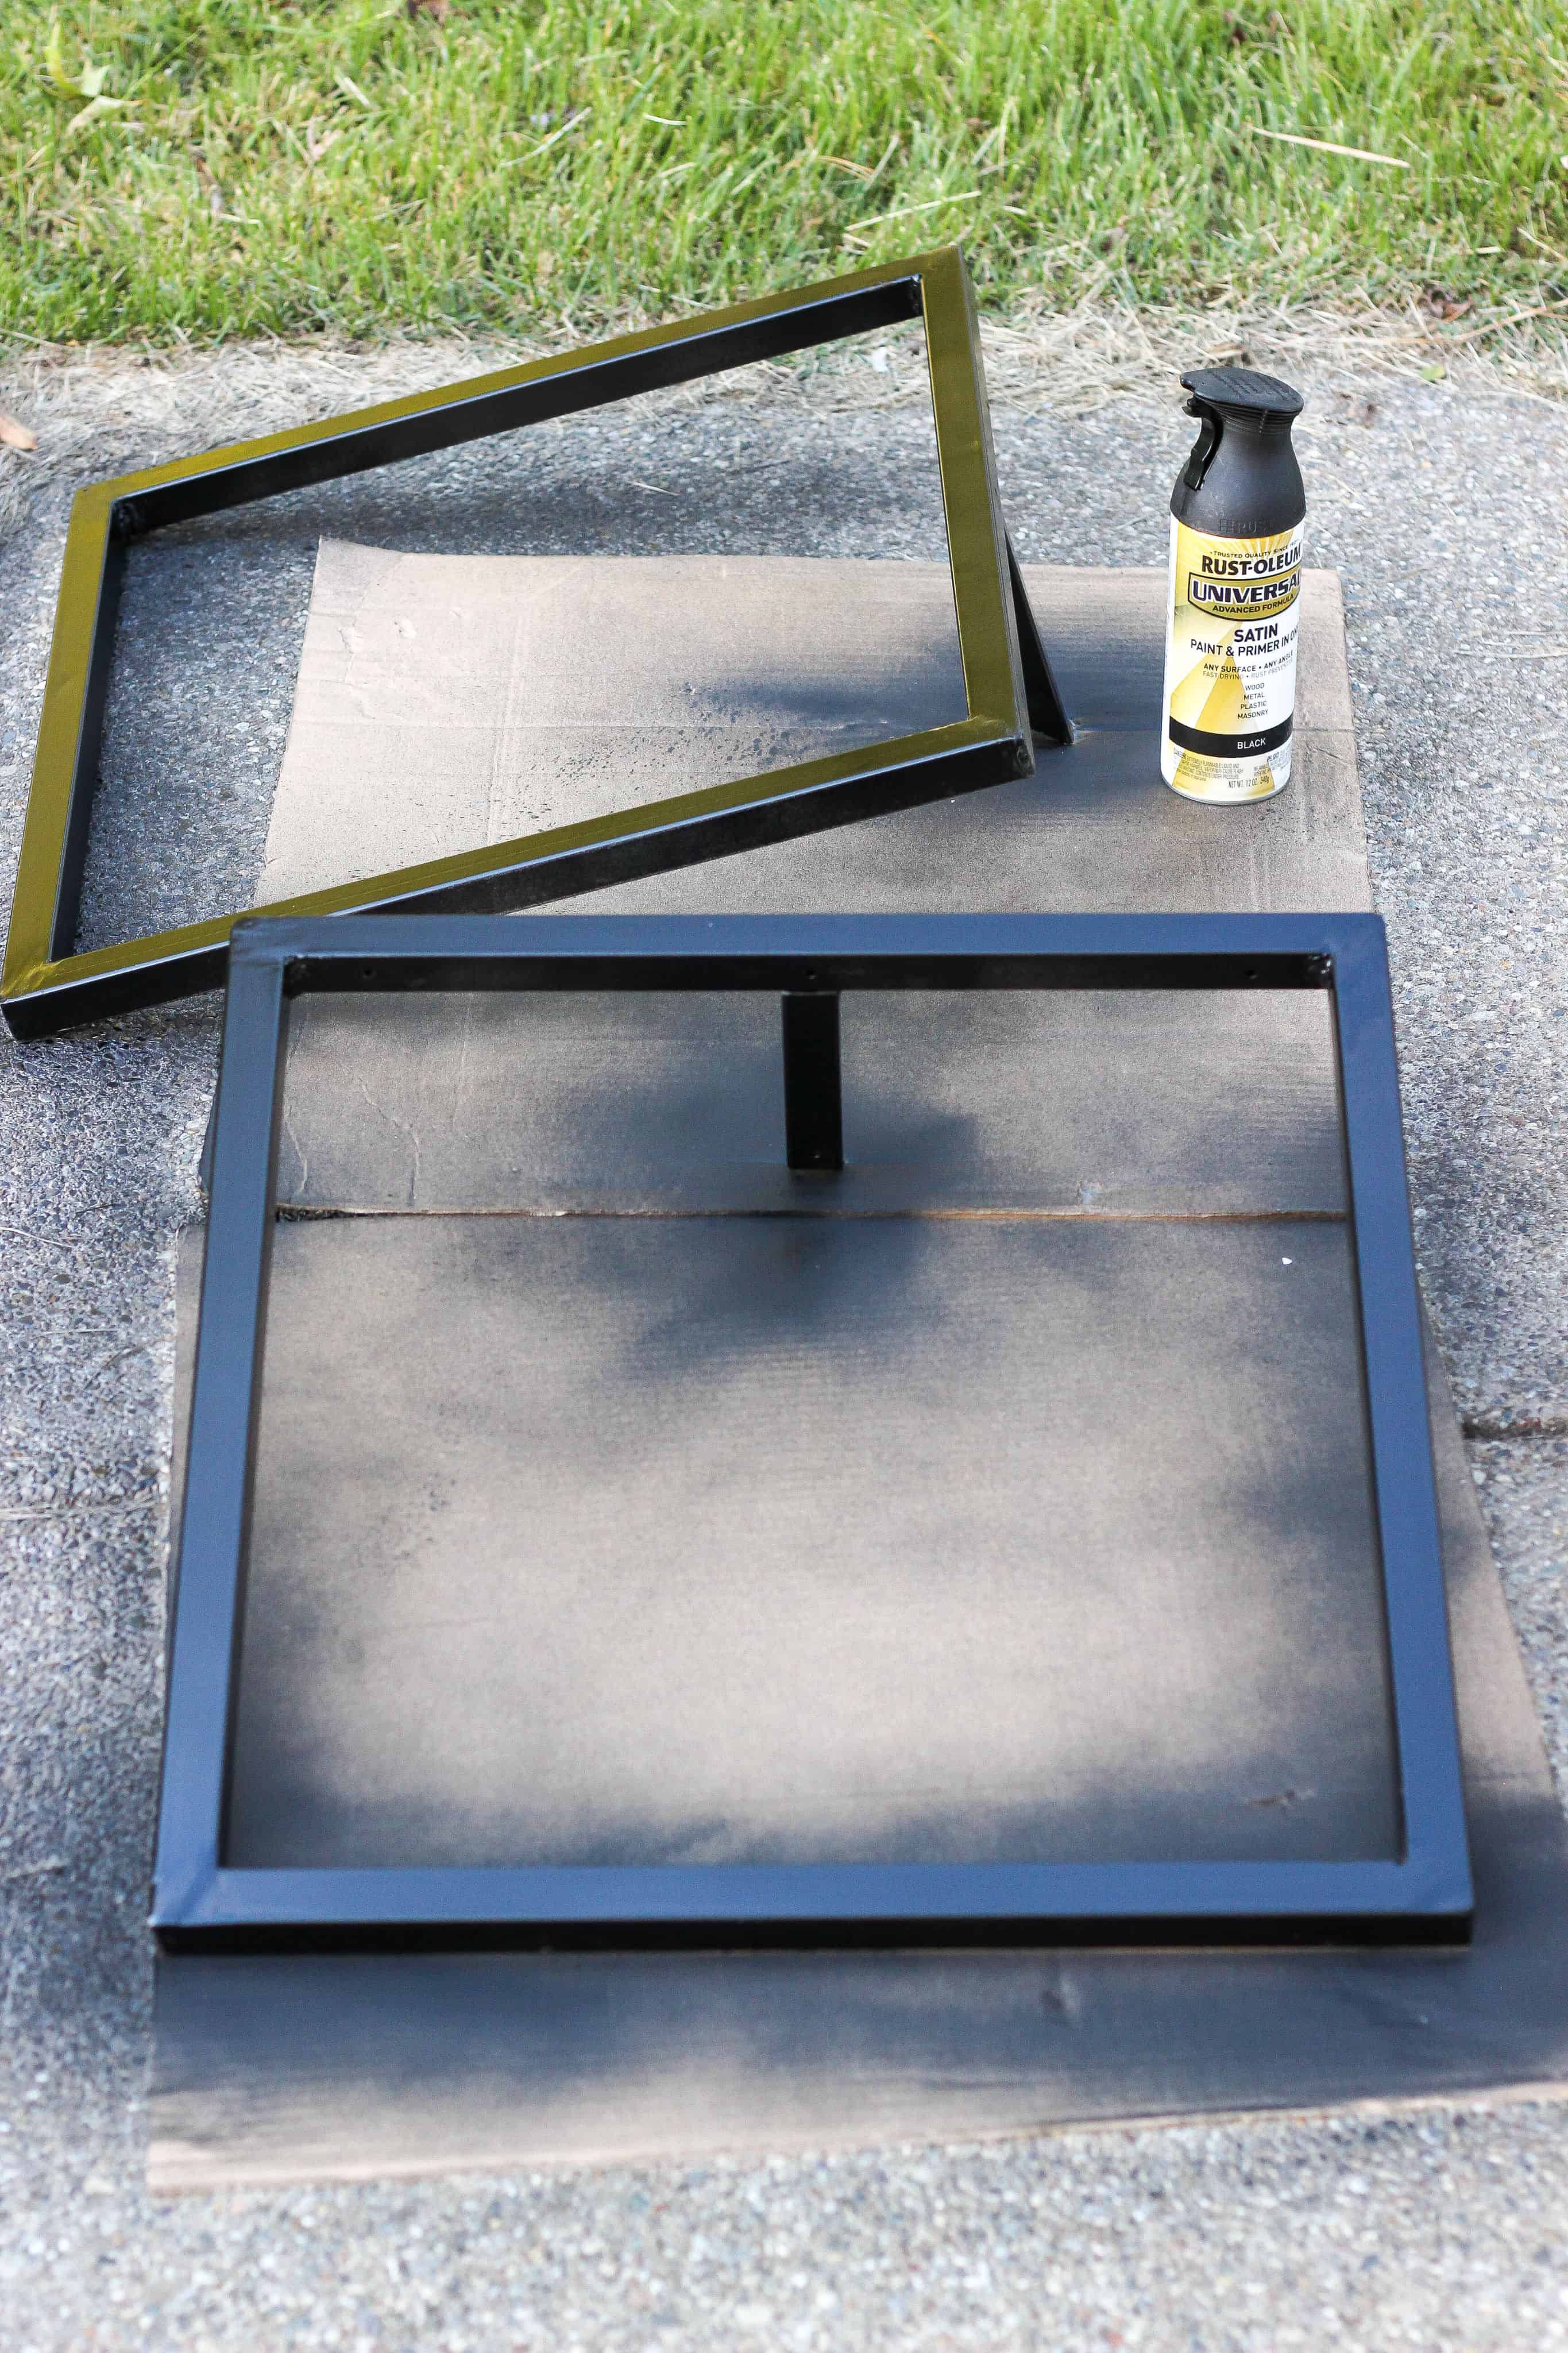
The Legs
The legs are made from 1′ square tubing with a 1/16″ wall. I made 2 identical squares by cutting 45 degree angles into eight 20″ sections. Those were welded together into two squares. A short 6″ stub was welded to the top center of each square as shown in the picture below to provide additional support under the table. 3/16″ holes were drilled through the frame so that the legs could be fastened to the underside of the table with 1 1/4″ screws. The welds were ground smooth, cleaned with a rag and Xylene (to remove oils and dirt) and painted black with spray paint.
The Top
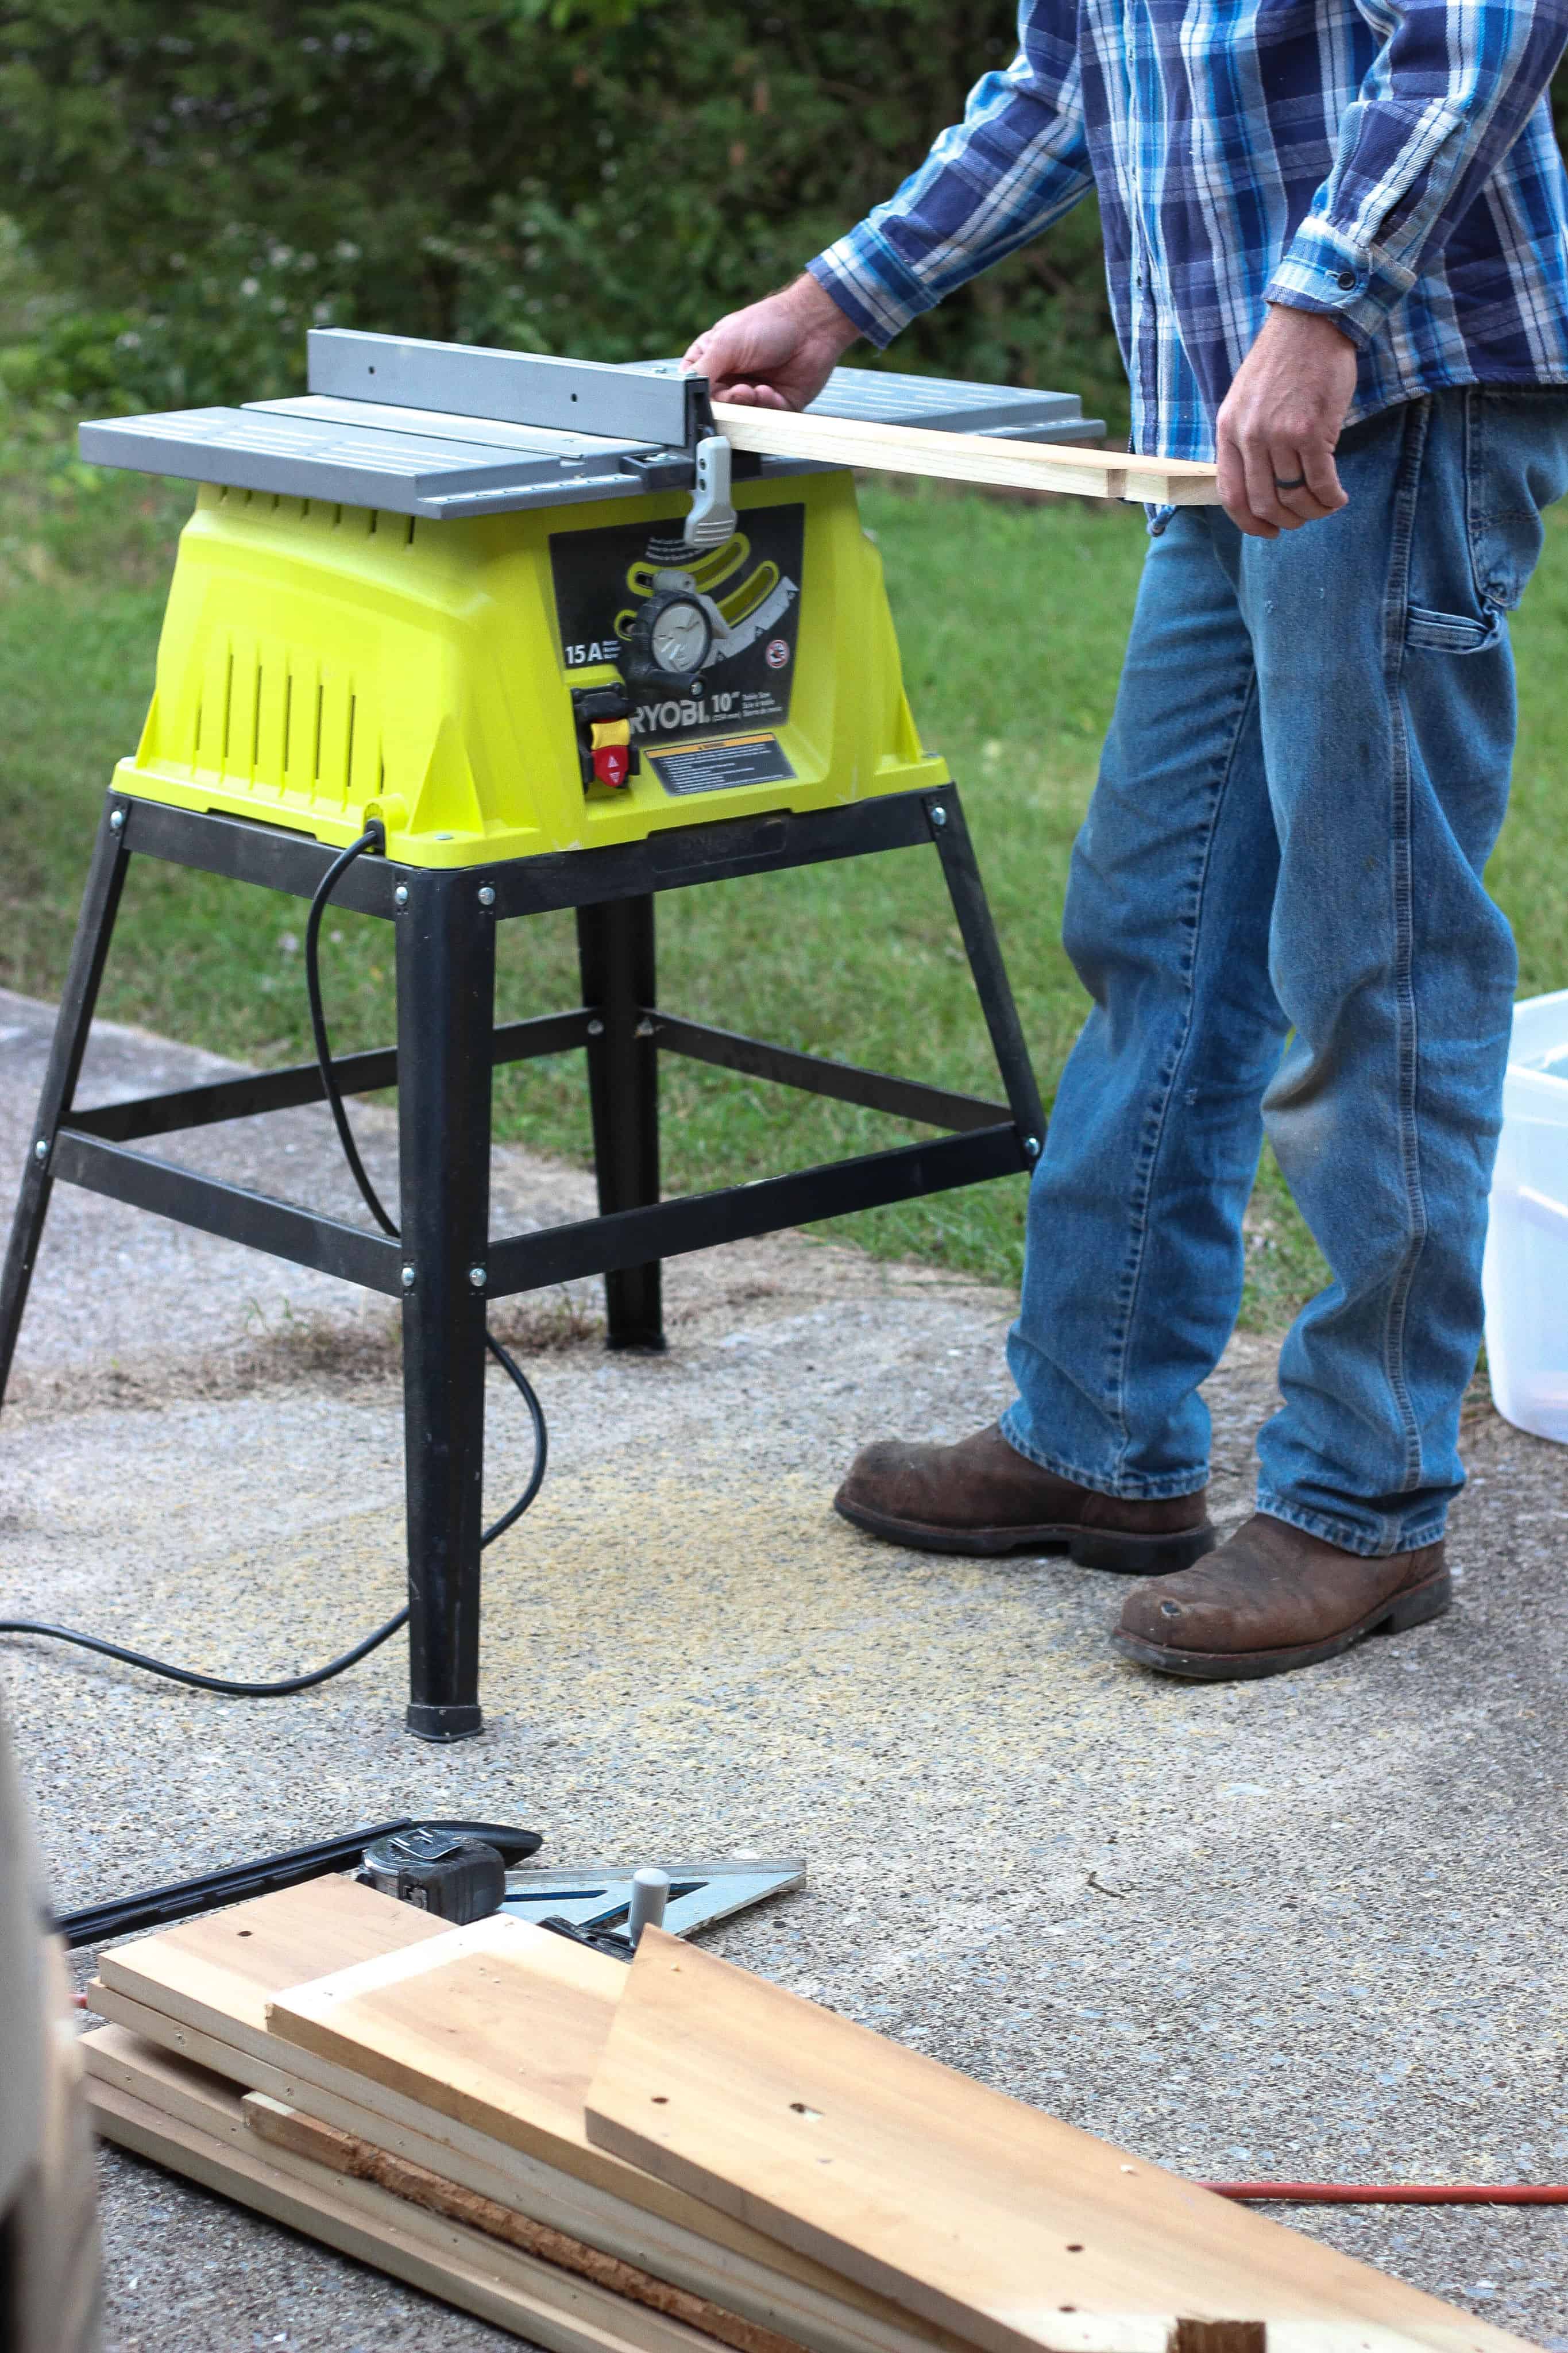
To make the table top, poplar was reclaimed from another woodworking project. Poplar has a nice light color and is relatively inexpensive compared to some other nice woods. Slats were cut on the table saw that measured 7/8″ tall by 3/4″ wide. The boards were already 3/4″ wide so the fence on the table saw was set for 7/8″. The extra height would allow the table sections to be planed and sanded down to create a smooth surface after the slats were all glued together. The advantage to using a butcher block style table is that different length pieces can be used so that large sections are not needed.
Gluing the Top
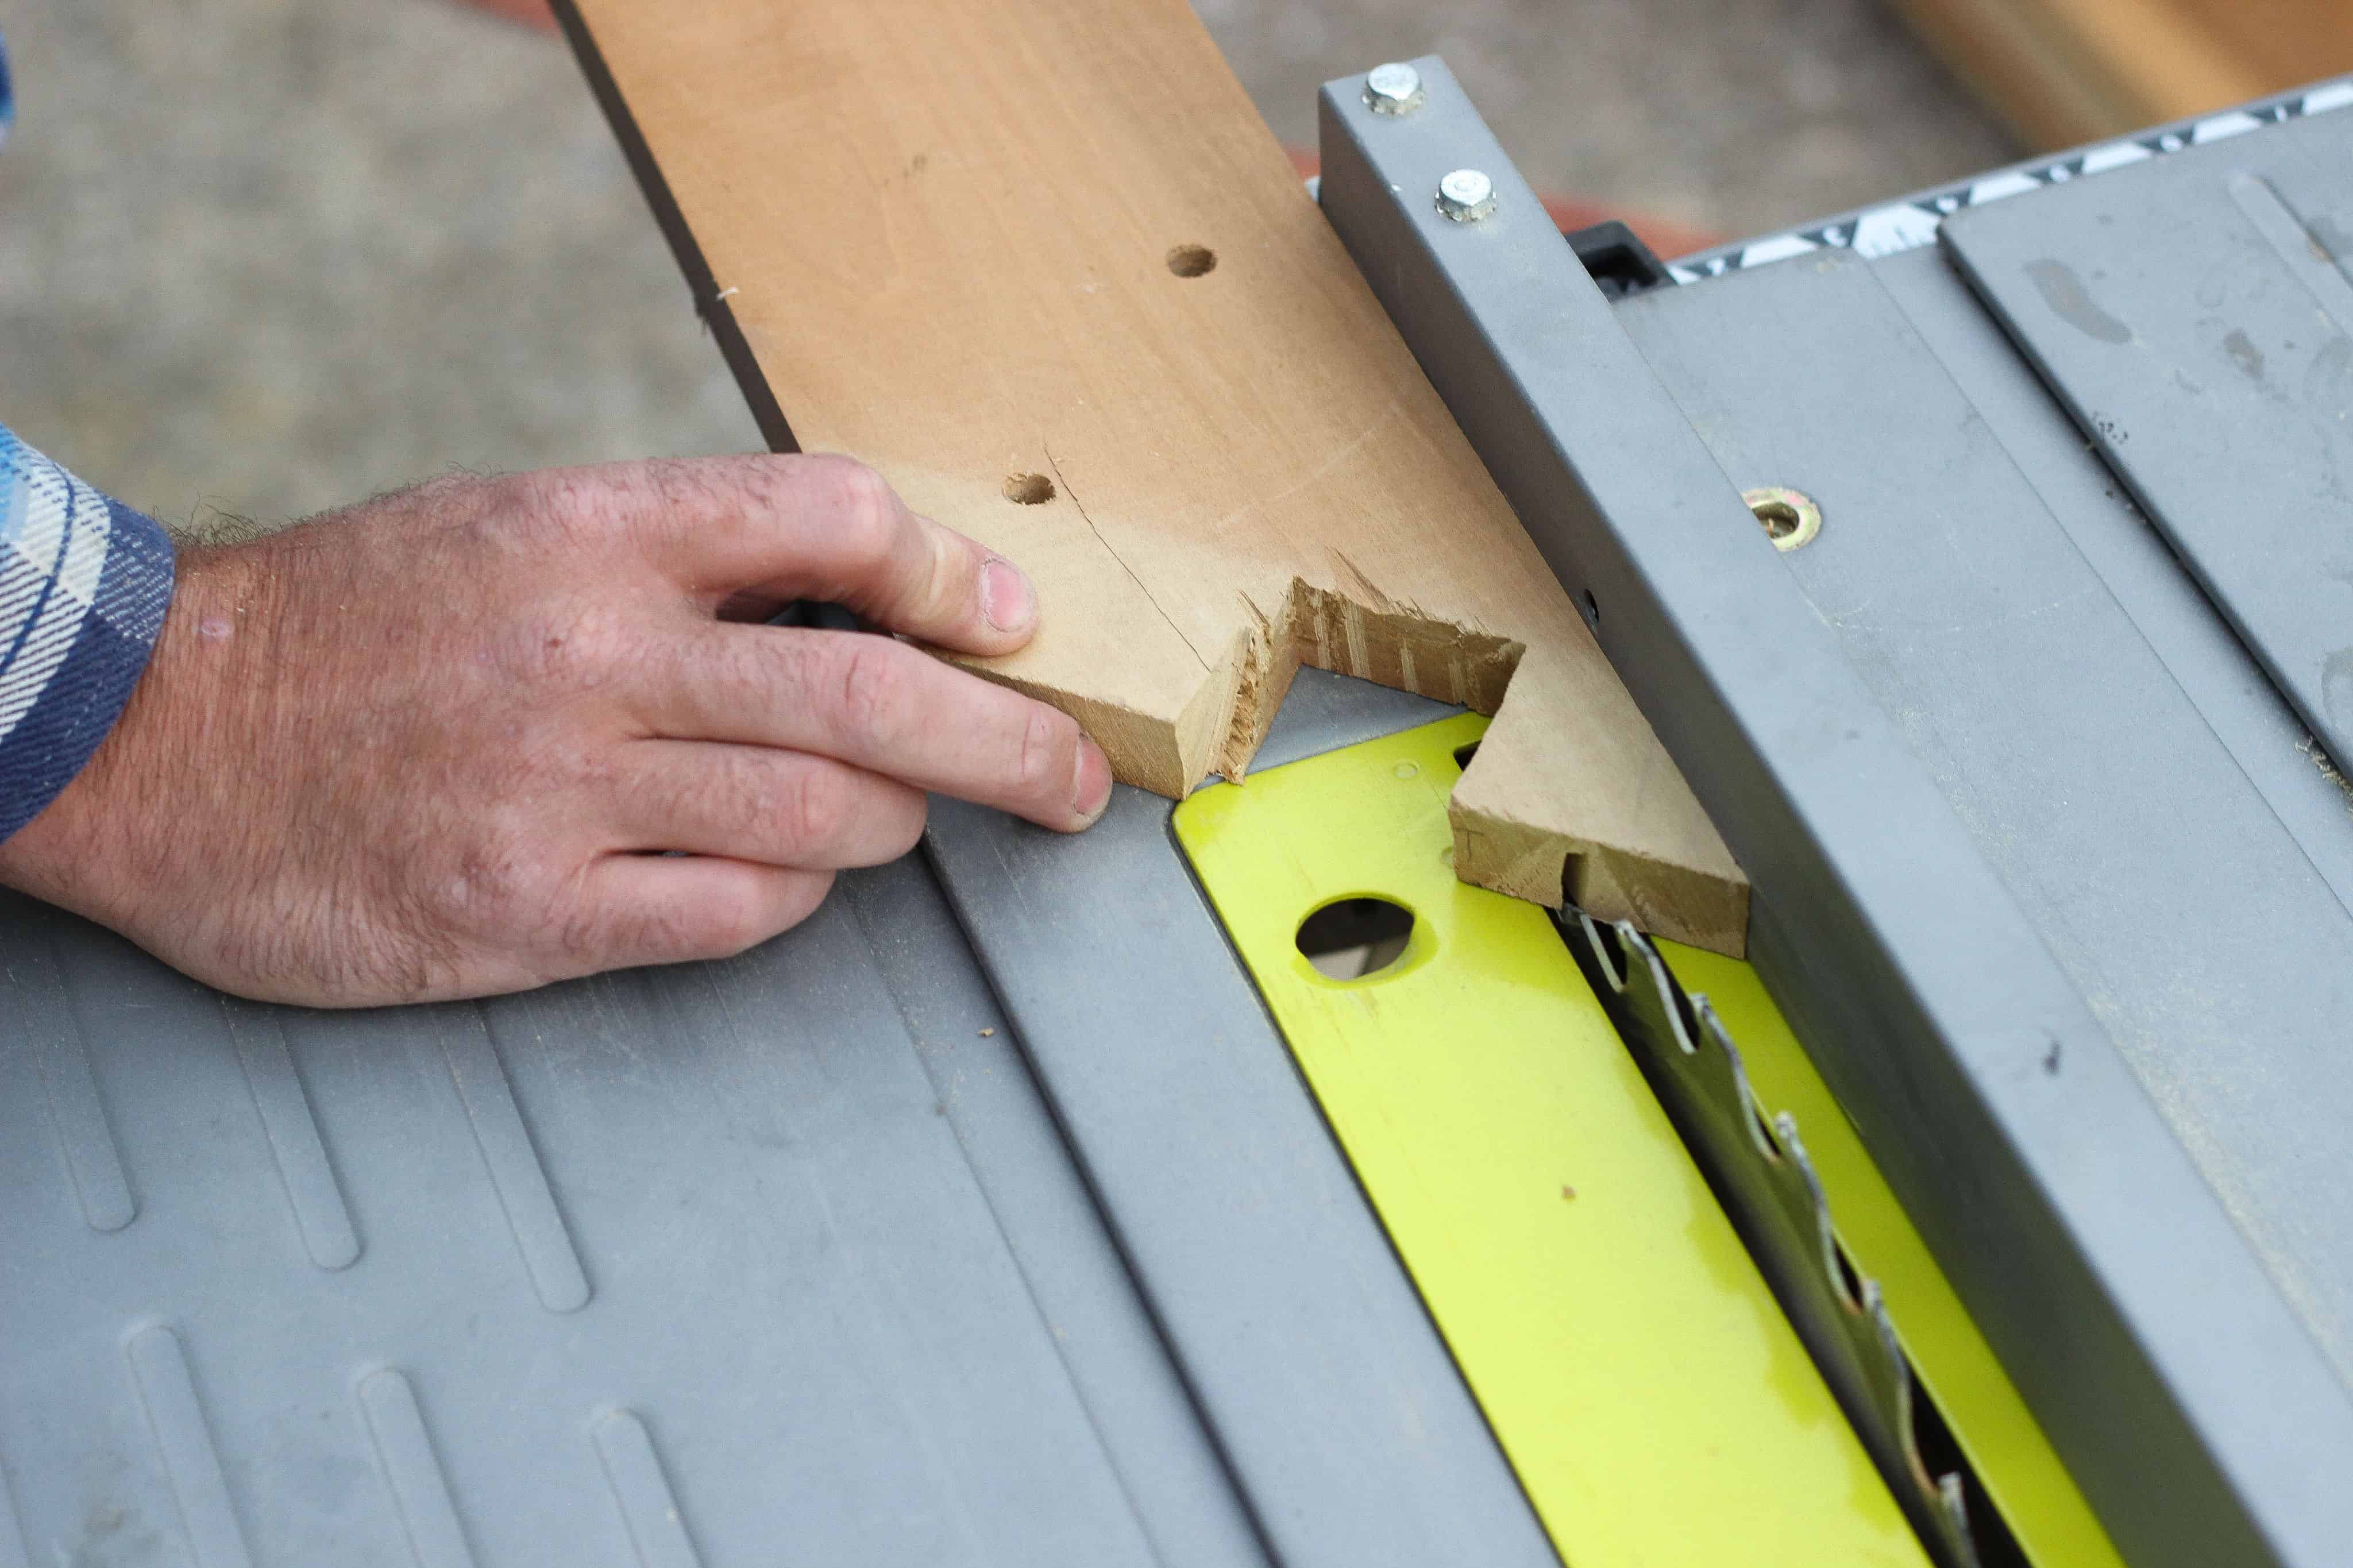
Once all the slats are cut, square the ends of all the pieces. This will ensure good fit when it comes to gluing. It is helpful to lay out all the pieces ahead of time to make sure everything looks good. Stagger the joints throughout the table (similar to how hardwood flooring is put in) to create whatever look you want. This particular table was assembled in two sections so that each one could be put through the planer later. (my planer accepts 12″ maximum width)
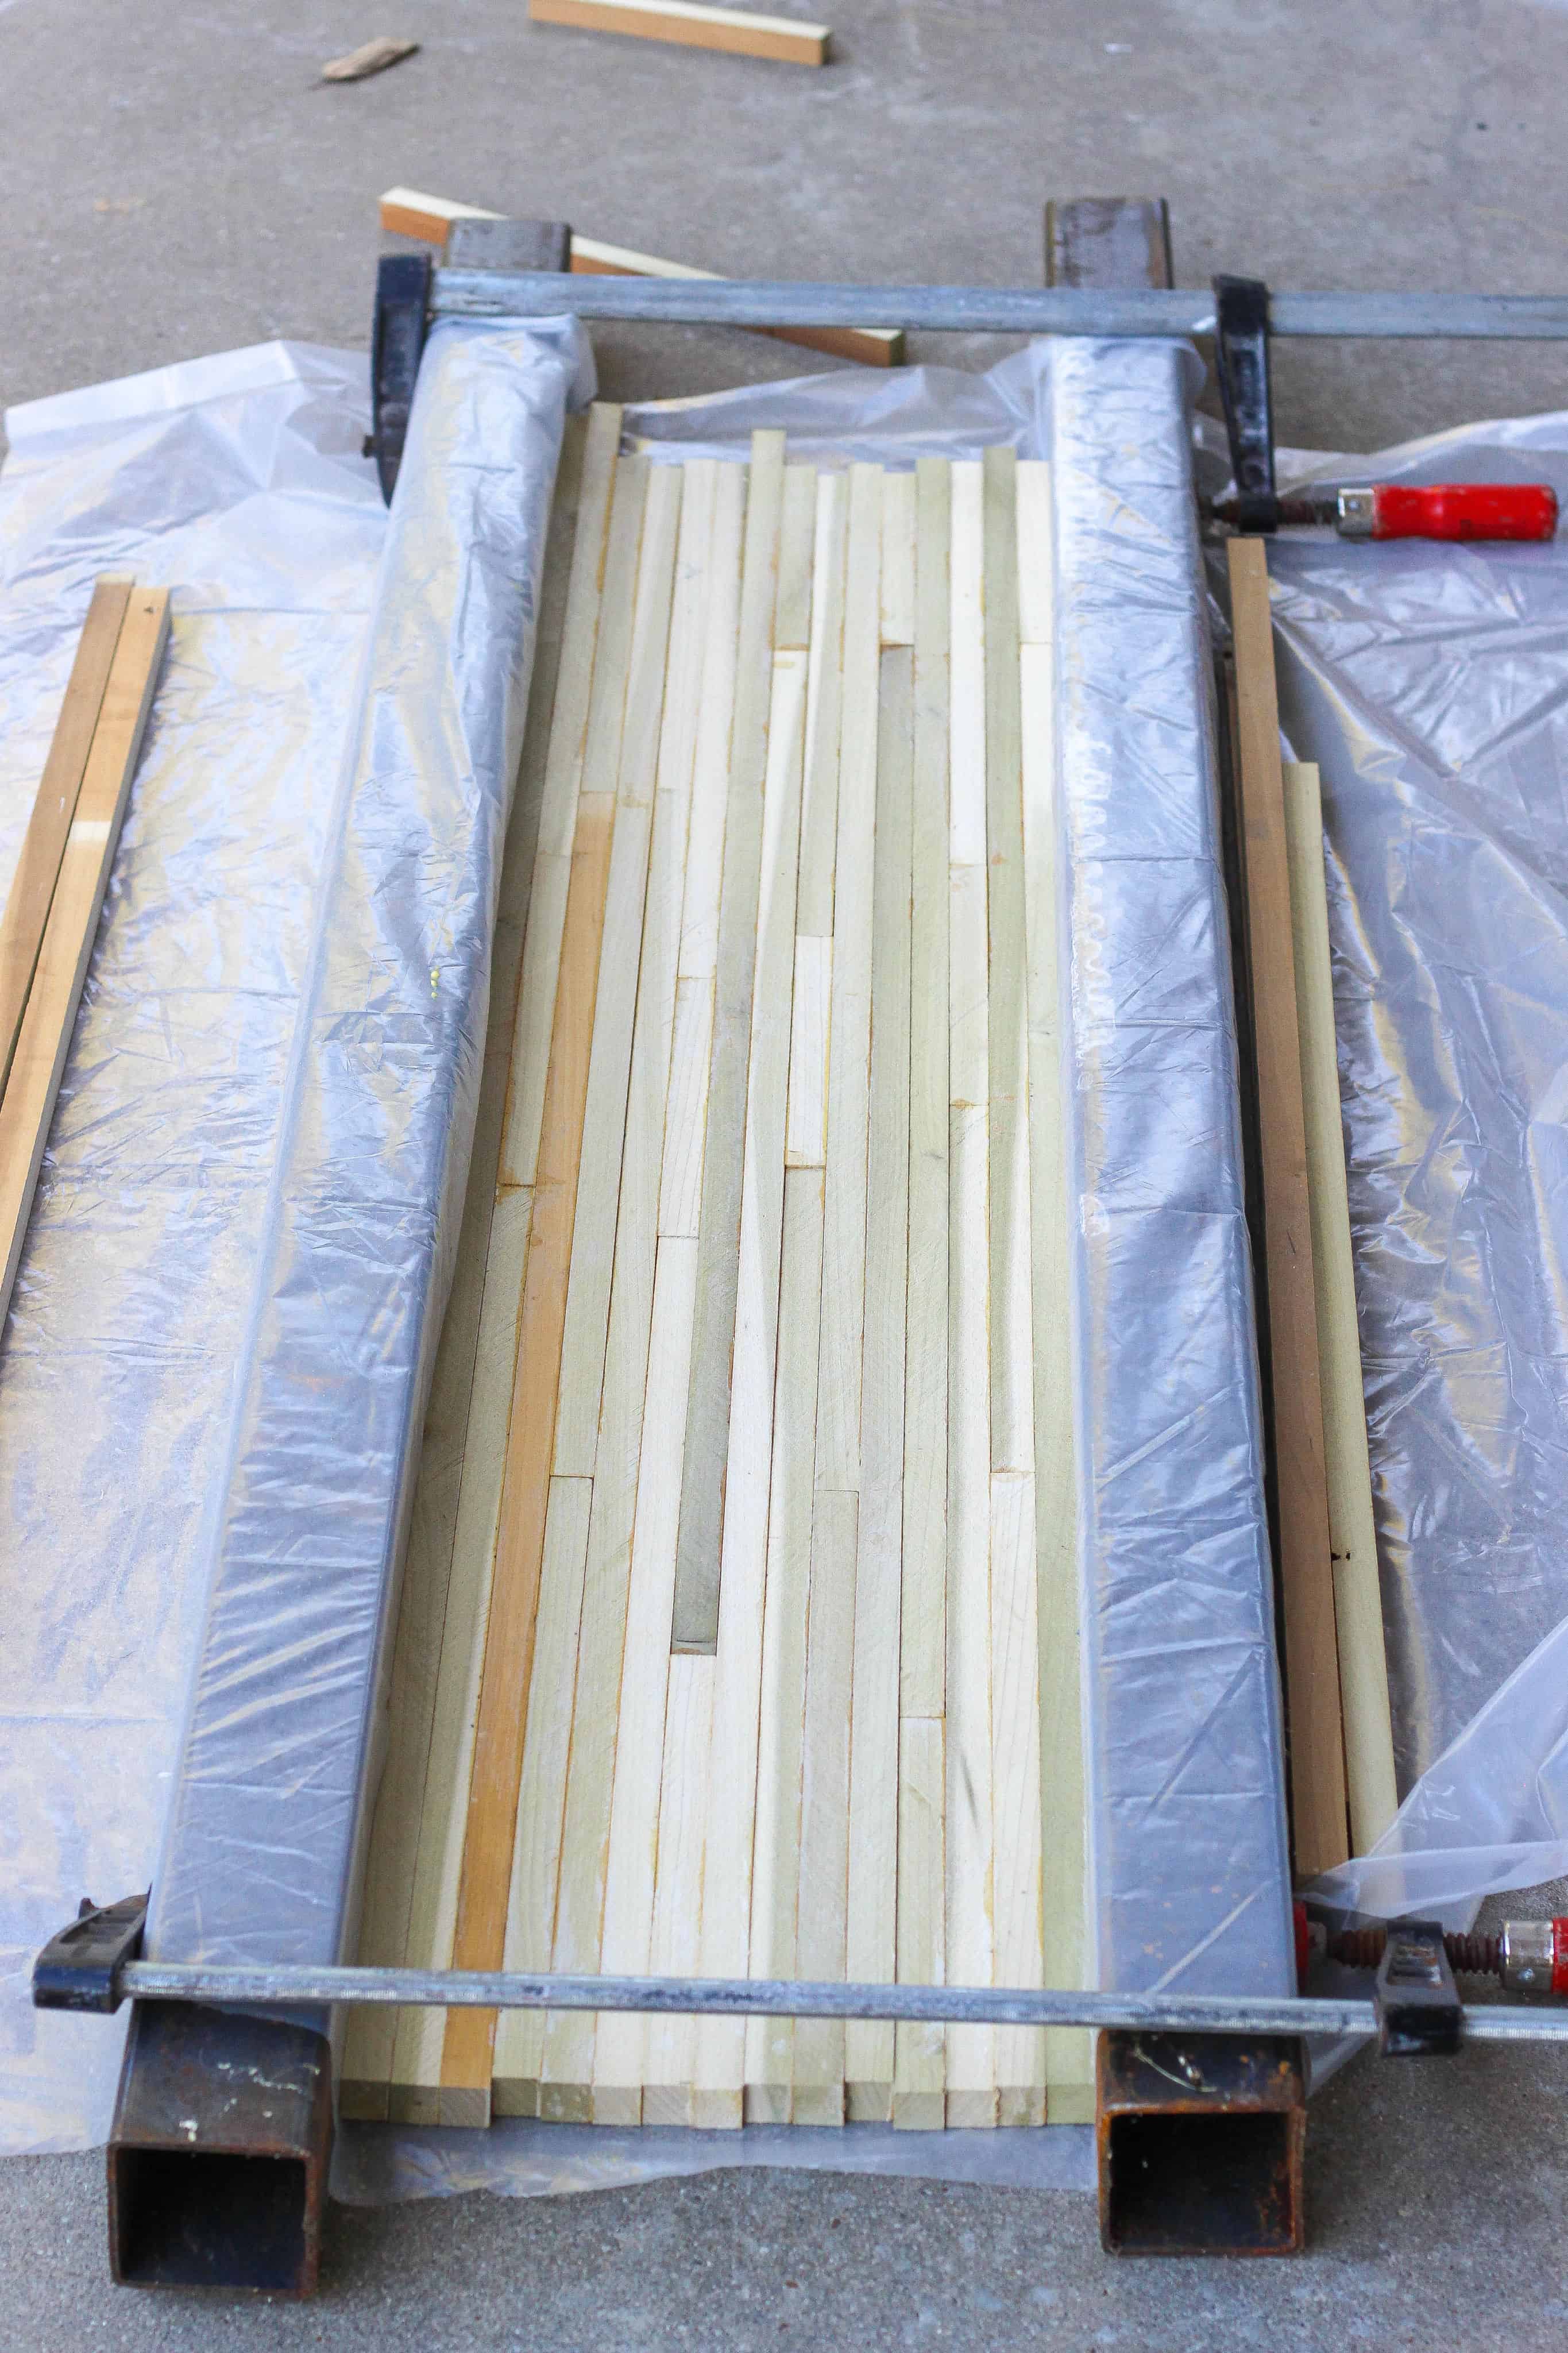
When assembling, the wood glue is put on the 7/8″ sides so that the 3/4″ side shows on top. Make sure the wood is clean and smooth. Lay all the pieces on their side, apply glue, and use a small trim roller (for paint) to spread the glue evenly. Flip the pieces up and press together. Make sure all the joints in the slats are together and clamp for 12-24 hours. The gluing is most easily done on a flat surface covered in plastic. This prevents the glue from bleeding through or sticking to anything unintentionally.
To clamp, use two straight boards to hold pressure from the clamps. (I used some big square steel tubing I had). Clamp firmly. Use a rubber mallet to knock the slats down so that they are as even as possible. Wipe away excess glue from the ends and top with a damp rag. The planer will clear the bottom in the next step. Don’t worry if the ends are uneven. They can be trimmed later to make a nice edge at the finished length.
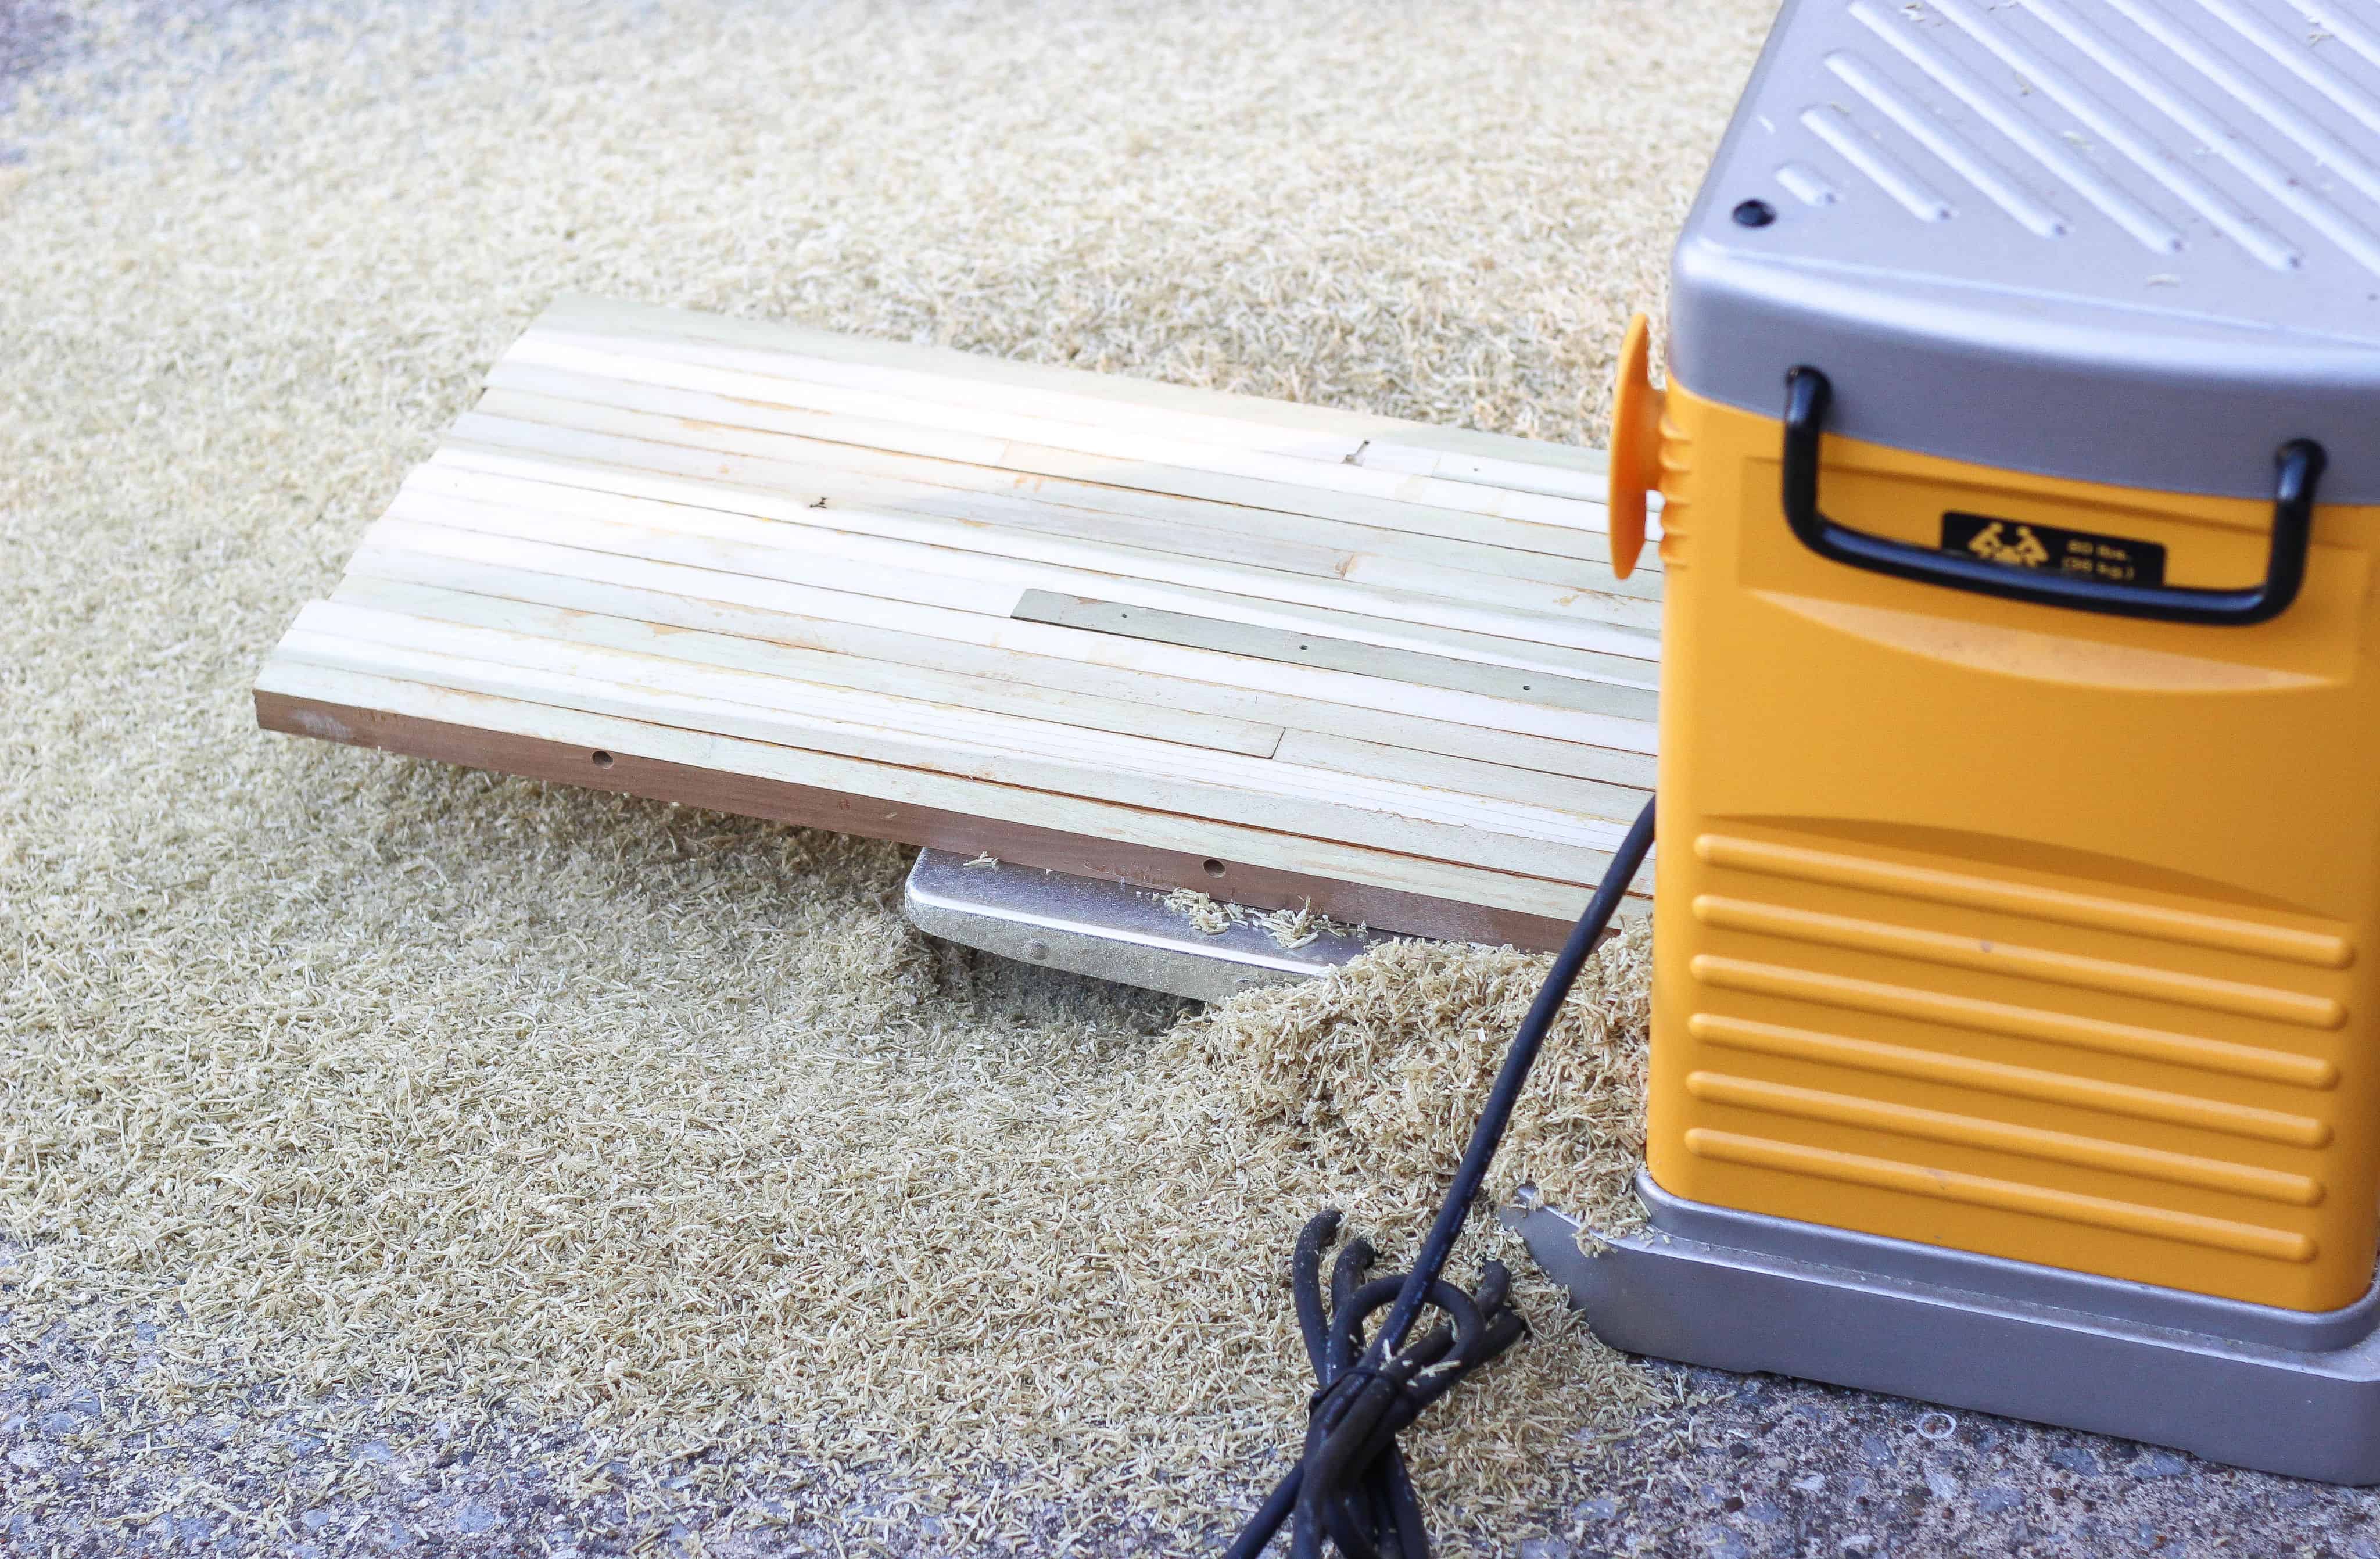
Planing the Top and Assembling
Once both sides are glued and have set for 24 hours, they can be planed. This will take an uneven surface (above) and make it smooth and uniform in thickness. Make light passes (1/32″) to get the panels to final thickness where they are smooth and even. Plane both the top and bottom, starting with the bottom. Do final passes on both sides of the table at the same settings on the planer to make sure they are the same.
Once planed, put both panels side by side and see how they fit. The joint on this table wasn’t very good initially and needed about an hour of hand planing and sanding on the edges of both pieces to ensure a good fit. Once the fitting is complete, glue the two panels side by side to make the finished table using the same method as before. Clamp and let sit for 24 hours again.
Staining and Attaching the Legs
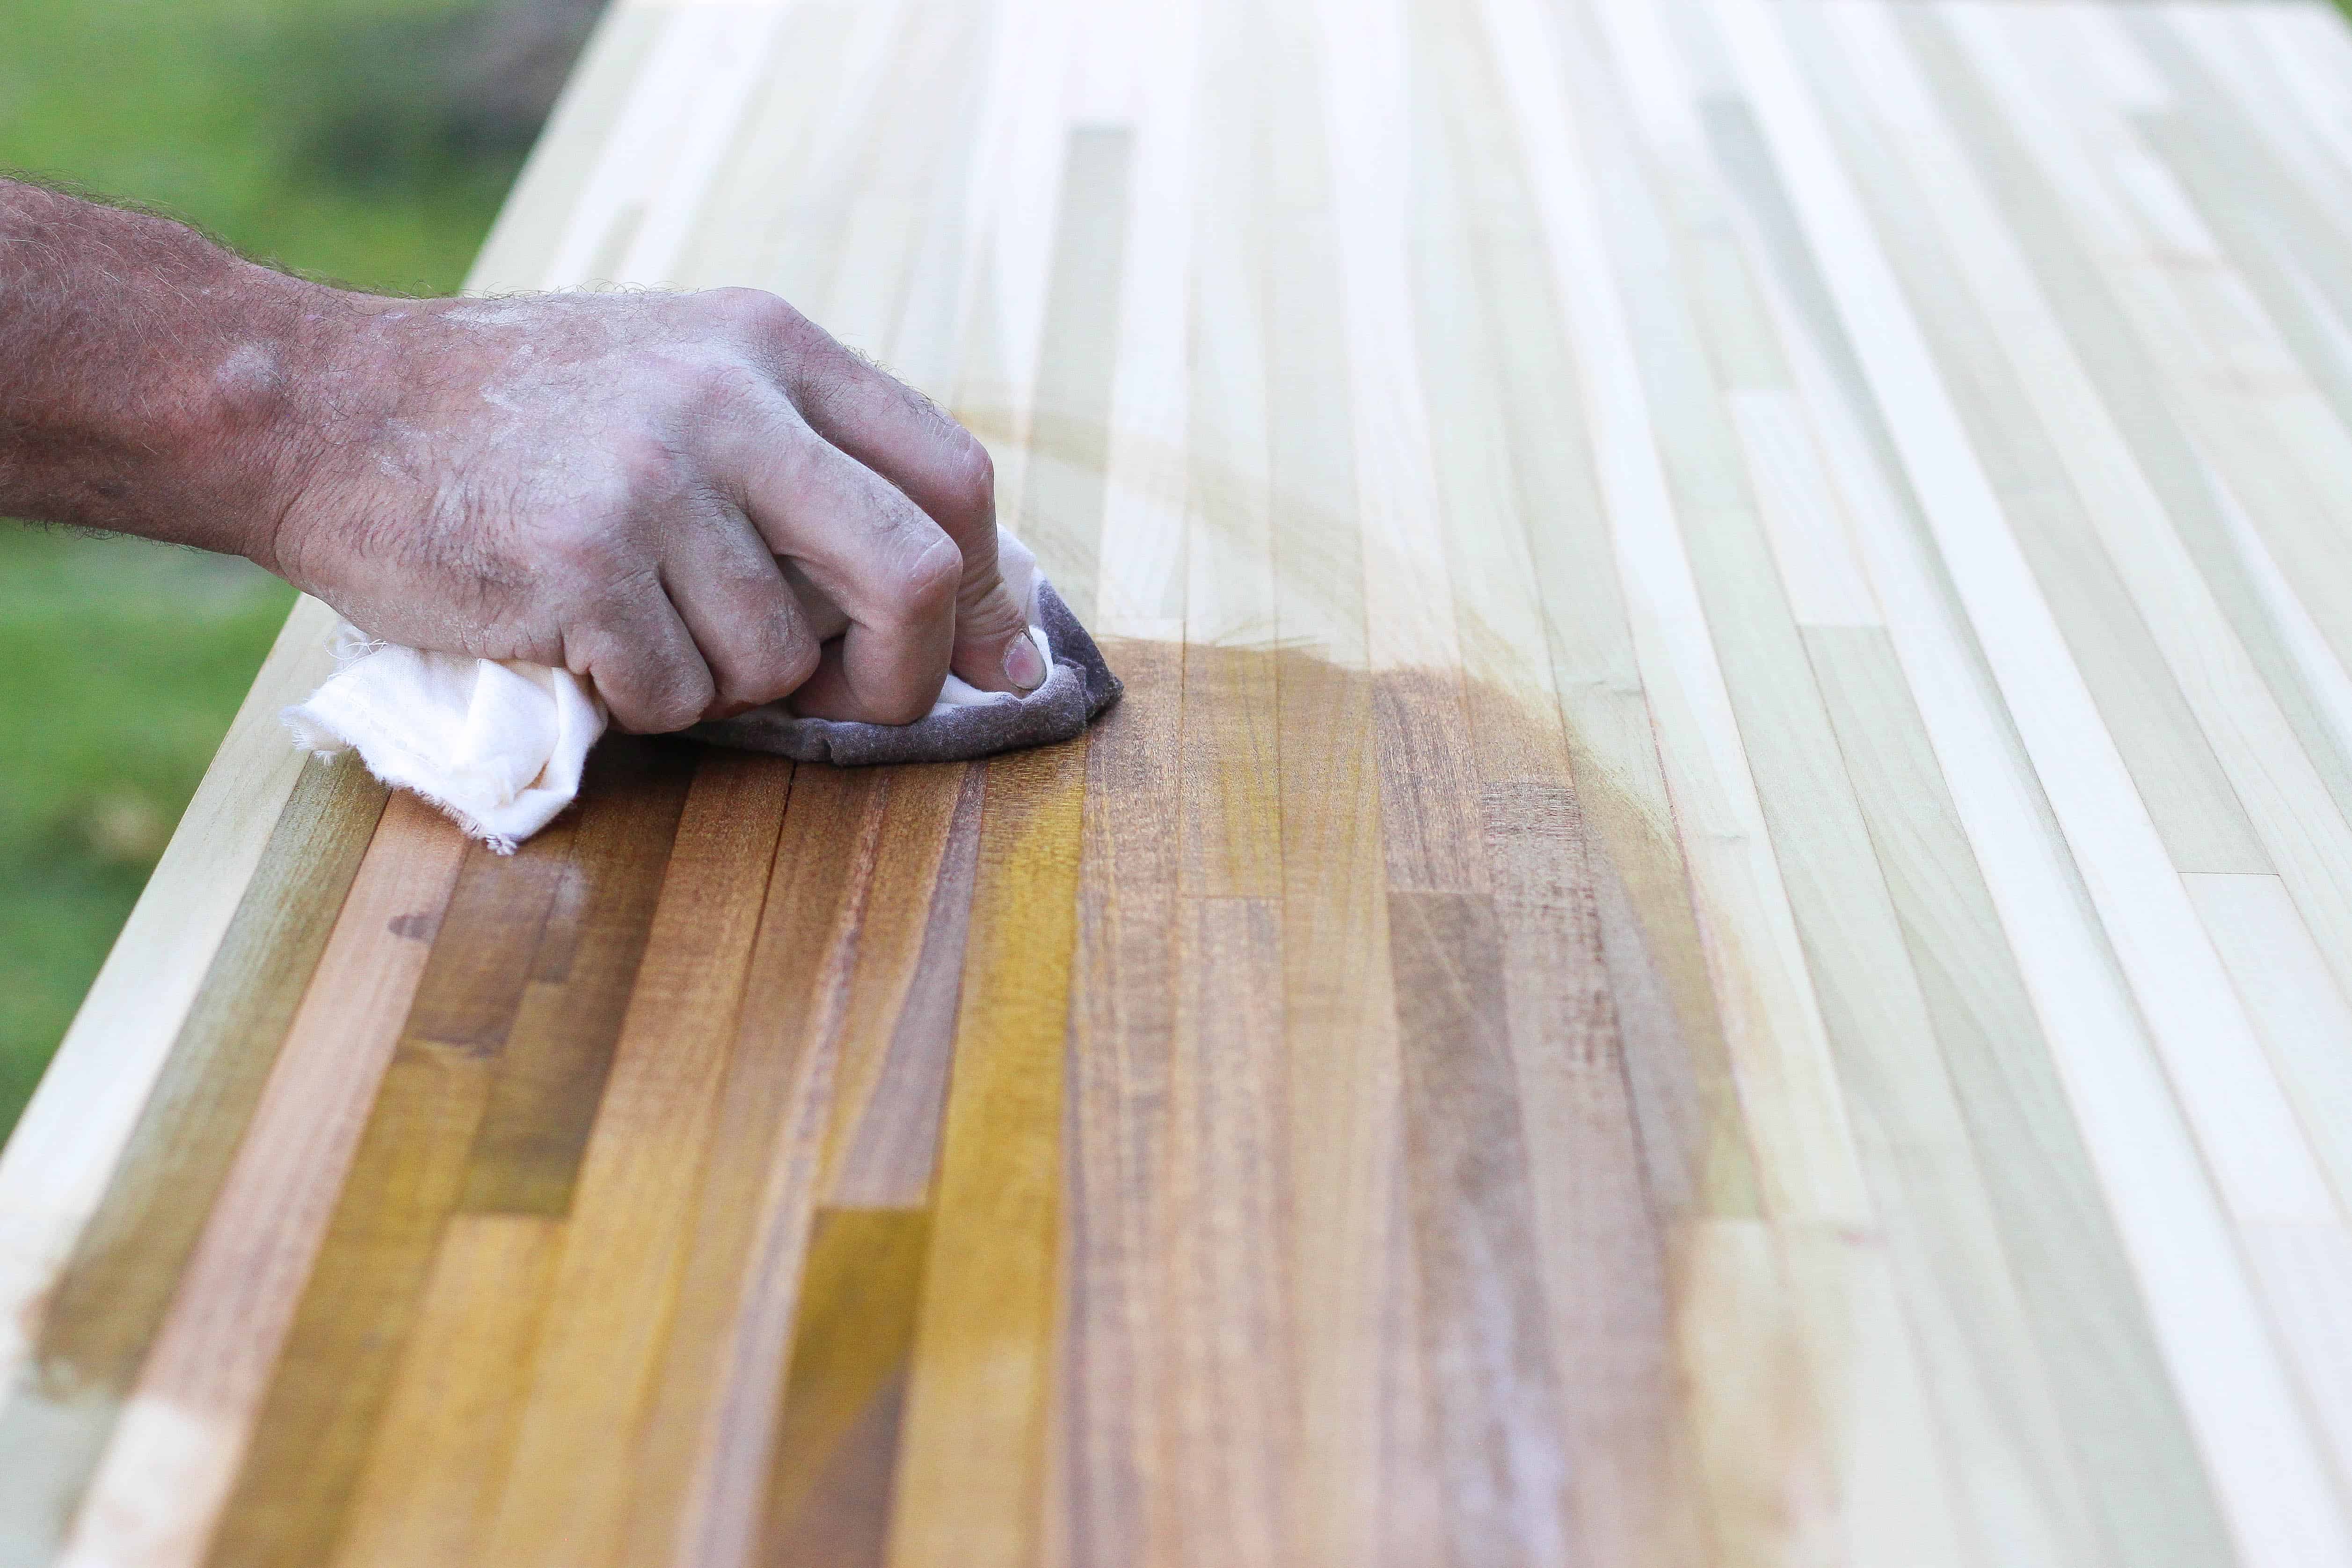
Before staining, cut the ends square to the finished length and sand the top and sides (I used a palm sander with 220 grit sandpaper). Even out any variance in the main center joint. The center joint on this table needed a good bit of hand planing and sanding to make even. Once all of the carpentry is finished, wipe clean with a clean, damp cloth.
Apply the stain of your choice with either a brush or clean rag (I prefer a clean rag since they deal with corners and edges better and tend not to drip as much) and let sit for 5-15 minutes. (This may vary; check the instructions on the stain) Wipe the excess stain with a clean rag after the allotted time.
The amount of time the stain sits will determine its darkness. Multiple coats can be applied until the desired finish is reached. Attach the legs to the bottom using the 1 1/4″ screws. Felt pads can be applied to the bottom of the legs for extra floor protection.