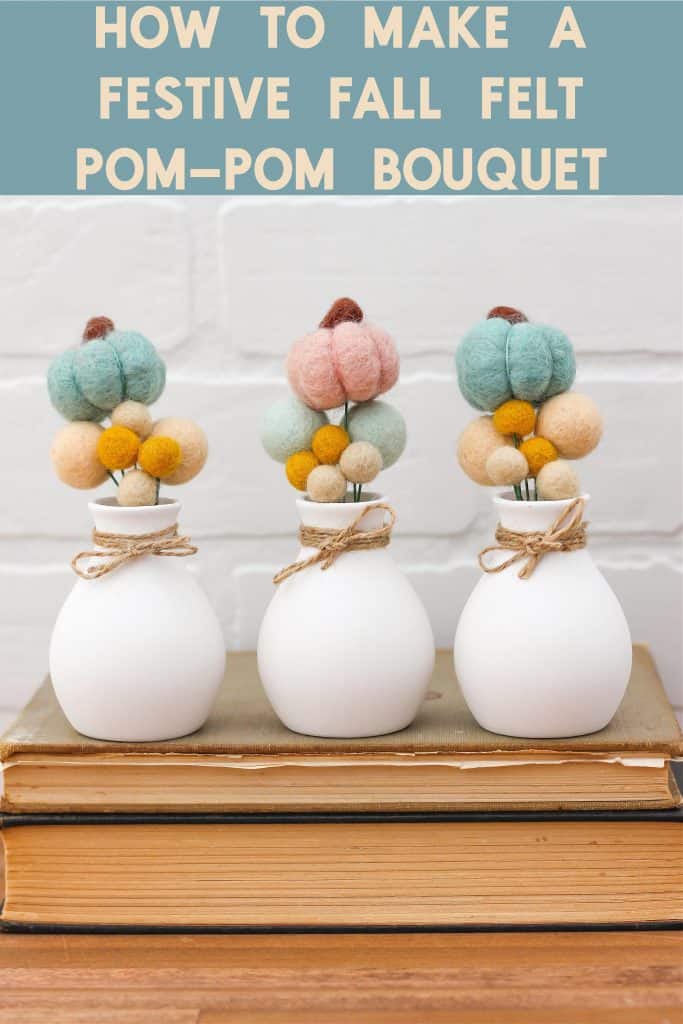
Learn how to make the most cute festive fall felt pom-pom bouquet to decorate your home or giveaway to a friend.
With fall approaching I thought I would make fun project and I just love how these pom bouquets turned out. They are so adorable.
Fall is my absolute favorite time of year. I just love everything about like pumpkins, candles, hot chocolate, fuzzy socks, falling leaves, and sweaters.
But if you’re not quite ready for autumn this pom pom bouquet is a nice way to ease into the season. You can use neutrals or even muted tones of felt poms for decorating your home.
Here are a few of my favorite fall crafts to make:
- Muted tone pumpkin display
- Fall stove top potpourri
- Pumpkin chai candle
- Campfire mug candle
- Vintage inspired chalky paint pumpkins
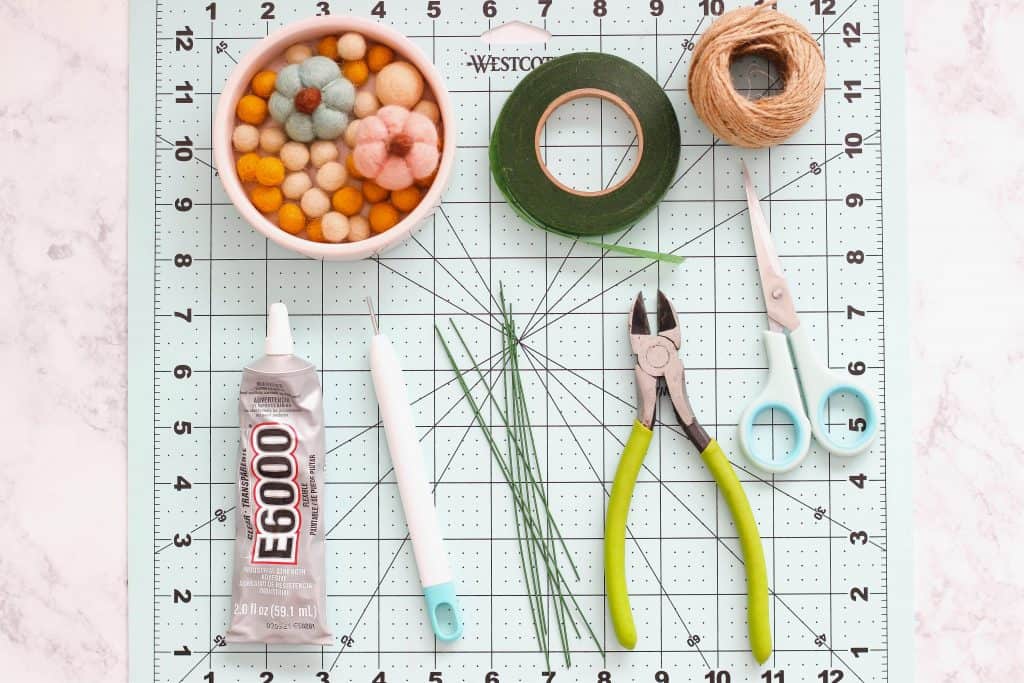
Supplies to make a felt pom pom bouquet:
- Felt pom poms ( I buy my felt from Benzie Design)
- Floral wire
- Wire cutter
- Glue
- Piercing tool
- Floral tape
- Vase and twine
How to make a felt pom pom bouquet:
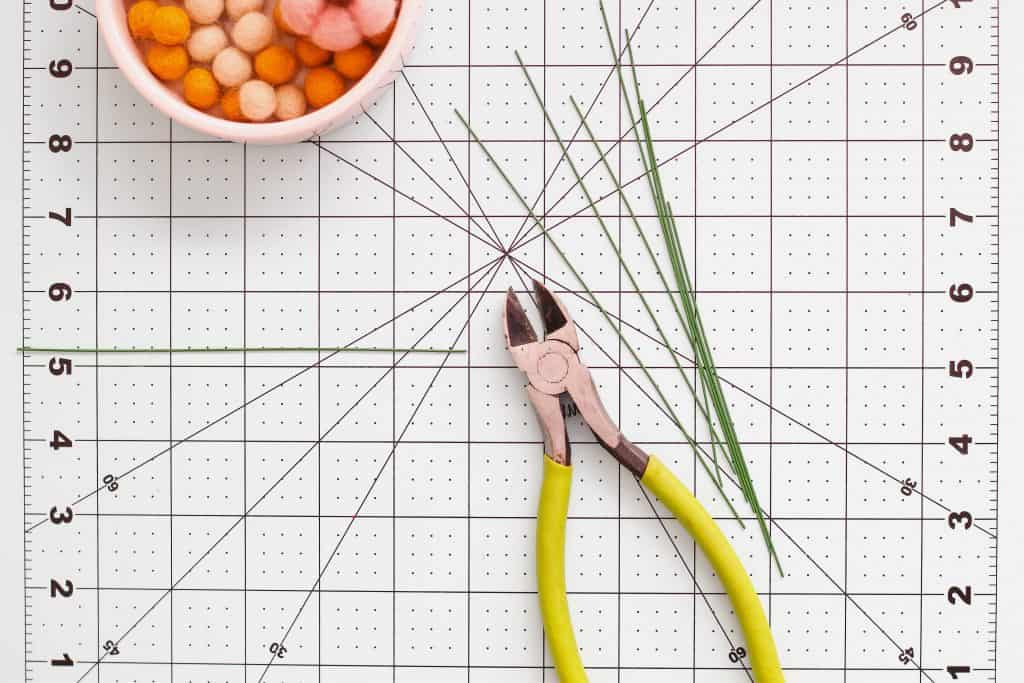
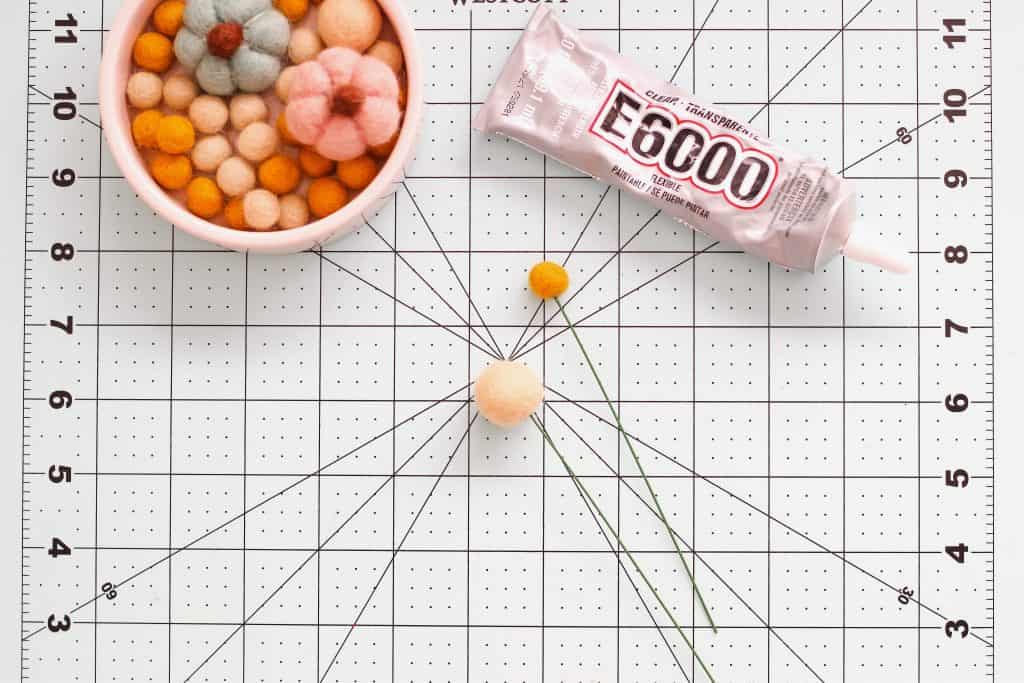
Step 1: Start by cutting the stem floral wire into 6 inch long pieces. The stems that I bought are 18 inches so I can get three stems from one piece. Each pom bouquet will need 7 stems.
If you don’t have wire cutters I highly recommend them. They are a multipurpose tool that I use often around my house.
Step 2: Take a piercing tool to make a tiny hole in each of the felt poms. If you don’t have a piercing tool you could try a large sewing needle.

Step 3: Take each cut floral stem and dip one end into an adhesive. I like to use E6000 because it’s clear and is very durable when it dries. Another great option would be Gorilla Glue.
Next, stick the adhesive side of the floral stem into the hole of the pierced felt pom. Repeat this process until you have complete all seven stems.
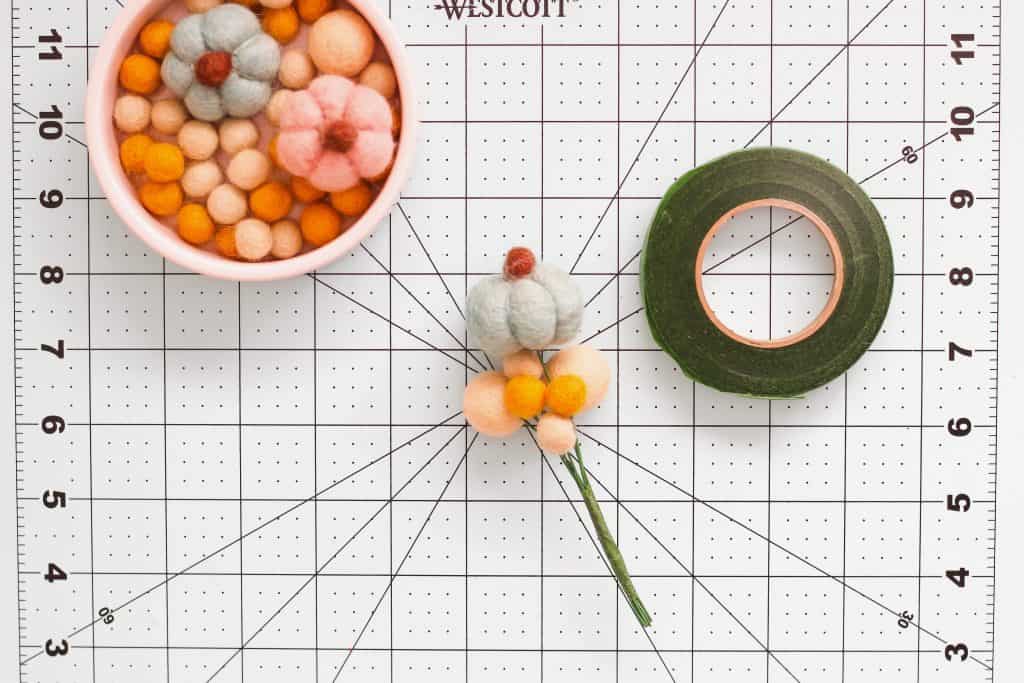
Step 4: Once the adhesive has dried bunch the stems together to make a bouquet. Next, cut a piece of floral tape and wrap around the stems. You want the bunch of poms staggered so they look put together.
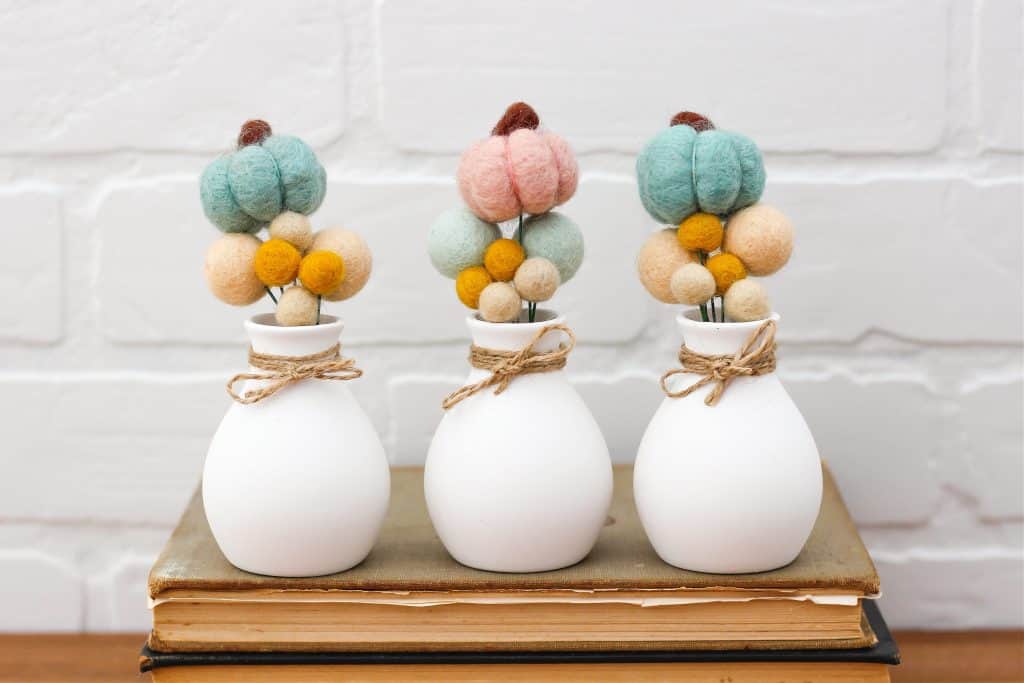
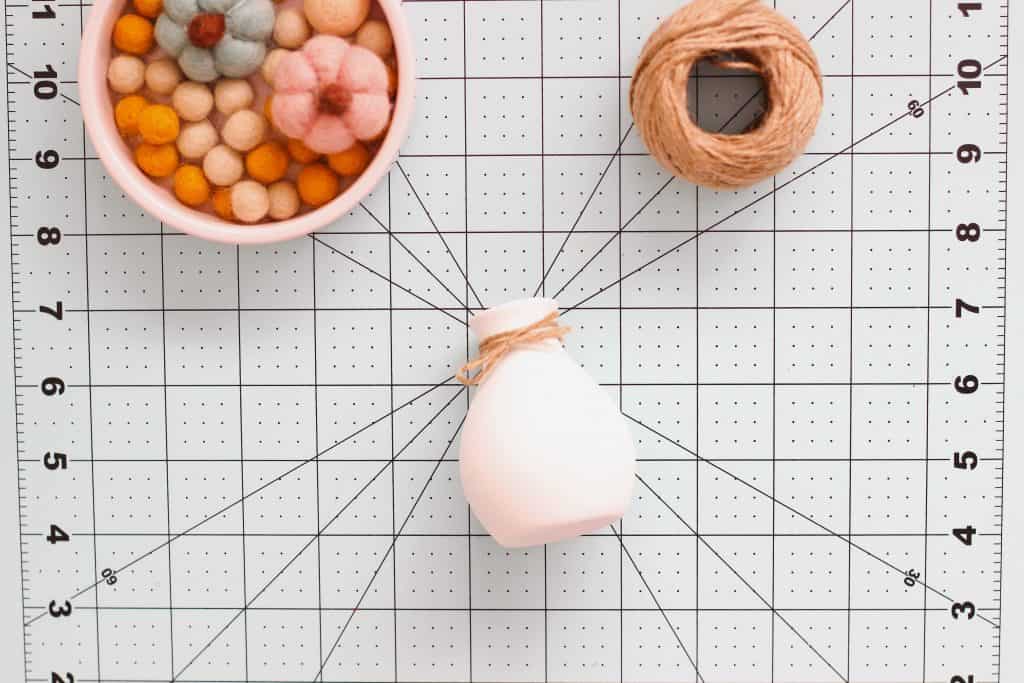
Step 5: Finally, add your pom pom bouquet to a vase. I am using the small white bulb vases from the Target dollar spot. I added a piece of twine to around the neck of the vase to finish the look.
This adorable felt pom pom bouquet would be the perfect addition to your home decor for fall and for displaying on a shelf, coffee bar, dresser display or tiered tray.
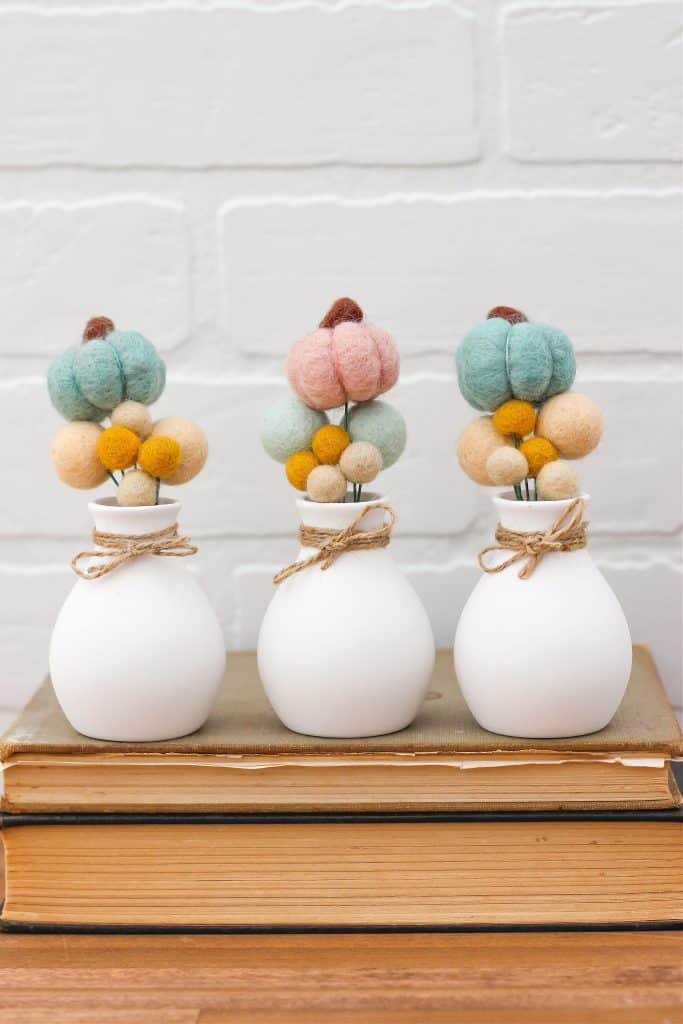
Just the one pom pom bouquet was so easy to make and didn’t take very long. You can make several of them in no time and display in your home or they would make great gifts for friends, neighbors, and teachers.
Make sure you pin the image below so you can save the instructions in this post to make at a later time.
I hoped you enjoy this little craft project for fall.