![IMG_1710[1]](https://www.purelykatie.com/wp-content/uploads/2013/07/IMG_17101.jpg)
This Happy Birthday card was a creation I came up with an inspiring sketch from Sunday Stamps. They do a weekly challenge for card making. *Fingers crossed I hope I win! I really do love this card. It’s so playful and fun.
Here are the materials I used to make it:
- Pre made Card
- 6 x 6 paper pad
- Ink pad
- Ink blending tool
- Twine
- Pop dots
- Jewel stickers
- Tape runner
- Scissors
- Paper Cutter
- Embossing machine and plate
First I started with a piece of colorful polka dot paper from the Fancy Pants Designs, What A Wonderful Day 6 x 6 paper pad. I cut the piece of paper with the paper cutter just slightly smaller the the card. Using my tape runner on the back of the piece of paper, I adhered the paper to the card.
![IMG_1688[1]](https://www.purelykatie.com/wp-content/uploads/2013/07/IMG_16881-e1374636081956.jpg)
Then I took a piece of red and white chevron paper from the paper pad and sized it to fit just on the left side of the card. Again cutting it with the paper cutter and adhering it with the tape runner.
![IMG_1689[1]](https://www.purelykatie.com/wp-content/uploads/2013/07/IMG_16891-e1374636393960.jpg)
Next I took a piece of plain white card stock and cut that just smaller than the red and white chevron paper. Then I used my Sizzix Texture Boutique Embossing machine and Cricut cuttlebug Happy Birthday embossing folder to emboss the words Happy Birthday onto the white card stock.
![IMG_1690[1]](https://www.purelykatie.com/wp-content/uploads/2013/07/IMG_16901-e1374636958466.jpg)
![IMG_1691[1]](https://www.purelykatie.com/wp-content/uploads/2013/07/IMG_16911-e1374637059534.jpg)
![IMG_1693[1]](https://www.purelykatie.com/wp-content/uploads/2013/07/IMG_16931-e1374637166365.jpg)
Now that the white card stock is embossed with the Happy Birthday sentiment, I wanted to add some color to it. Using my ink blending tool I dabbed it onto a blue ink pad several times until the foam pad took on ink. Then I lightly went over the embossing. I waited until the ink was dry to adhere it to the card.
![IMG_1694[1]](https://www.purelykatie.com/wp-content/uploads/2013/07/IMG_16941-e1374637528192.jpg)
![IMG_1695[1]](https://www.purelykatie.com/wp-content/uploads/2013/07/IMG_16951.jpg)
Next I needed to make some banners. I used a yellow heart, slate gray and blue dollie paper pieces from the paper pad. I just hand cut these with scissors to fit onto the right side of the card. I stuck 3D foam squares to the back of each pendent and placed them on the card.
![IMG_1698[1]](https://www.purelykatie.com/wp-content/uploads/2013/07/IMG_16981-e1374638156284.jpg)
![IMG_1700[1]](https://www.purelykatie.com/wp-content/uploads/2013/07/IMG_17001-e1374638296157.jpg)
Next I cut a piece of baker’s twine to go across the banner and tied a knot at each end. I used my taper runner on the twine to place it down. Then I added some jewel stickers in between the pendents on the banner.
![IMG_1701[1]](https://www.purelykatie.com/wp-content/uploads/2013/07/IMG_17011-e1374638808828.jpg)
![IMG_1702[1]](https://www.purelykatie.com/wp-content/uploads/2013/07/IMG_17021-e1374638913388.jpg)
The last thing I did was take a label sticker from the Fancy Pants Designs collection What A Wonderful Day and stuck it right below the banner.
![IMG_1703[1]](https://www.purelykatie.com/wp-content/uploads/2013/07/IMG_17031-e1374639203568.jpg)
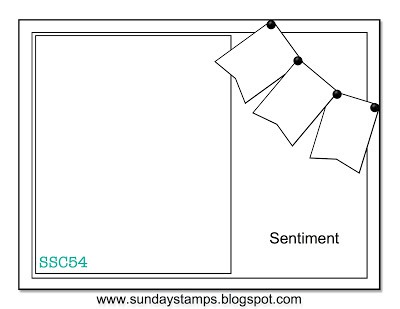
This is what Sunday Stamps sketch looks like:
And this is my creation.
What do you think? Pretty close.
Fun, fun, FUN! And way to go with the step by step tutorial for everyone to follow along with 🙂 Thanks so much for playing along with us at Sunday Stamps, we sure hope to see you back again soon!
Thanks so much Hayley! I’m soo glad I found your blog. Can’t wait for a new sketch.
I LOVE this birthday card. Bright and cheery and just plain fun. Great tutorial too. Thanks so much for joining us at Sunday Stamps!
Thanks SO much Brenda! I love Sunday Stamps blog. Great sketches…looking forward to the next one!
Love this bright & cheerful card!! So glad you joined us at Sunday Stamps with this beauty, hope you will join us again.
Thanks Kathya for the sketch inspiration! Love your blog!!
Great card – what a fun embossing folder – and I love the way you’ve coloured it! Thanks for playing along with us at Sunday Stamps.
Thank you Joan! It was fun coming up with a card off the sketch. Hope to see you again 🙂
This card is great, I love it! Thanks so much for linking up to the Krafty Inspiration Thursday party. I can’t wait to see what you’ve been up to this week.
Have a lovely evening!
Maria @ Krafty Cards etc.
http://kraftycardsetc.blogspot.com/