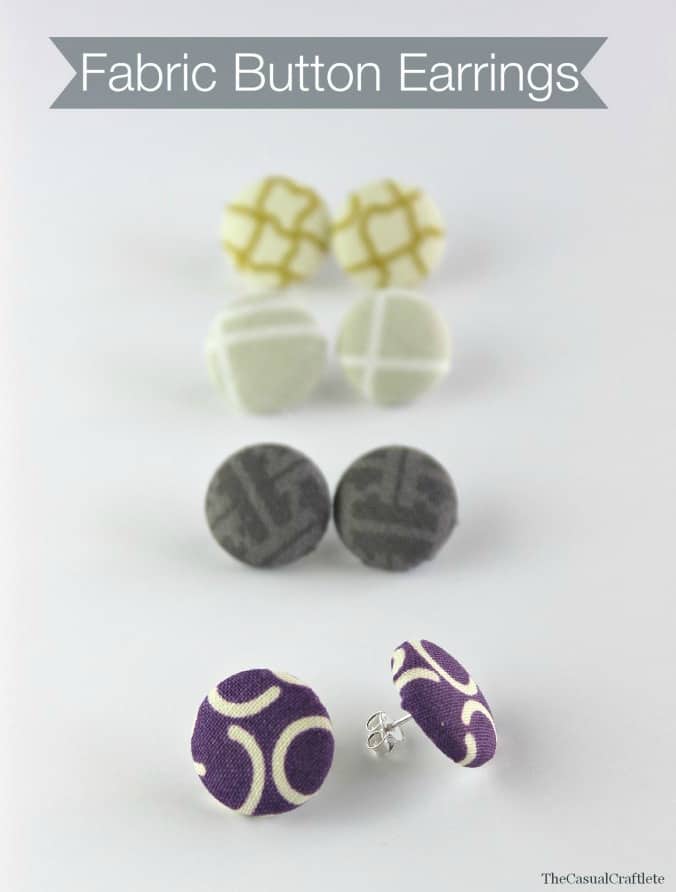
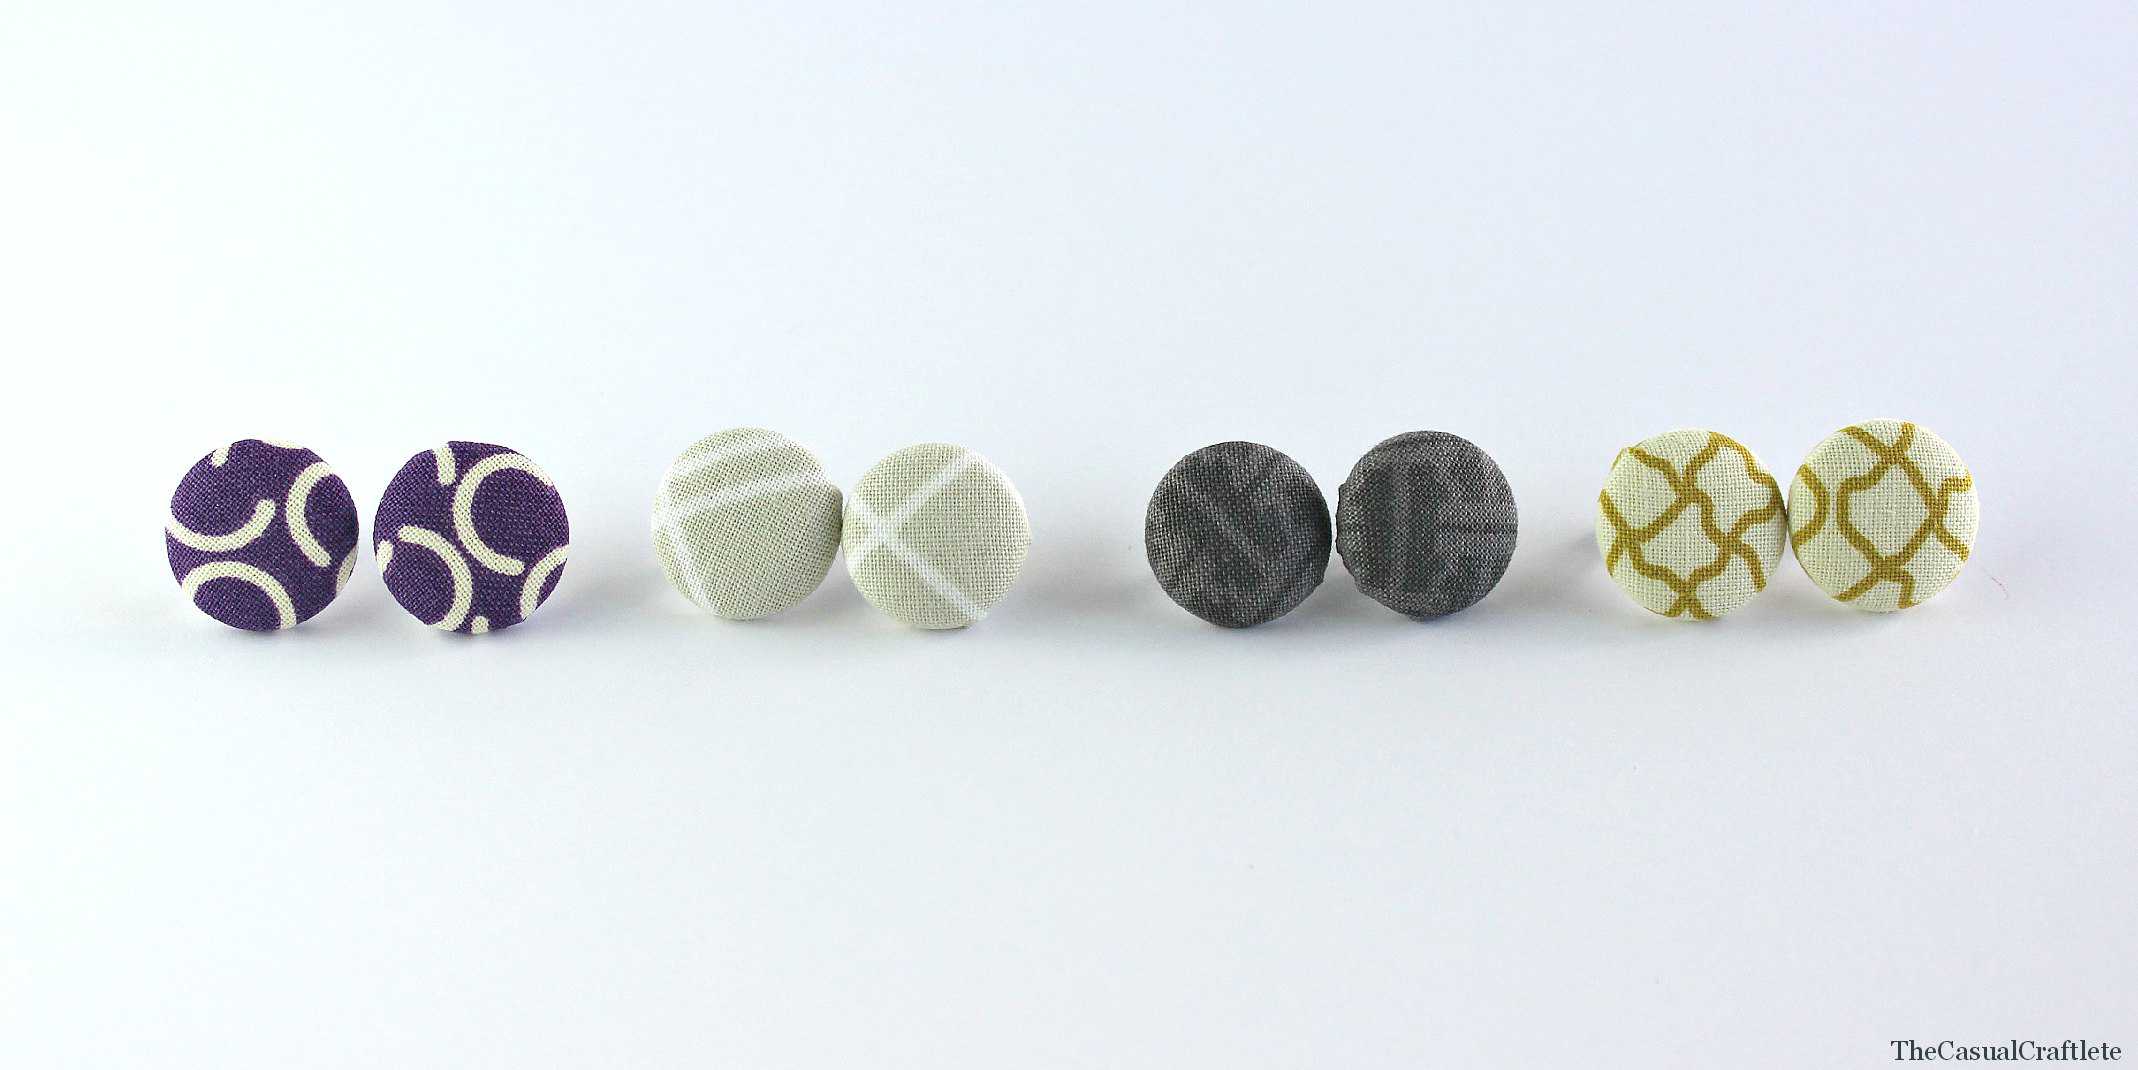
Hey lovelies! I am beyond excited to share these super cute Fabric Button Earrings with you all today! I have done a lot of crafts in my life but this might be my favorite so far. These earrings are so modern and classy looking. Plus, they are incredibly easy to make, with no sewing required. I banged out four of them in no time. It’s also a great project to use up any scrap fabric you have laying around and they make great gifts too! Christmas is coming up…hint hint.
Earrings are the one piece of jewelry I regularly have on and when I don’t, I feel bare without them. Studs are my go to and that’s what you will typically see me wearing. I just like the look and feel of them better then dangly earrings. Just recently I had a birthday (31) and wanted to make some modern earrings for myself.
Let’s get started!
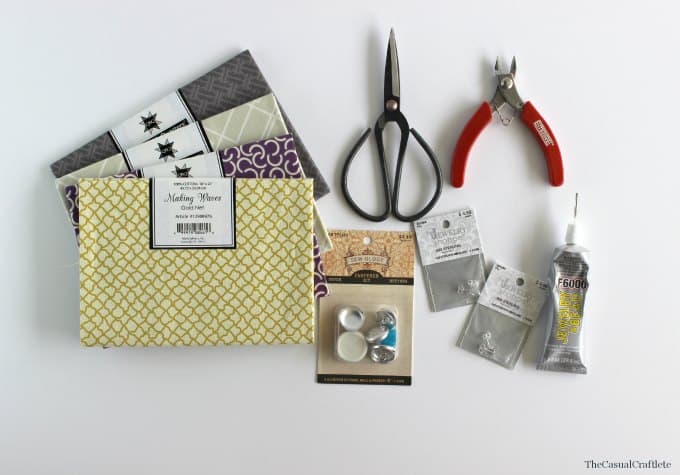
MATERIALS:
- Fabric (I used quilt block quarters but you can use scraps fabric)
- Scissors
- Side Cutting or Needle-Nose Pliers
- E6000 Jewlery & Bead Glue
- Glue On Earring Posts
- Aluminum Cover Button Kits
First you start by making a fabric button.
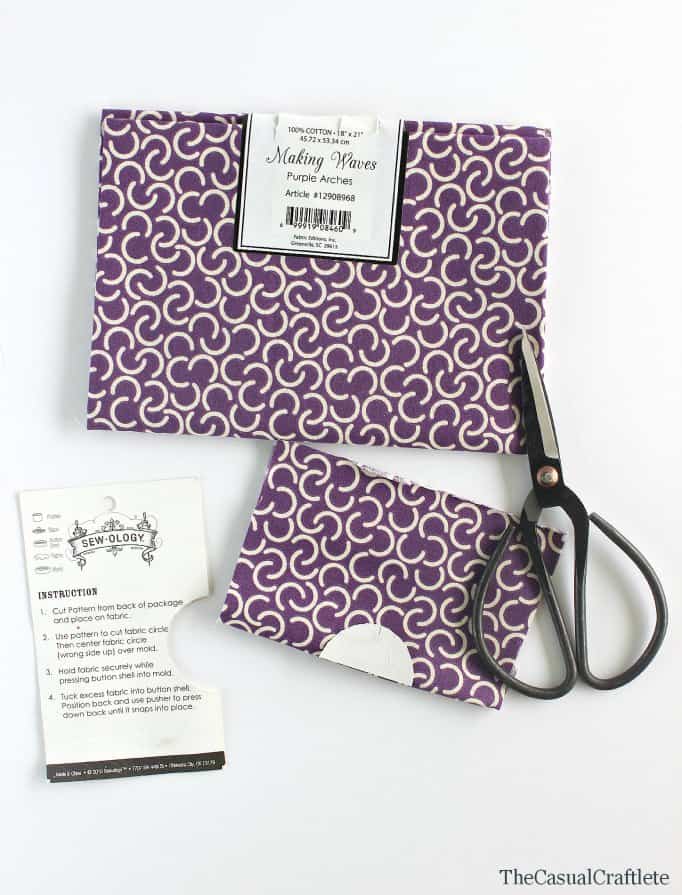
Following the instructions on the back of the button kit, you want to cut out the pattern on the package. It looks like a half circle. Then, cut a piece of the quilt block or you can use up any scraps you have. I really liked the modern look of these fabrics. Next, take the fabric piece and fold it in half. Take the cutout and place the flat side against the fold of the fabric. Line the center of the cutout to the center of the fabric where the earring will be. Cut around the pattern with a pair of scissors. It doesn’t have to be perfect. You should end up with a complete circle of fabric.
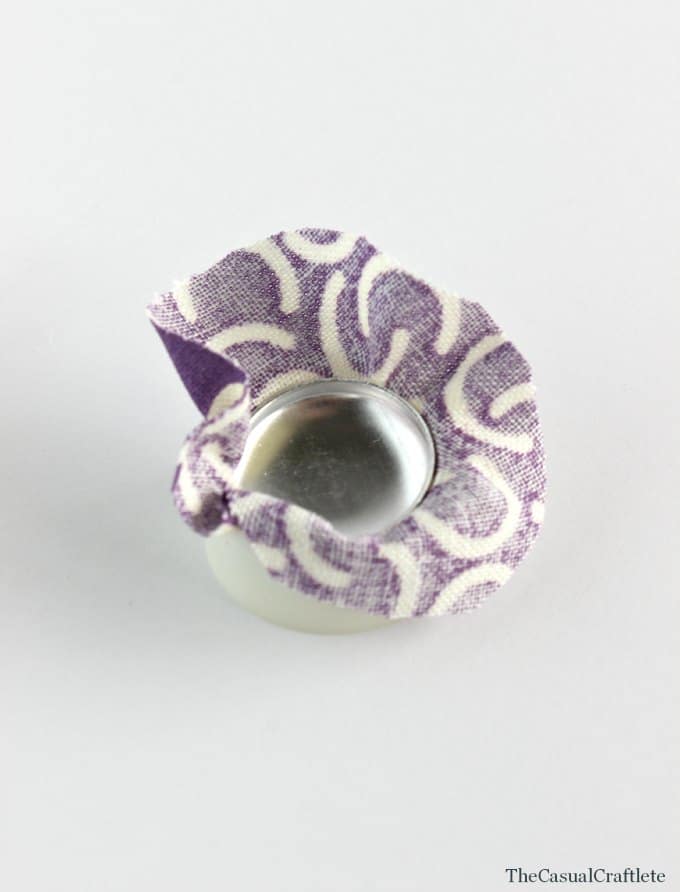
Take the fabric circle and place the center into the rubber mold. Push the fabric down with the aluminum button shell. Tuck in the excess fabric into the button shell.
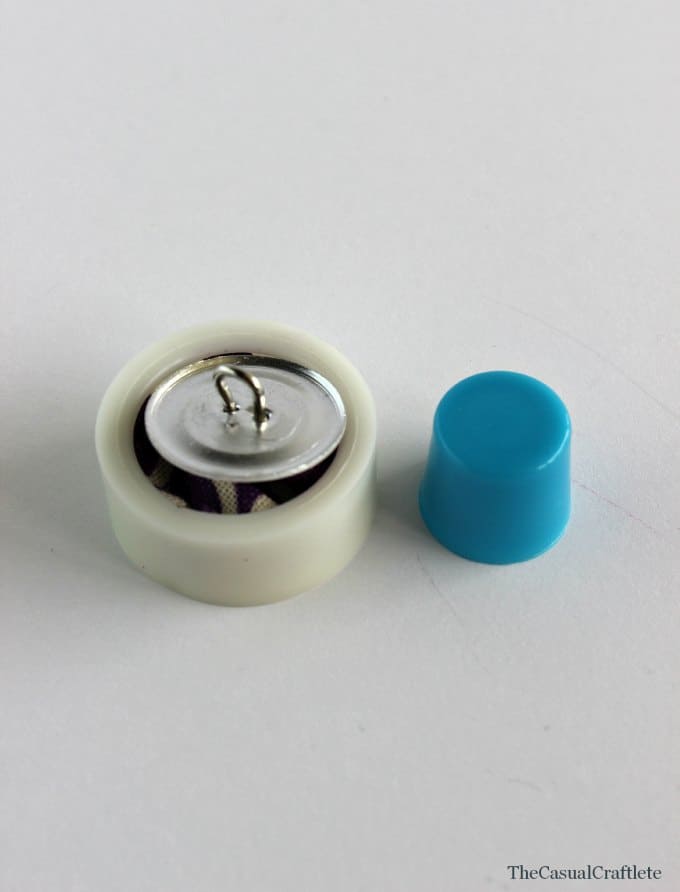
Place the back of the button over the tucked fabric and button shell. Use the blue pusher to push the back into the shell. You might even hear a “pop” sound. Once it snaps into place, you can remove the button from the mold.
You now have fabric buttons. Let’s turn them into earrings.
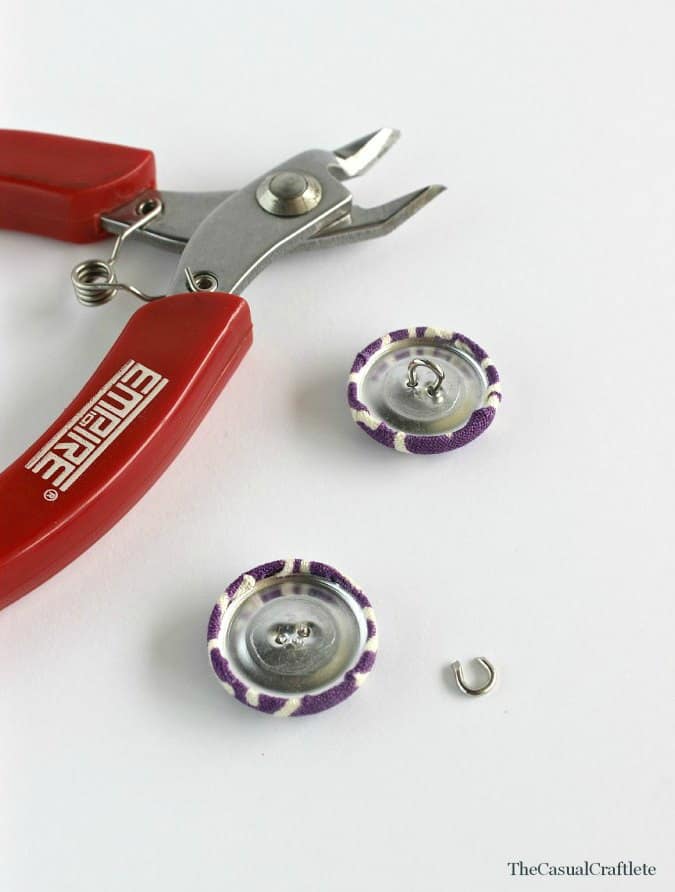
Use the side cutting pliers to remove the button loop. They should come off fairly easy.
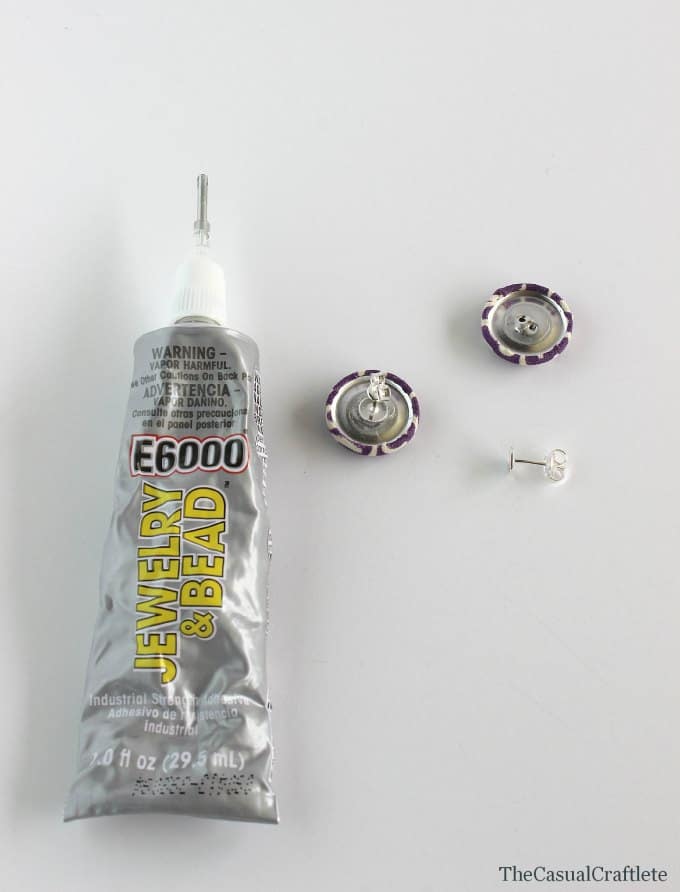
Place a small amount of the jewelry glue to the back of the earring posts. Then glue down the post to the center of the button back. Hold for a few seconds until the glue is secure. Allow the glue to set 24-72 hours for maximum strength.
I used sterling sliver posts because I have sensitive ears. If you don’t have pierced ears, you could always use clip ons.
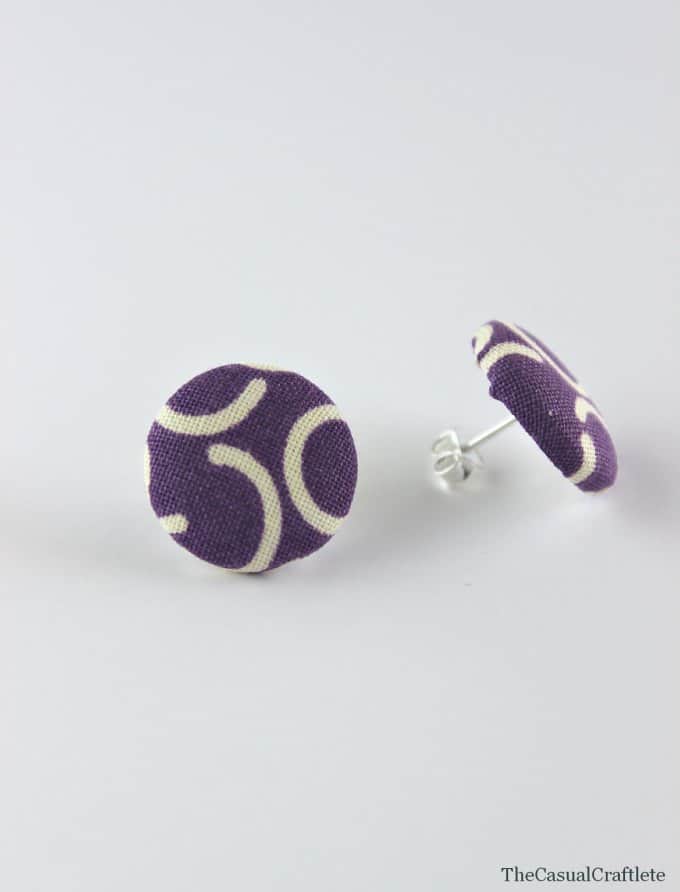
I LOVE how these earrings turned out! Like I mentioned earlier, they are super quick and easy to make. They also make great gifts!
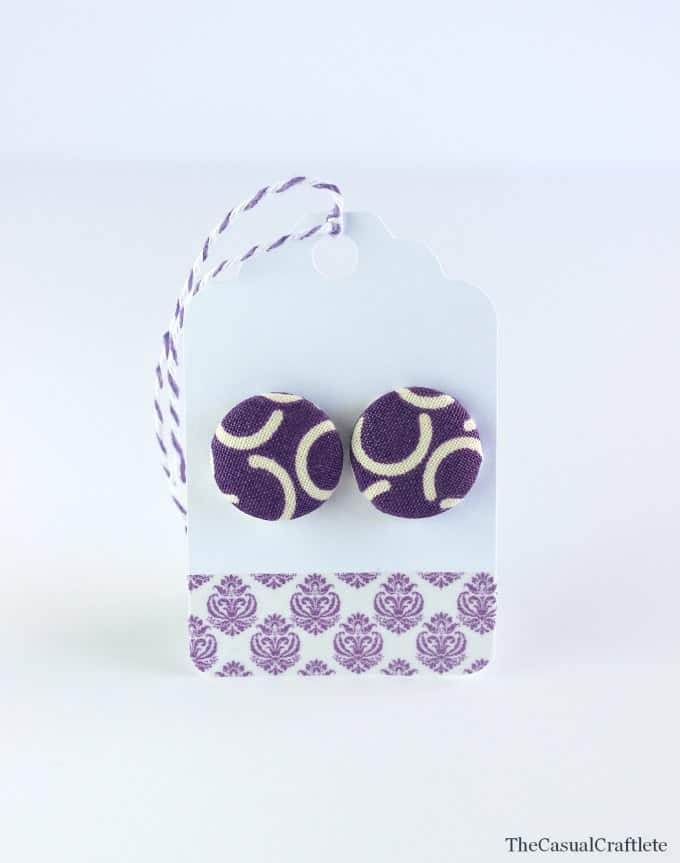
I made a tag using a punch and decorated it with washi tape and twine. How fabulous are they? I mailed this pair to a dear friend of mine who recently moved back home. She absolutely loved them.
Thanks for letting me share my earrings with you! I hope you enjoy them as much as my friend and I do.
Thank you Katie for sharing this tutorial. Its very detailed and the pics are awesome. I will surely use this sometime as I plan on making hand painted fabric.
Stopping by from the Party Bunch link party. Great idea and tutorial, pinning to my Wish to make: Jewellery Pinterest board,. Diane @ Mrs U Makes.
These are absolutely adorable. Pinning this to remember, I can’t wait to try it out.
XOX – Kristy @ 3 Peppers Recipes – Crafts, Cooking & Color
These are really cute! I love the tag that you created to display the earrings!
These are adorable! My daughter’s Girl Scout Troop would love this! Visiting from the Frugal Crafty Home Blog Hop
What size button kit did you use please?
Hi Ramona! You can use any size buttons you like. I used 3/4 inch (1.9 cm). They are pretty large but I like that size the best.