I made a trip to Michael’s over the weekend and bought a ton of fall scrapbooking items. The closest store is an hour away, so I have to stock up when I can. Well, last night a friend of mine asked me how to use an embossing gun. I thought making a tag with my Michael’s purchases would be a quick and easy way to show everyone.
Supplies used to make embossed tag are:
- Embossing gun
- Embossing tinsel
- Tag punch
- Scrapbook paper
- Watermark ink pad
- Hole punch
- Twine
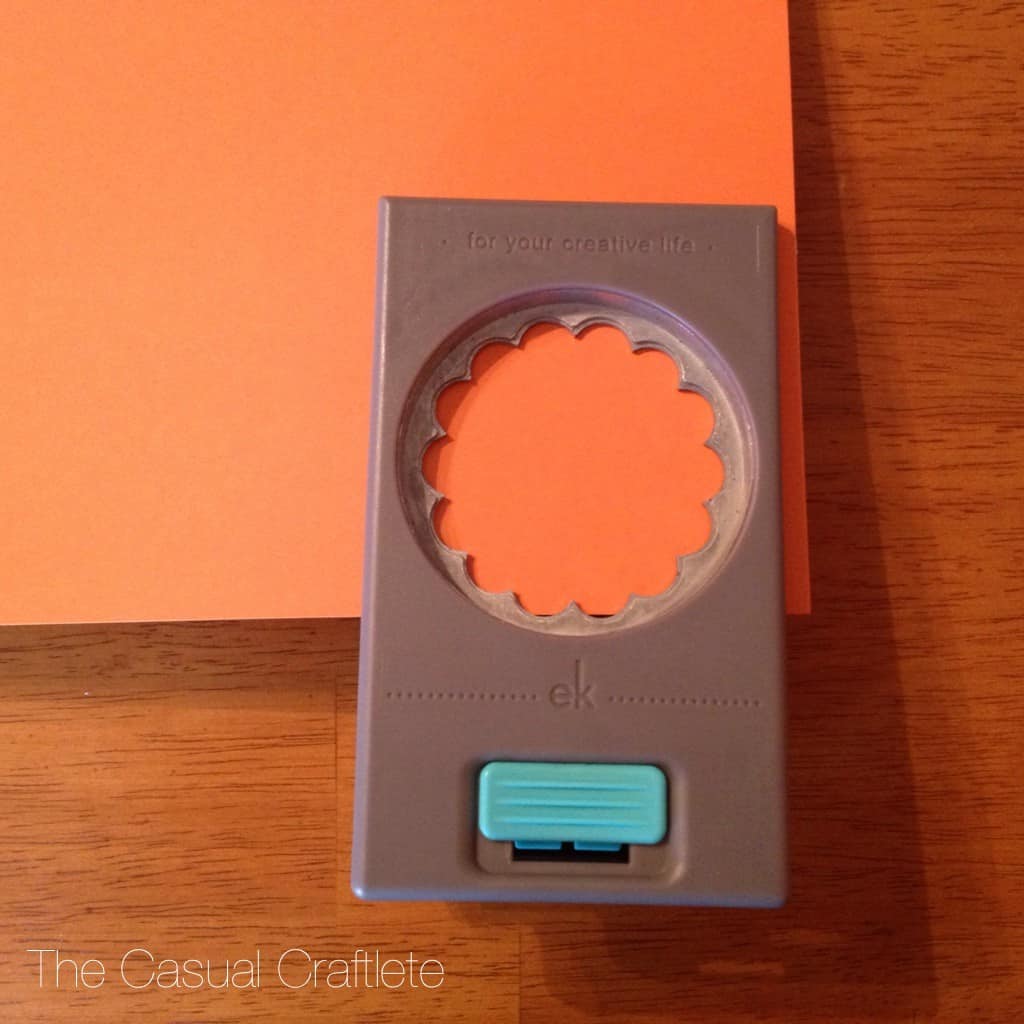
First I started by making a tag using scrapbook paper and the EKSuccess circle scallop punch.
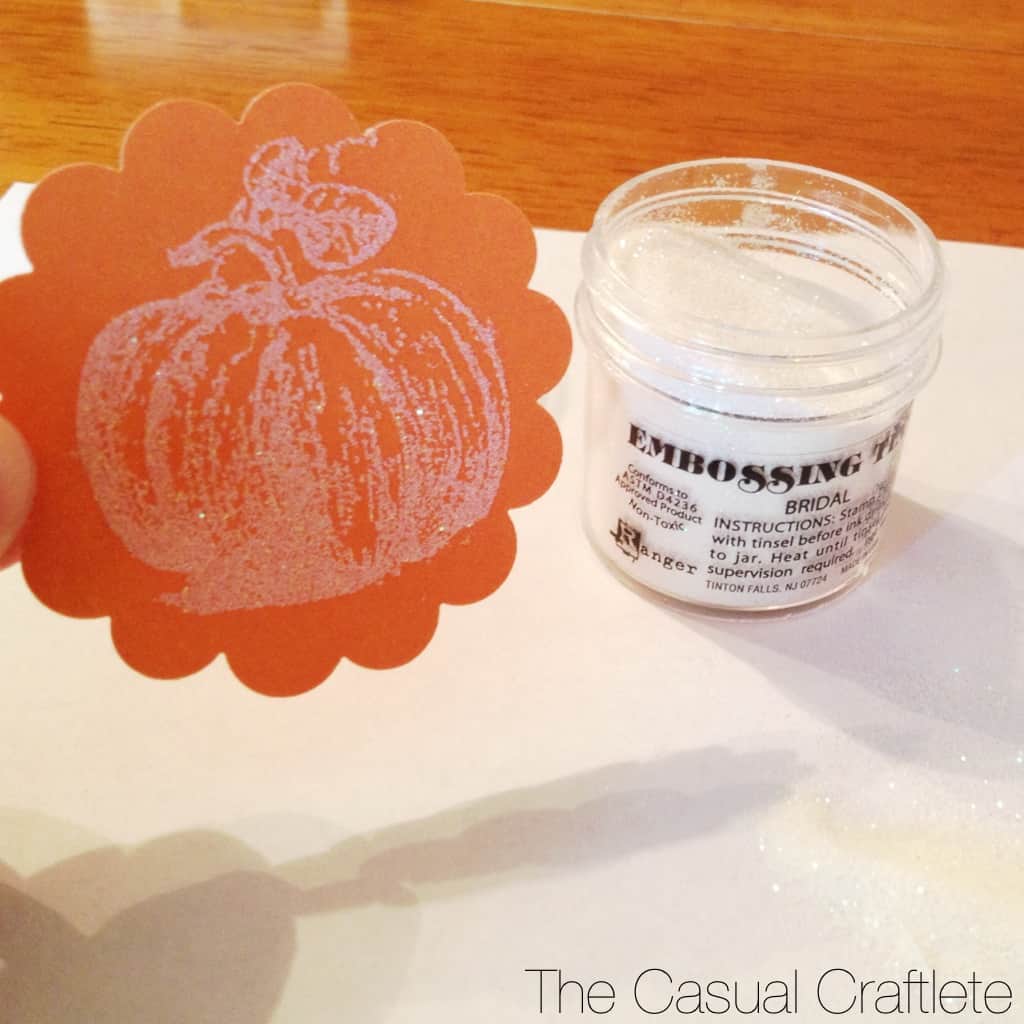
Then I took my wooden pumpkin stamp and inked it using a Watermark ink pad.
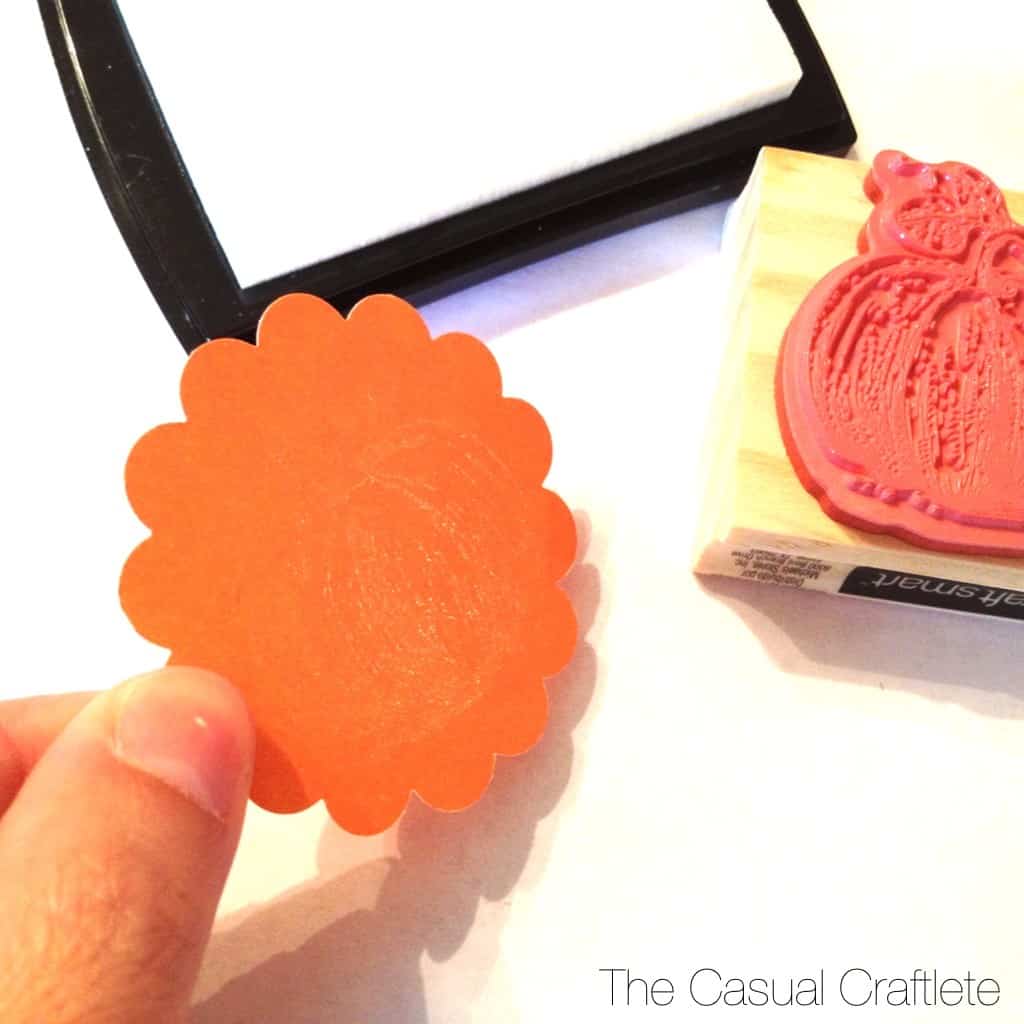
The Watermark makes a translucent image.
Next, I sprinkled embossing tinsel over the ink.
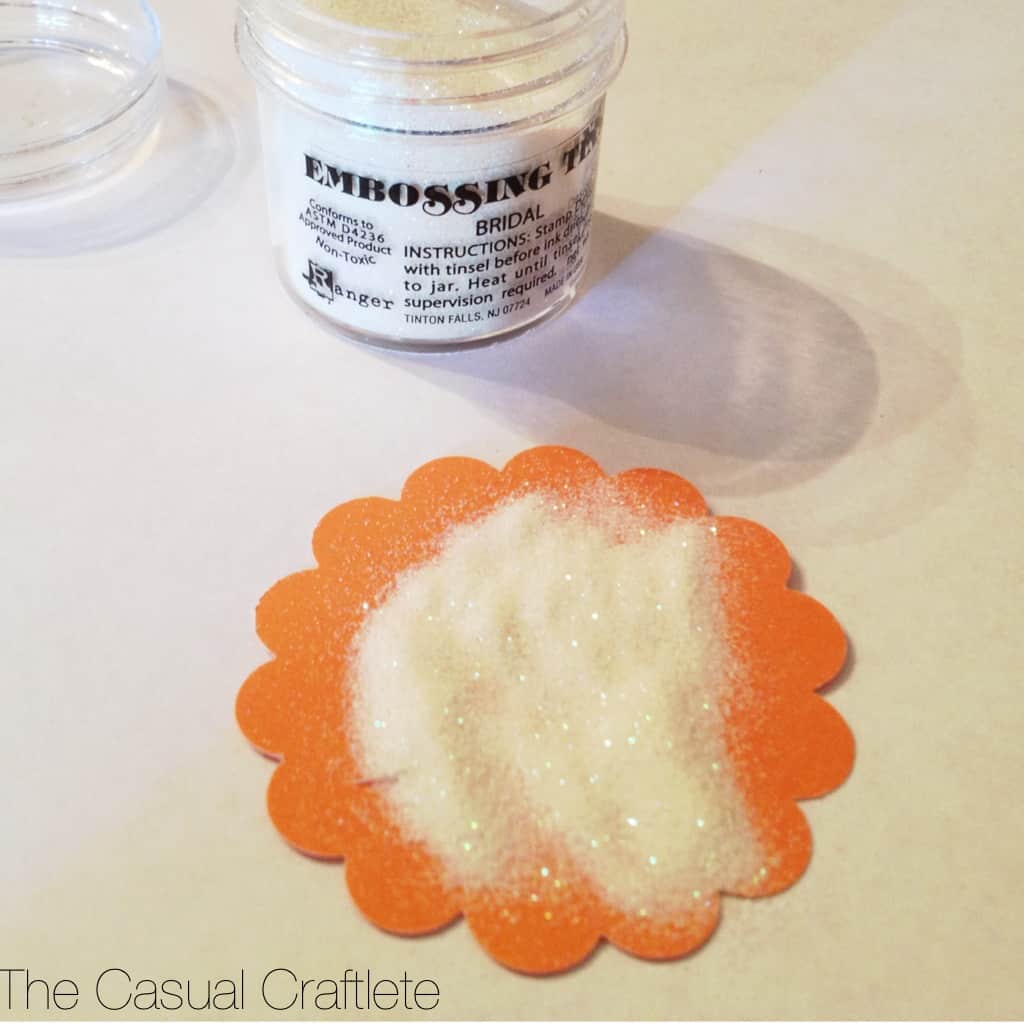
Then shake off the excess.
Place your embossing heat gun a few inches away from the paper. Then turn on the gun and heat until tinsel is melted. Be very careful, the gun gets very hot!
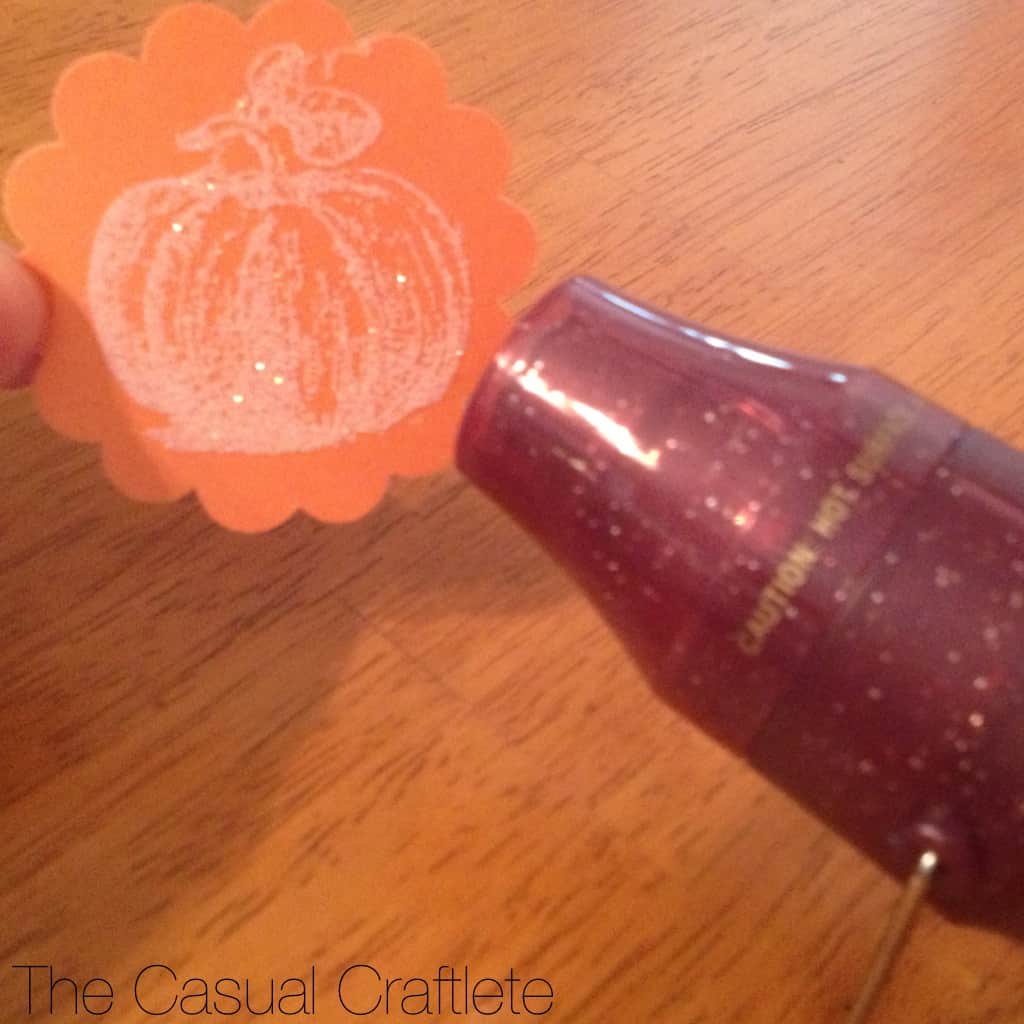
The tinsel puffs up and becomes 3D. It’s a really neat technique. And who doesn’t love to play with tools?!
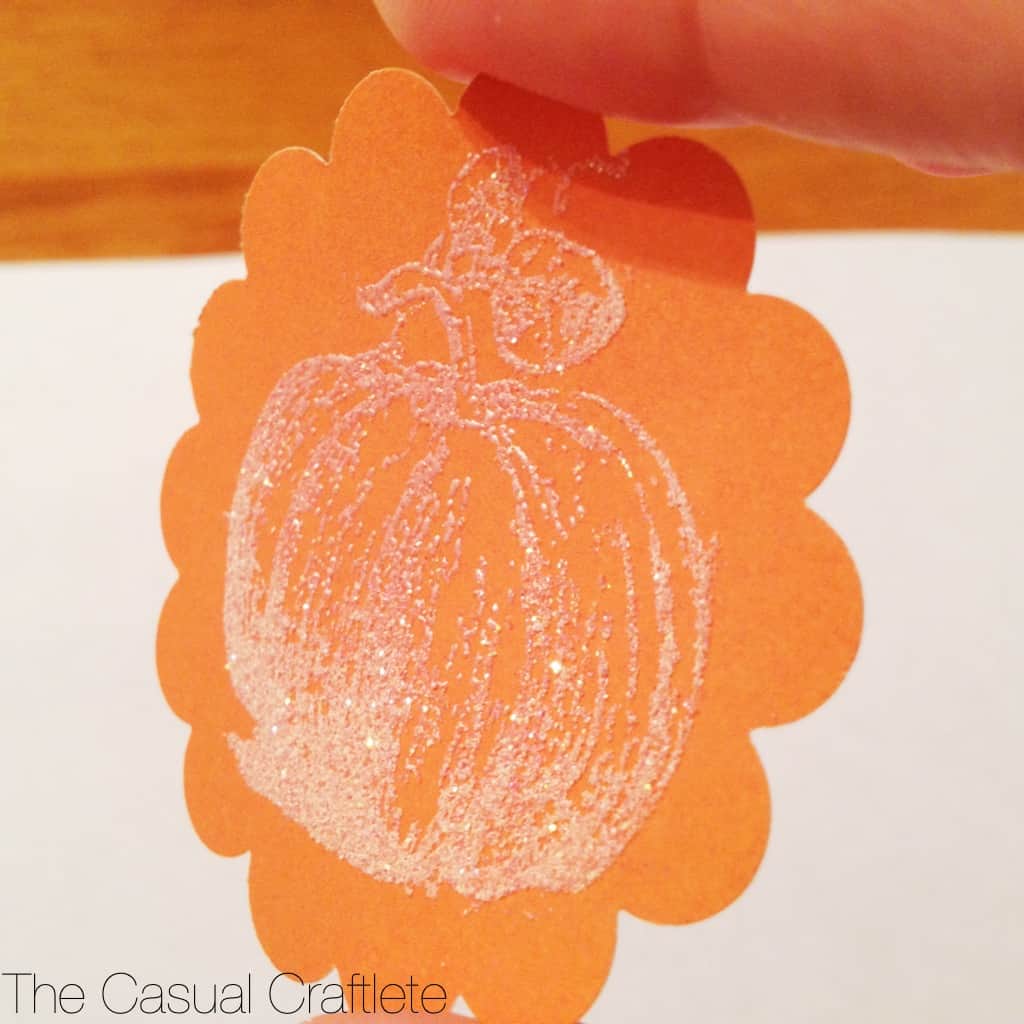
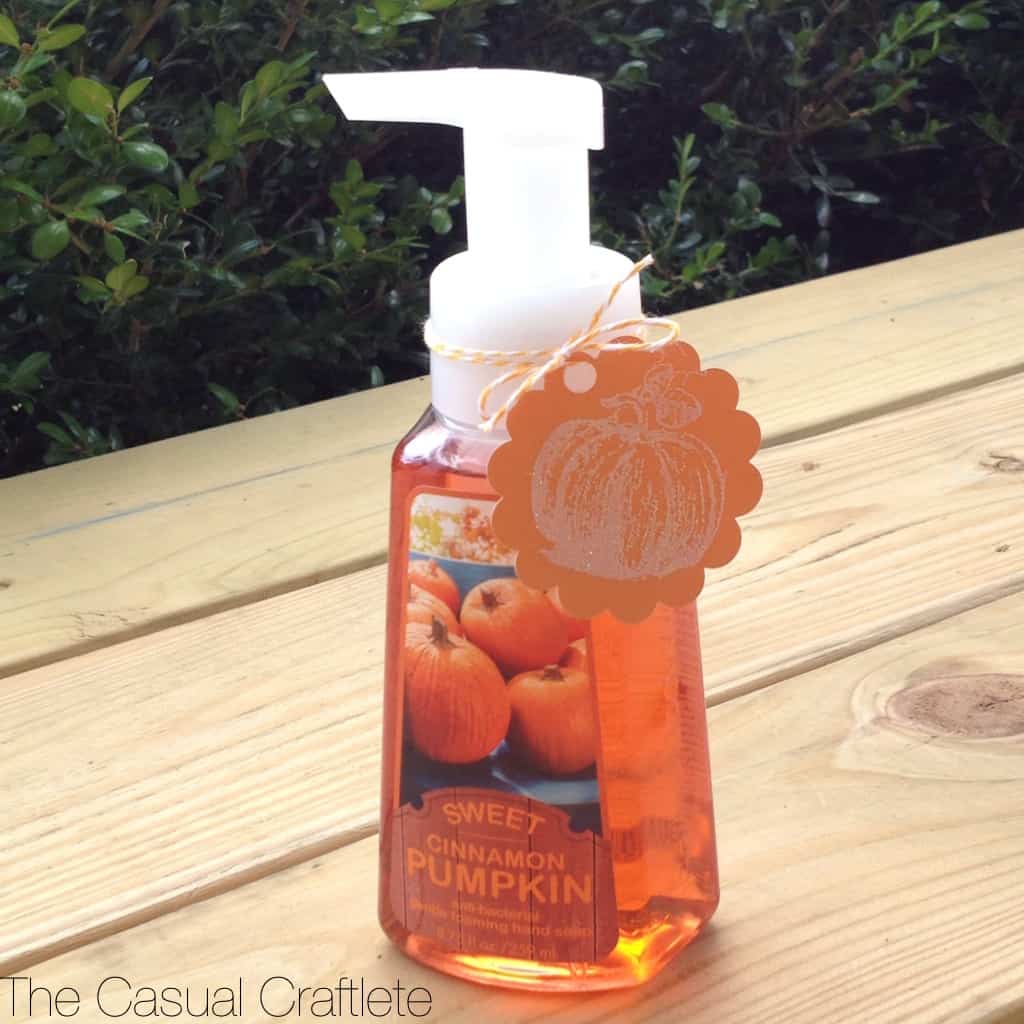
The last thing I did was use a hole punch and baker’s twine to finish the tag.
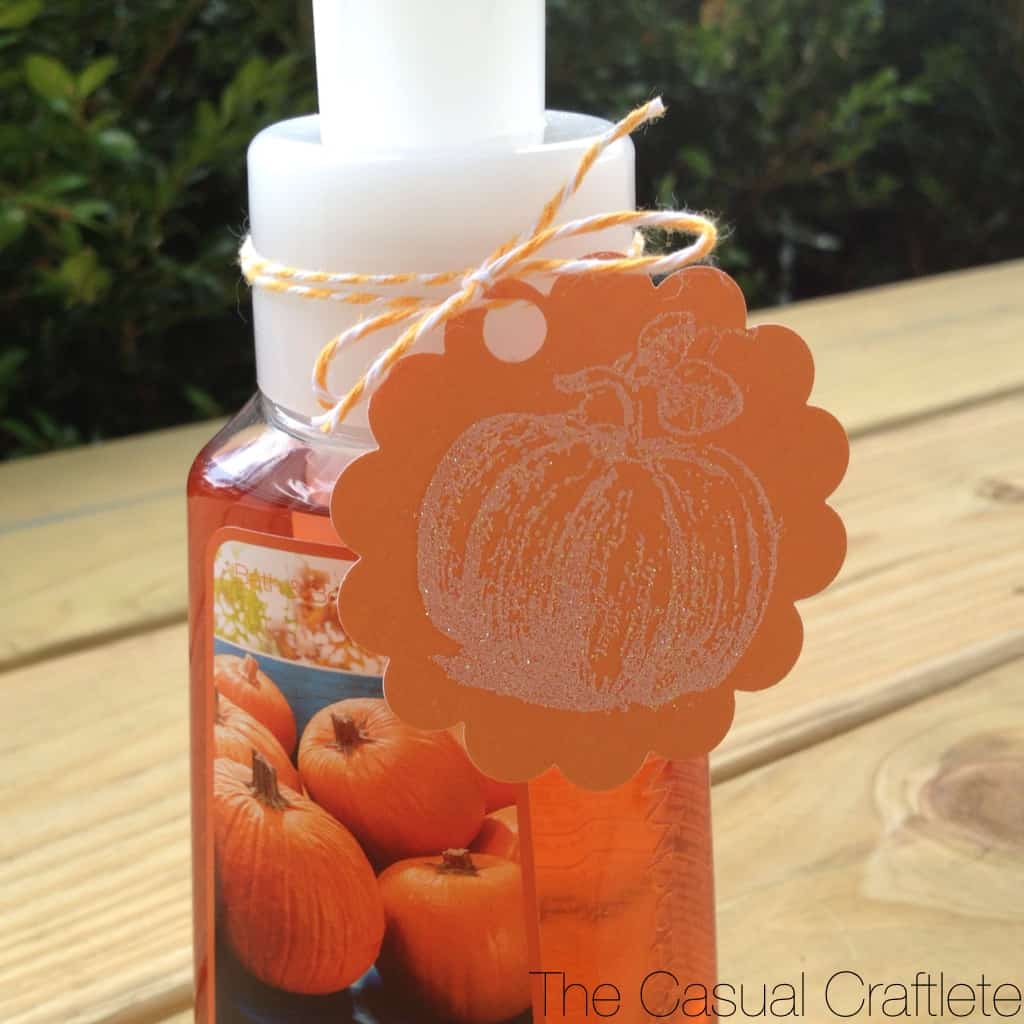
This would make a gift great for Teachers, Sunday School leaders or someone who is hosting a fall party.
That is how you use an embossing gun!
*Quick Tip…Use baby wipes to remove the ink from your stamps. They work wonders!
This post was featured 9-3-13 on

featured 9-3-15 on

Very cute, love the simplicity. Found you through the Inspiration Monday Party today.
Sarah
Creative Ramblings
Hi Katie! I love this project! What a nice touch it adds to a thoughtful gift! I need one of those punches! Thanks for sharing! Blessings from Bama!
Thanks Felecia! I’m all about simple and easy crafts. I love that punch! Have a wonderful day!
Katie
I am deathly afraid of my embossing gun. I know that is irrational, but I am. Love this tag and thanks for the tip about cleaning stamps.
Donna, I was afraid of my gun when I first got it too. But is really isn’t as scary as I thought. You should try again 🙂 oh yes, love the baby wipe tip! Have a wonderful night!
Katie
Embossing is something I’ve never gotten into. This is adorable and such a fun way to give a gift!
So cute. I used to emboss homemade cards with my mom and grandma – your blog just took me back! 🙂 Thanks for sharing on Tell Us Tuesday!
Lauren @ muchadoaboutsomethin.com
Thanks for the tutorial. I always walk by the embossing guns at Michaels now I will have to pick one up.
Thanks Kathy! I love using my embossing gun. Lots of fun crafts you can make with it. Have a wonderful night!
Katie
Totally cute! Love that punch 🙂 Thanks for sharing it at Work it Wednesday!!
Krista
I love this project! I have never used a heat embosser even though I love how great it always looks. Thanks for sharing at Krafty Inspiration Thursday Link Party, you have been chosen as one of the top 5 featured posts at tomorrows party.
Have a lovely evening!
Maria @ Krafty Cards etc.
http://kraftycardsetc.blogspot.com/