Disclosure: I am a member of the core blogger program with DecoArt. I received product for this post. All ideas and opinions are 100% my own.
Create a custom DIY Easy Etch Glass Jar perfect for kitchen storage and those farm to table goods.
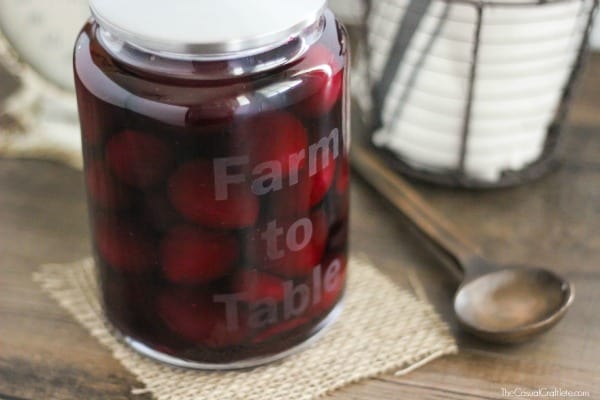
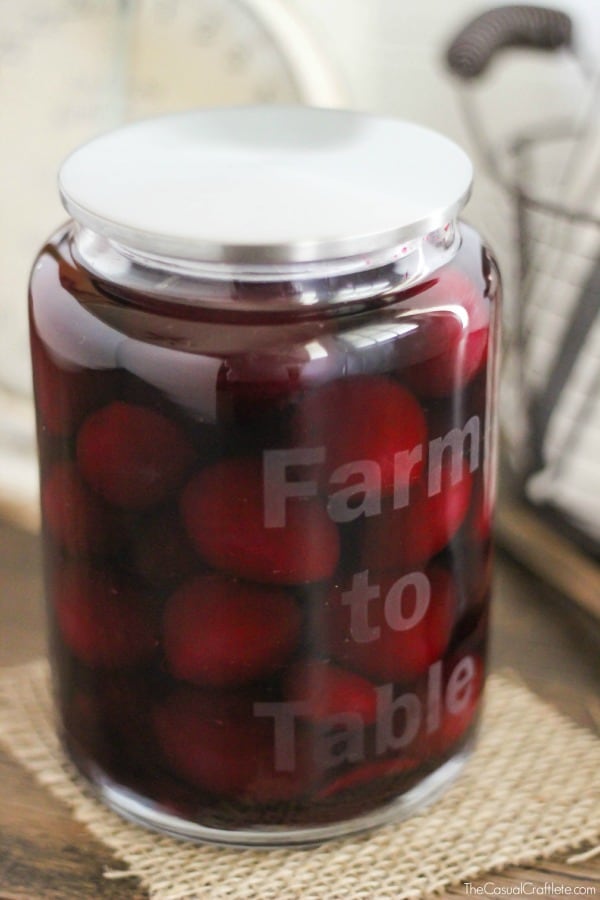
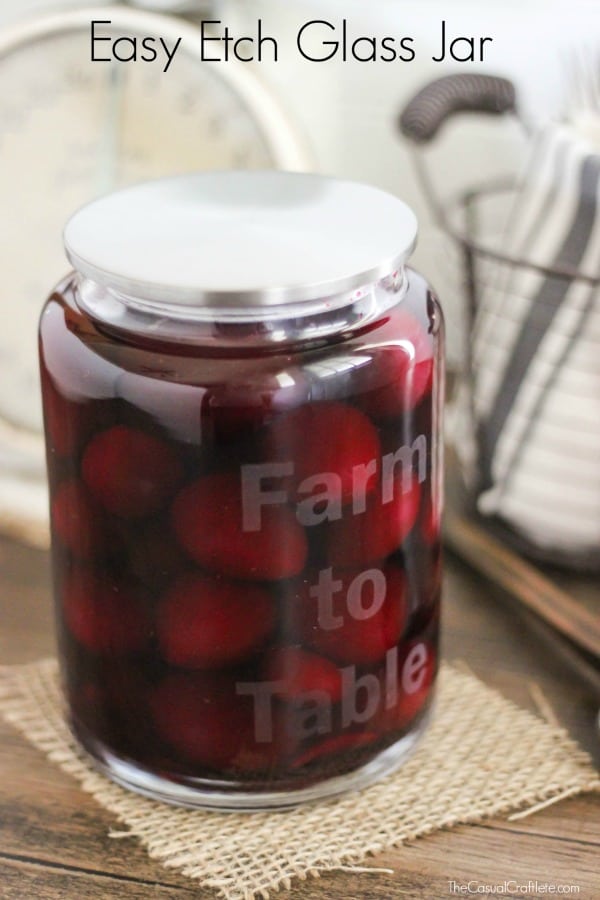 Hello there! Today I am excited to share this Easy Etch Glass Jar project. This is this first time I have ever used a glass etching cream and it was so easy to use. I love that you can customize any glass storage container to fit the needs of you and your home. I decided to make a stencil that says, “Farm to Table” with the thought of storing my garden goods, like pickled beets. It’s perfect for the harvest this time of year!
Materials (May contain affiliate links. Thanks for supporting The Casual Craftlete!)
- DecoArt Easy Etch
- Farm to Table stencil
- Electronic cutting machine
- Vinyl
- Transfer tape sheet
- Weeding tool
- Popsicle stick
Instructions:
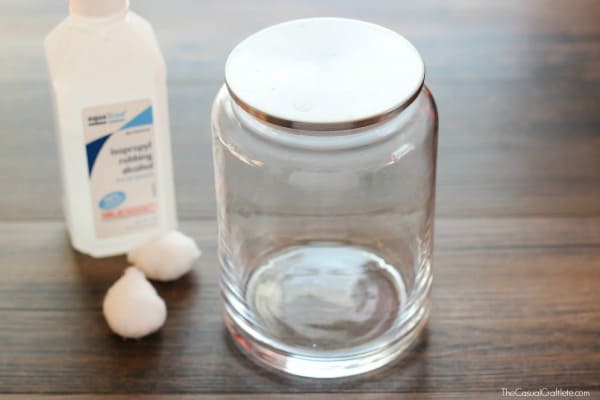
Prep the glass jar by cleaning the surface with rubbing alcohol and let dry.
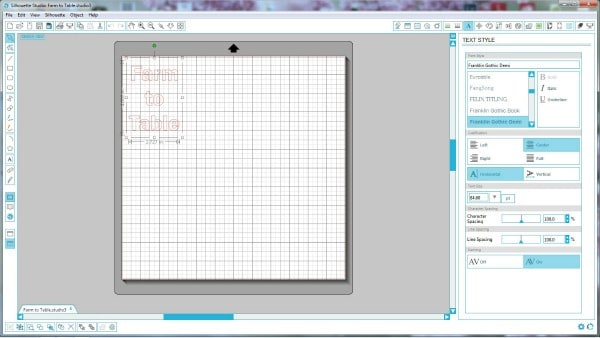
To make the cut file for the Silhouette I measured my jar and created text that would fit that space. I used the Franklin Gothic Demi font in Silhouette Studio. You can rearrange the spacing and other formatting options just like any other word processing program to fit your glass project. I used white vinyl for my stencil because you need an adhesive stencil while using the easy etch cream. Then cut design on the vinyl sheet with your electronic cutting machine.
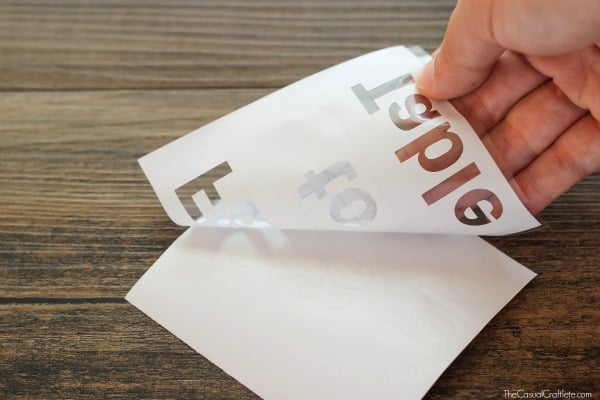
Next, weed out the negative space of the design using a weeding tool. Place a piece of transfer paper on top of the design and cut around it. Remove the plastic backing from the vinyl. Place the design in the center of the glass jar.
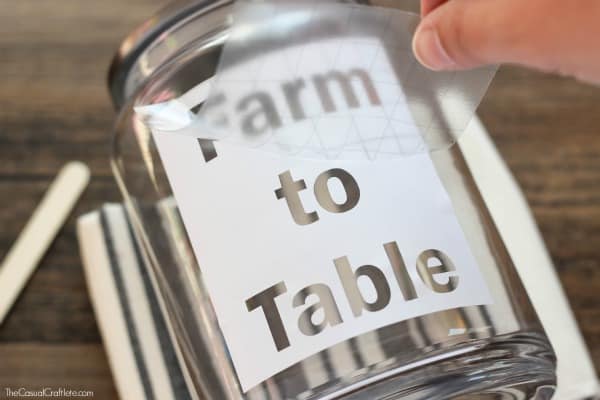
Go over the vinyl stencil using a popsicle stick. Make sure to firmly press down so the design adheres to the glass jar, then gently remove the transfer tape sheet. Don’t allow any air bubbles near the edges of the letters or the etching cream can get under the vinyl.
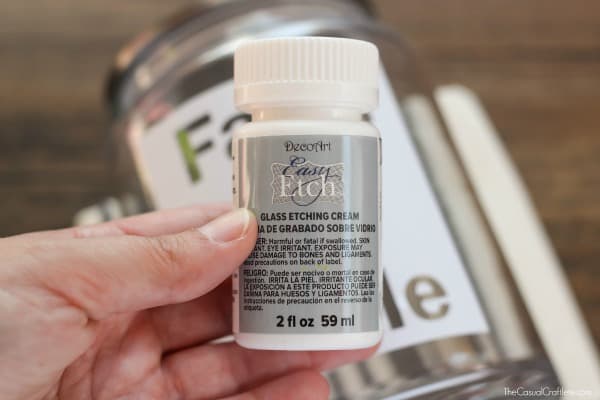
Make sure to read the entire instructions on the bottle of Easy Etch before using.

Apply a thick coat of Easy Etch cream over the letter stencil using a palette knife or popsicle stick. Let set for 15 minutes.
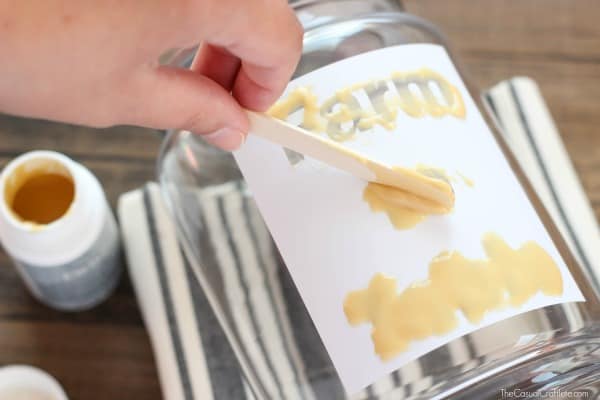
Once you have let the Easy Etch cream set for 15 minutes, you can actually remove the cream and return it to the container for re-use. How amazing is that?! That definitely saves on cost and waste.
Rinse the etched surface with water in a fiberglass or stainless steel sink to remove remaining cream. Then, remove the vinyl stencil and rinse again. Flush the sink thoroughly after rinsing.
Thank you for letting me share my Easy Etch Glass Jar with you. How do you think it turned out?
YOU MIGHT ALSO LIKE:
 Vintage Inspired Chalky Paint Pumpkins
Katie you did a great job! Your jar looks lovely. Thanks for sharing this tutorial.
Thank you so much, Debbie! I love the Easy Etch cream. Super easy to use…yay!
Katie, this is such a fantastic project I love it! I am off to pin, but in the meantime I am embarrassed to tell you I have never eaten beets (pickled or otherwise). I feel sheepish.
Thank you so much, Tauni! I’m super excited you stopped by to pin my easy etch glass jar. I think with beets you either love them or hate them. They are a root vegetable that have a very earthy taste. I personally love them. XO