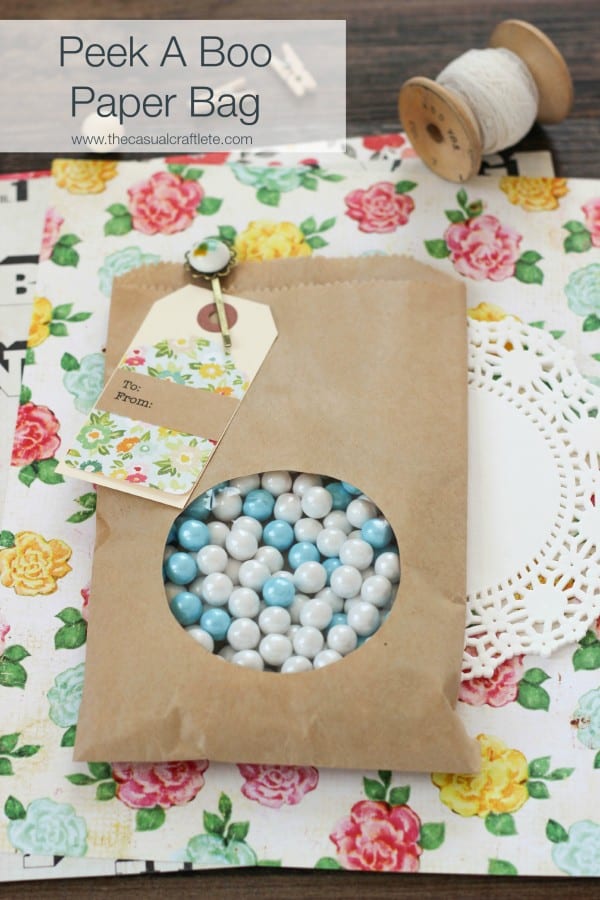
 Hello there! Today I am sharing how to make a cute DIY Peek A Boo Paper Bag. The bags are super easy to make and are a breeze to put together. Just fill these kraft bags with colorful goodies and share with your friends and family. It’s such an adorable gift idea for any occasion. They would also be great as goody bags for a party. You can also add embellishments to complete the pretty packaging.
 Do you ever get that moment when you say to yourself, “ah ha, this idea is so simple it just might work”? Well, that’s what I was feeling whenever I decided to make these peek a boo bags. I am so thrilled at how these bags turned out.
 Here are they materials I used to make the bags:
- Kraft bags (mine are 5″x 7″)
- Scissors
- Clear plastic goody bags
- Cardboard
- 3 inch circle cut out
- Adhesive tape
- X-acto knife
- Pencil
- Embellishments *optional
Here is how I made the bags:
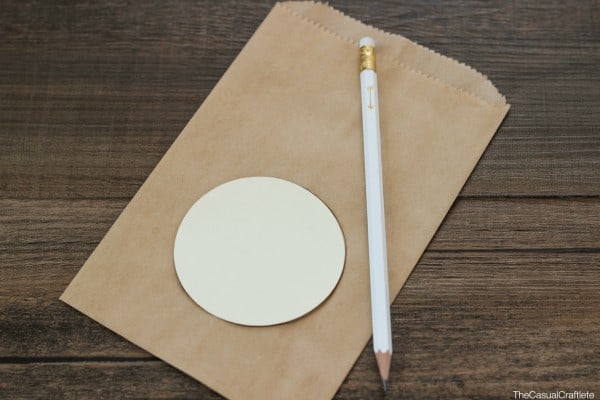 I started by making a 3 inch circle cut out using my Circut machine. If you don’t have a Circut, you could use a die cut machine, paper punch or hand make your own. Next, I placed the cut out onto the paper bag and traced around it with a pencil. I placed my cut out in the center, but 3/4 of the way down from the top. I did not want it to be perfectly centered, but you can place your cut out wherever you like.
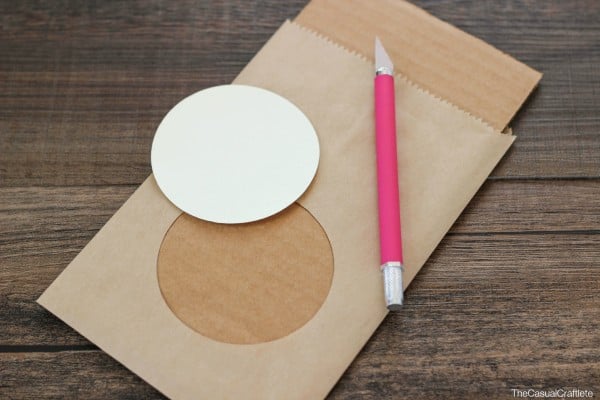 Then I placed a piece of cardboard inside the bag. Carefully use an X-acto knife to cut along the pencil marks.
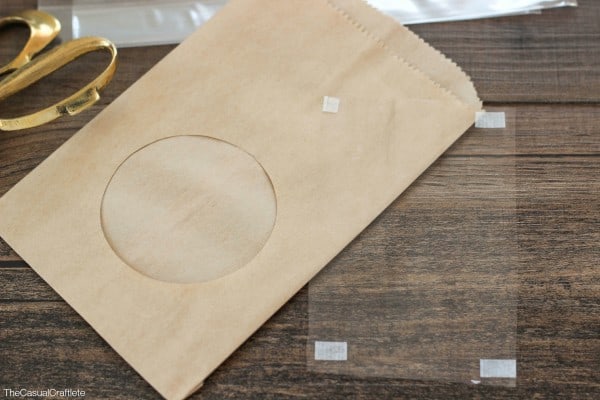 Remove the cardboard from the bag. Next, I cut a piece of the clear plastic goody bag to fit under the circle cut out. I used an adhesive tape runner to adhere the plastic to the inside of the bag. Make sure to place the plastic directly over the cut out on the inside of the bag.
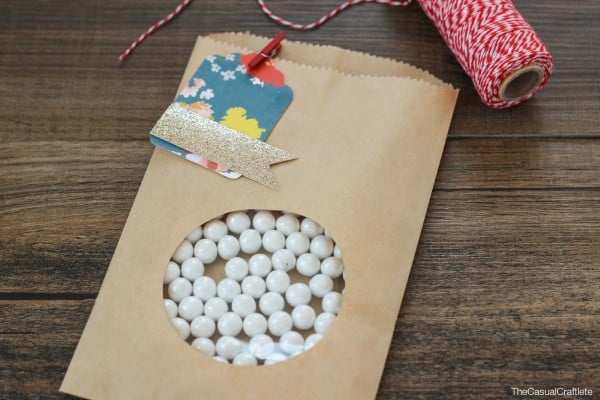
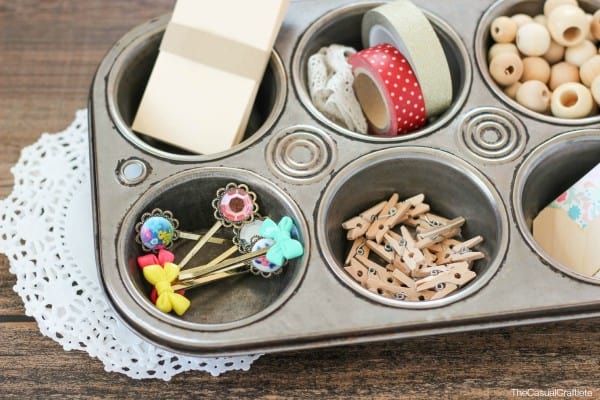 Next, is the fun part! I added some really cute embellishments and manilla tags using scrapbook paper to the paper bags. I love using clothespins and these darling flower and bow pins to attach tags. You can customize the bags for any occasion or party theme.
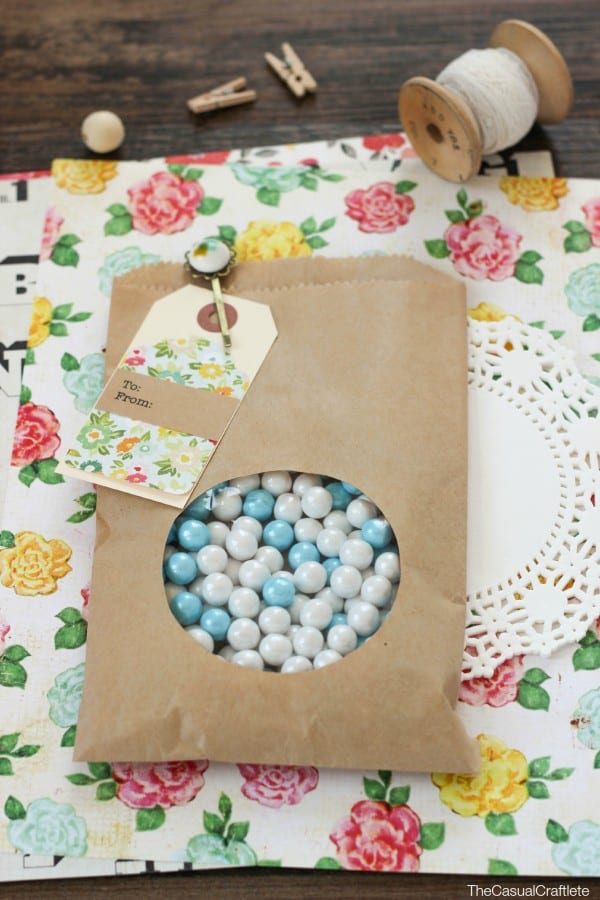 Fill the bags with colorful candy or a special gift. This bag looks like it is ready for spring!
I hope I have inspired you to create your own Peek A Boo Paper Bag!
YOU MIGHT ALSO LIKE:
You are a girl after my own heart! I love these — and thanks so much for linking to my shop!! Looking forward to hugging your neck next week. xo
Very clever – thanks for sharing this neat tip! The bags are adorable.
Now this is such a great idea. Can cut the round hole out easily enough I hope. Always pretty to be able to show teaser as to what’s in the bag. Looks really pretty. Think I’d fold down the top so ingredients couldn’t come out. Attach the cute pin on the fold. The bags are really cute and could be used again by recipients. Could stencil or rubber stamp on bags for the occasion. Glad you shared a really cute idea. Kids could hand these out to their class.
Happy rest of week